FPV Platforms
+ Goggle
System
Five airframe configurations across full build-fly-evaluate cycles, each with a specific design goal: modularity for crash recovery, aluminum crash-proof structure, integrated camera packaging, dihedral FPV platform, final integrated system. One complete FPV goggle built from a snowboarding goggle, head-mounted magnifier optics, and stripped receiver electronics when commercial options had inadequate field of view. A 3D-printed cloverleaf antenna bending jig for consistent matched-pair production.
Drone 1: H-Frame from Scratch
Racing quadcopters were just emerging. There were essentially no pre-built options. Individual components existed — motors, ESCs, open-source flight controllers, radio systems — but not complete platforms worth buying. The goal was to learn to fly completely manually with no computer stabilization, the opposite of what DJI locks you into. To do that well required understanding flight dynamics and airframe design from the component level. 3D printing was relatively new and I had access to a printer, so the answer was to design my own airframe from scratch rather than buy pre-designed frame parts.
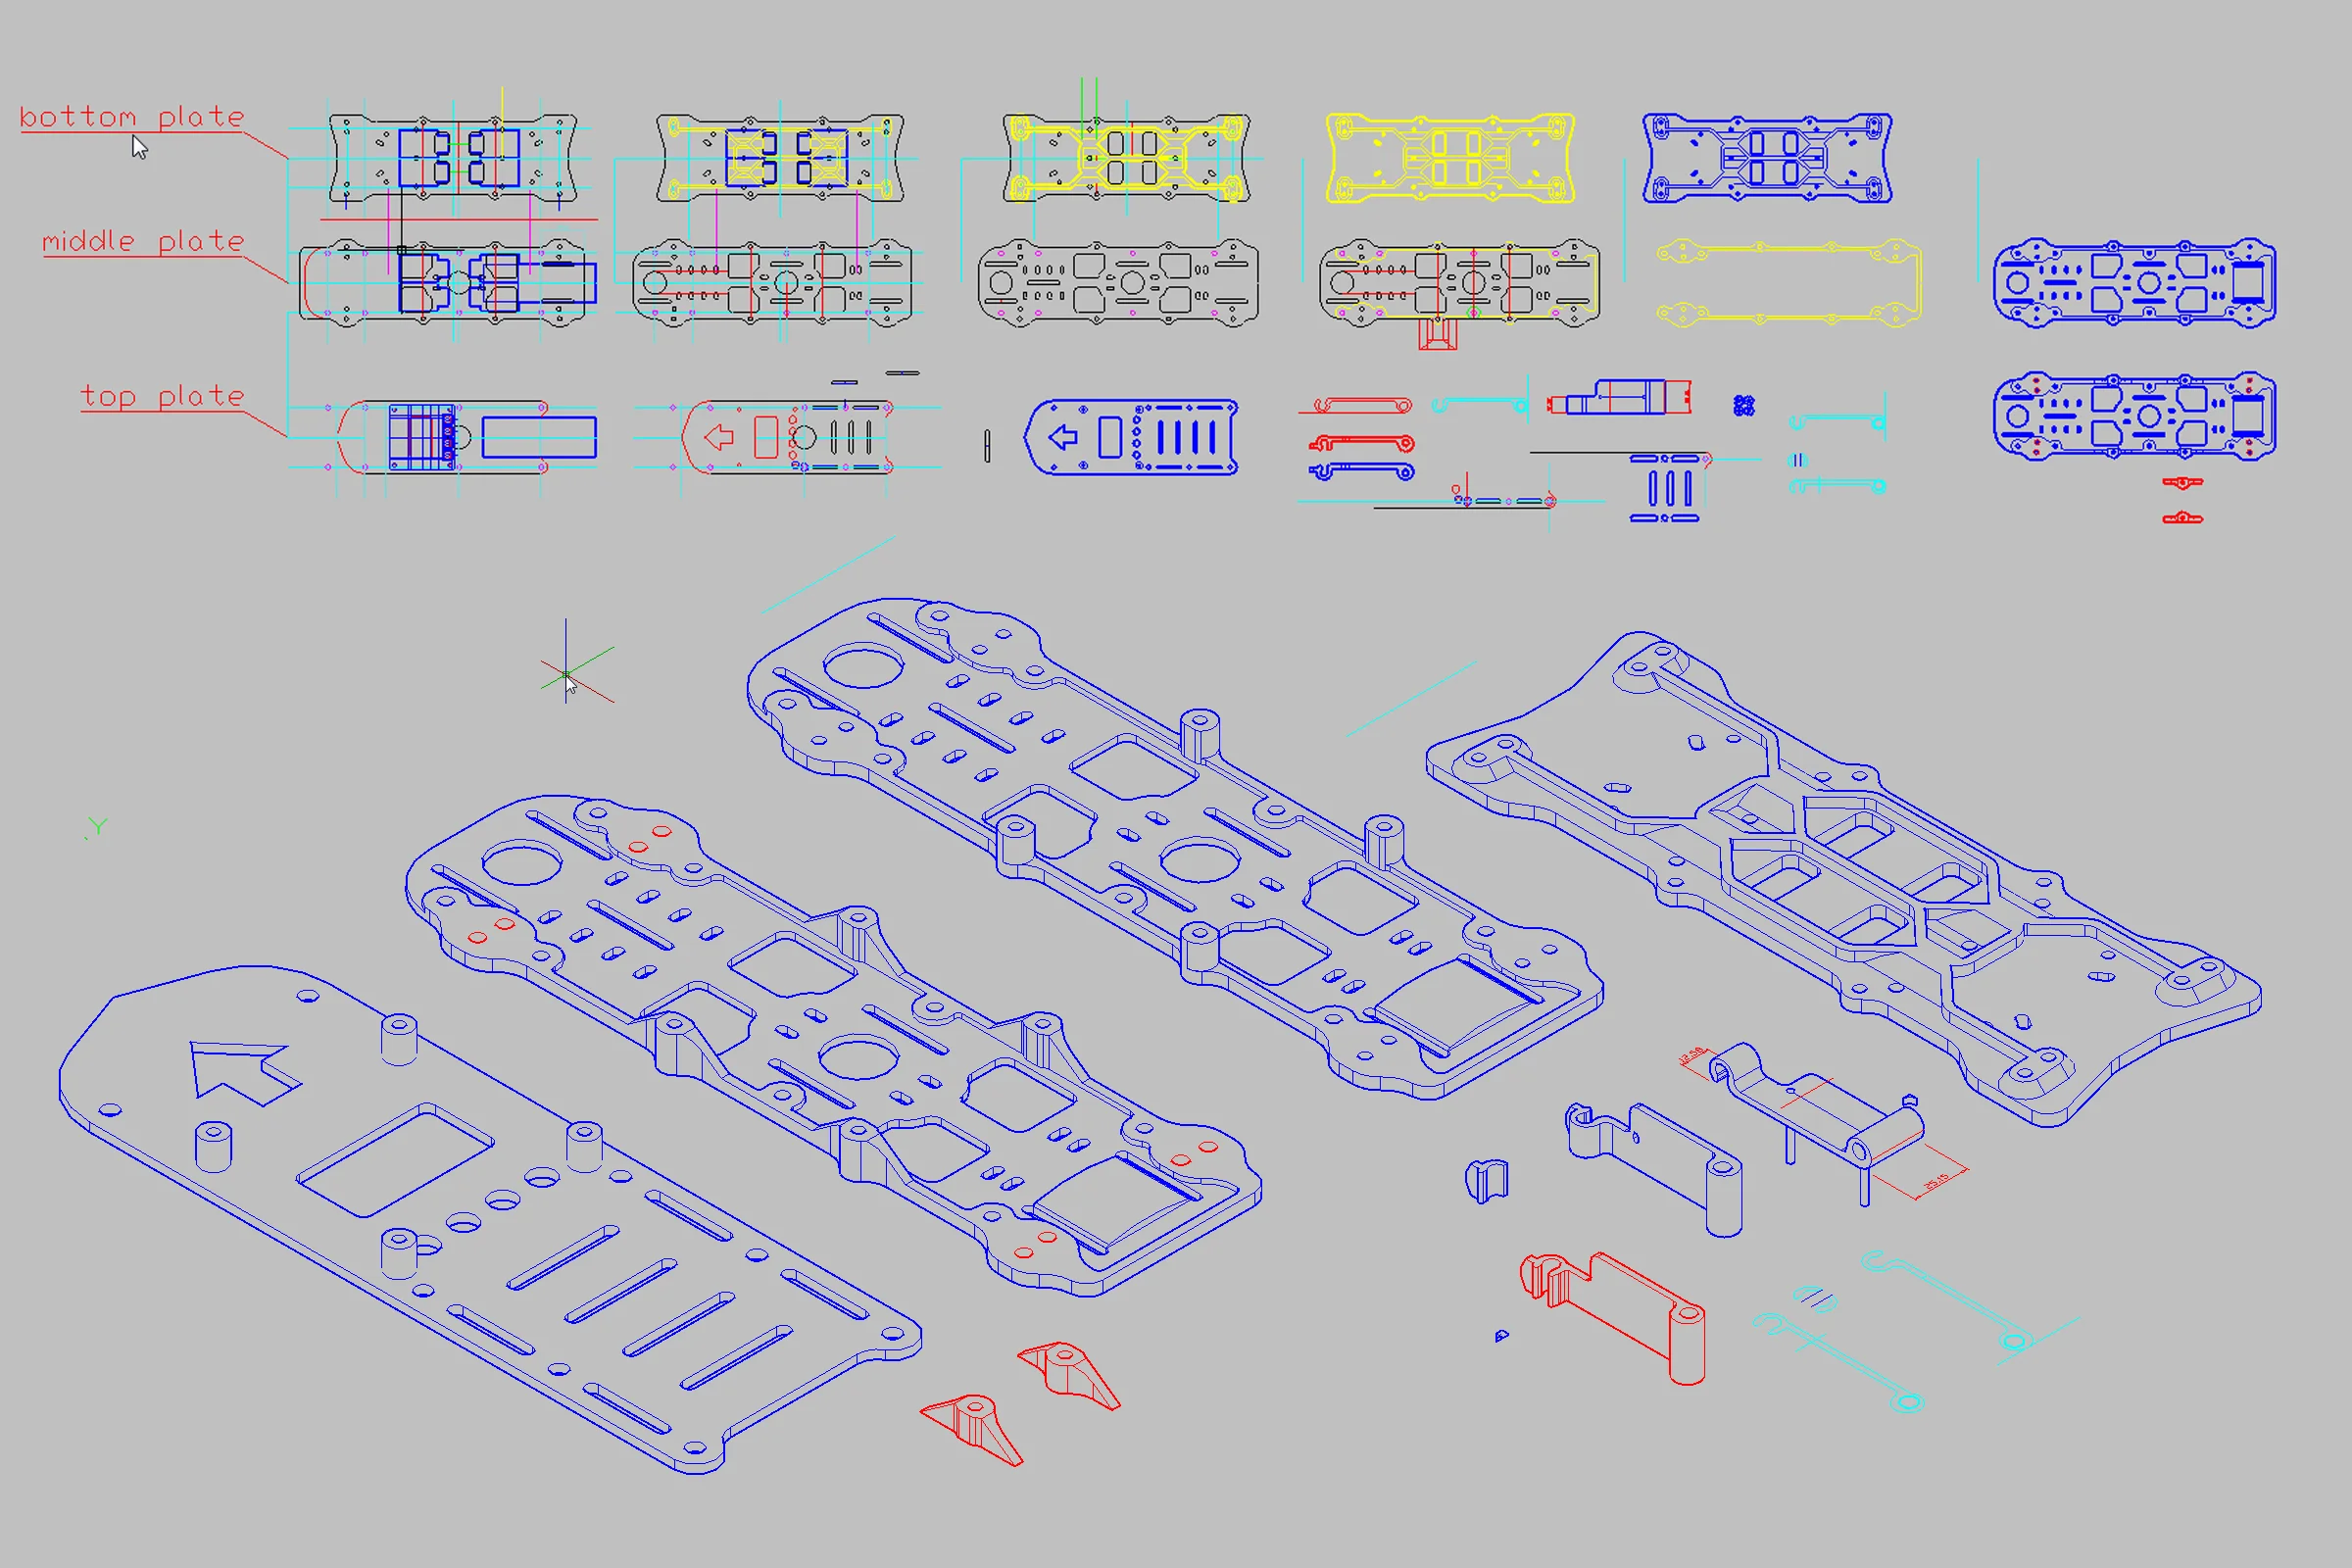
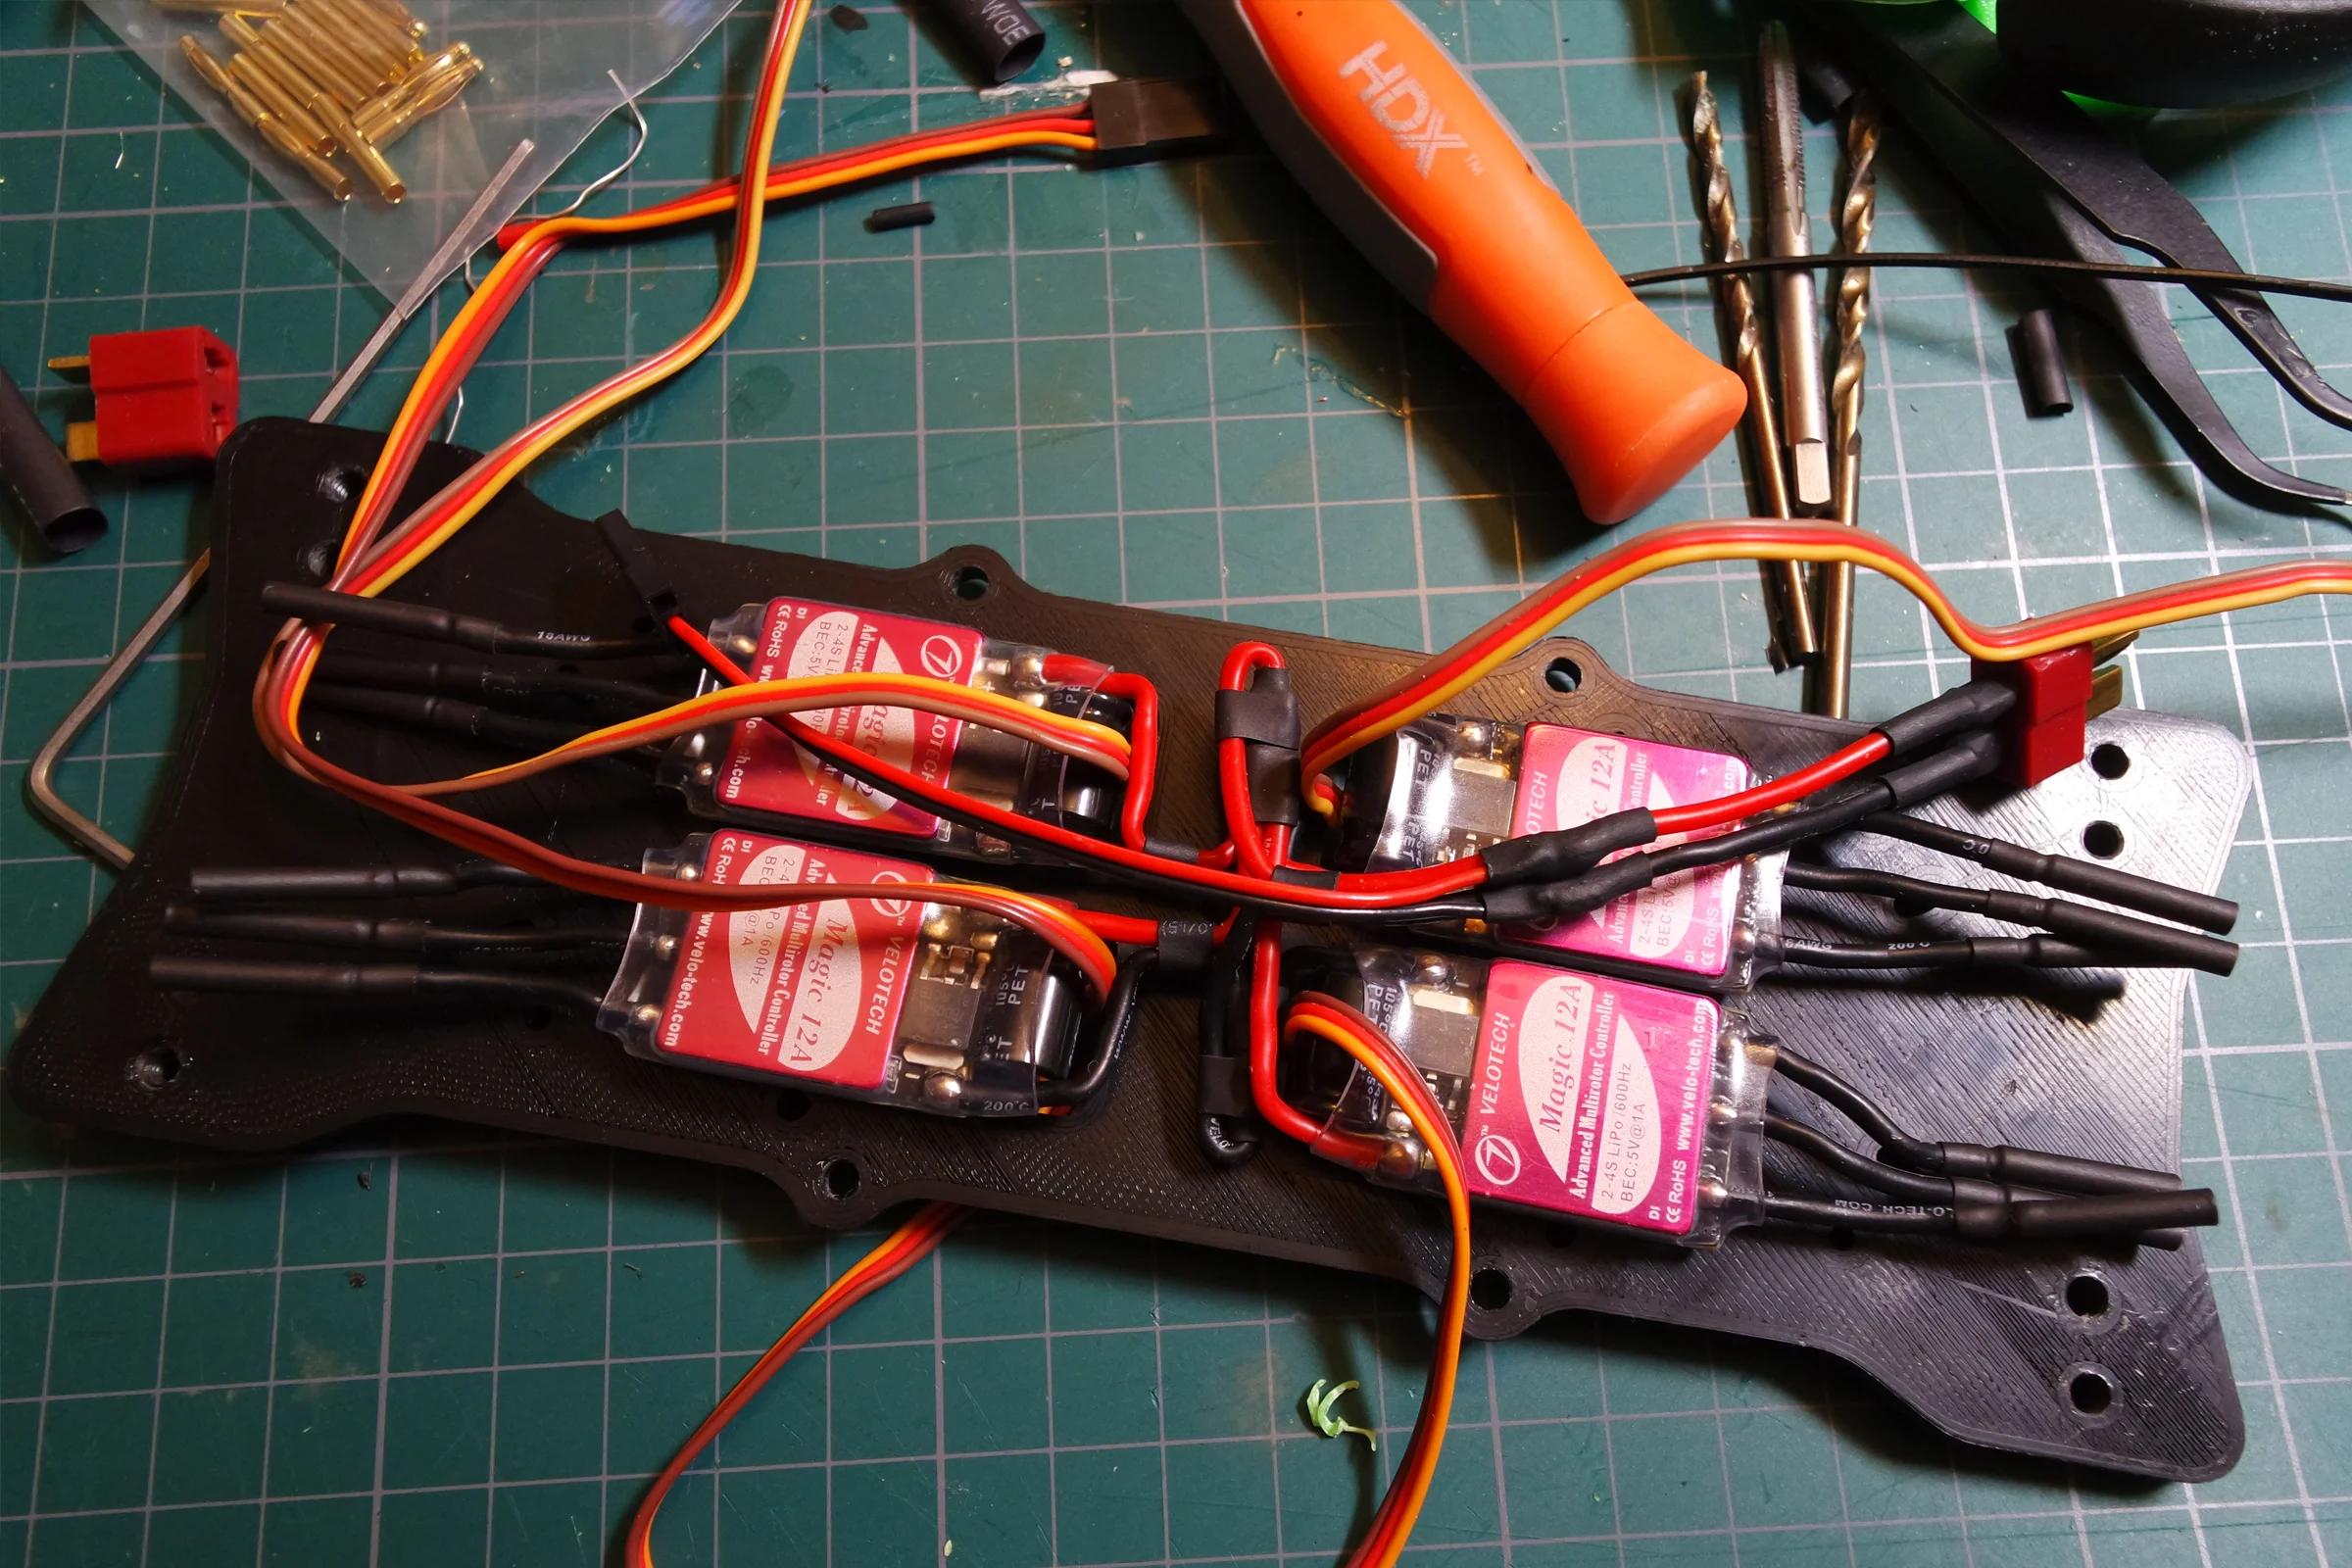
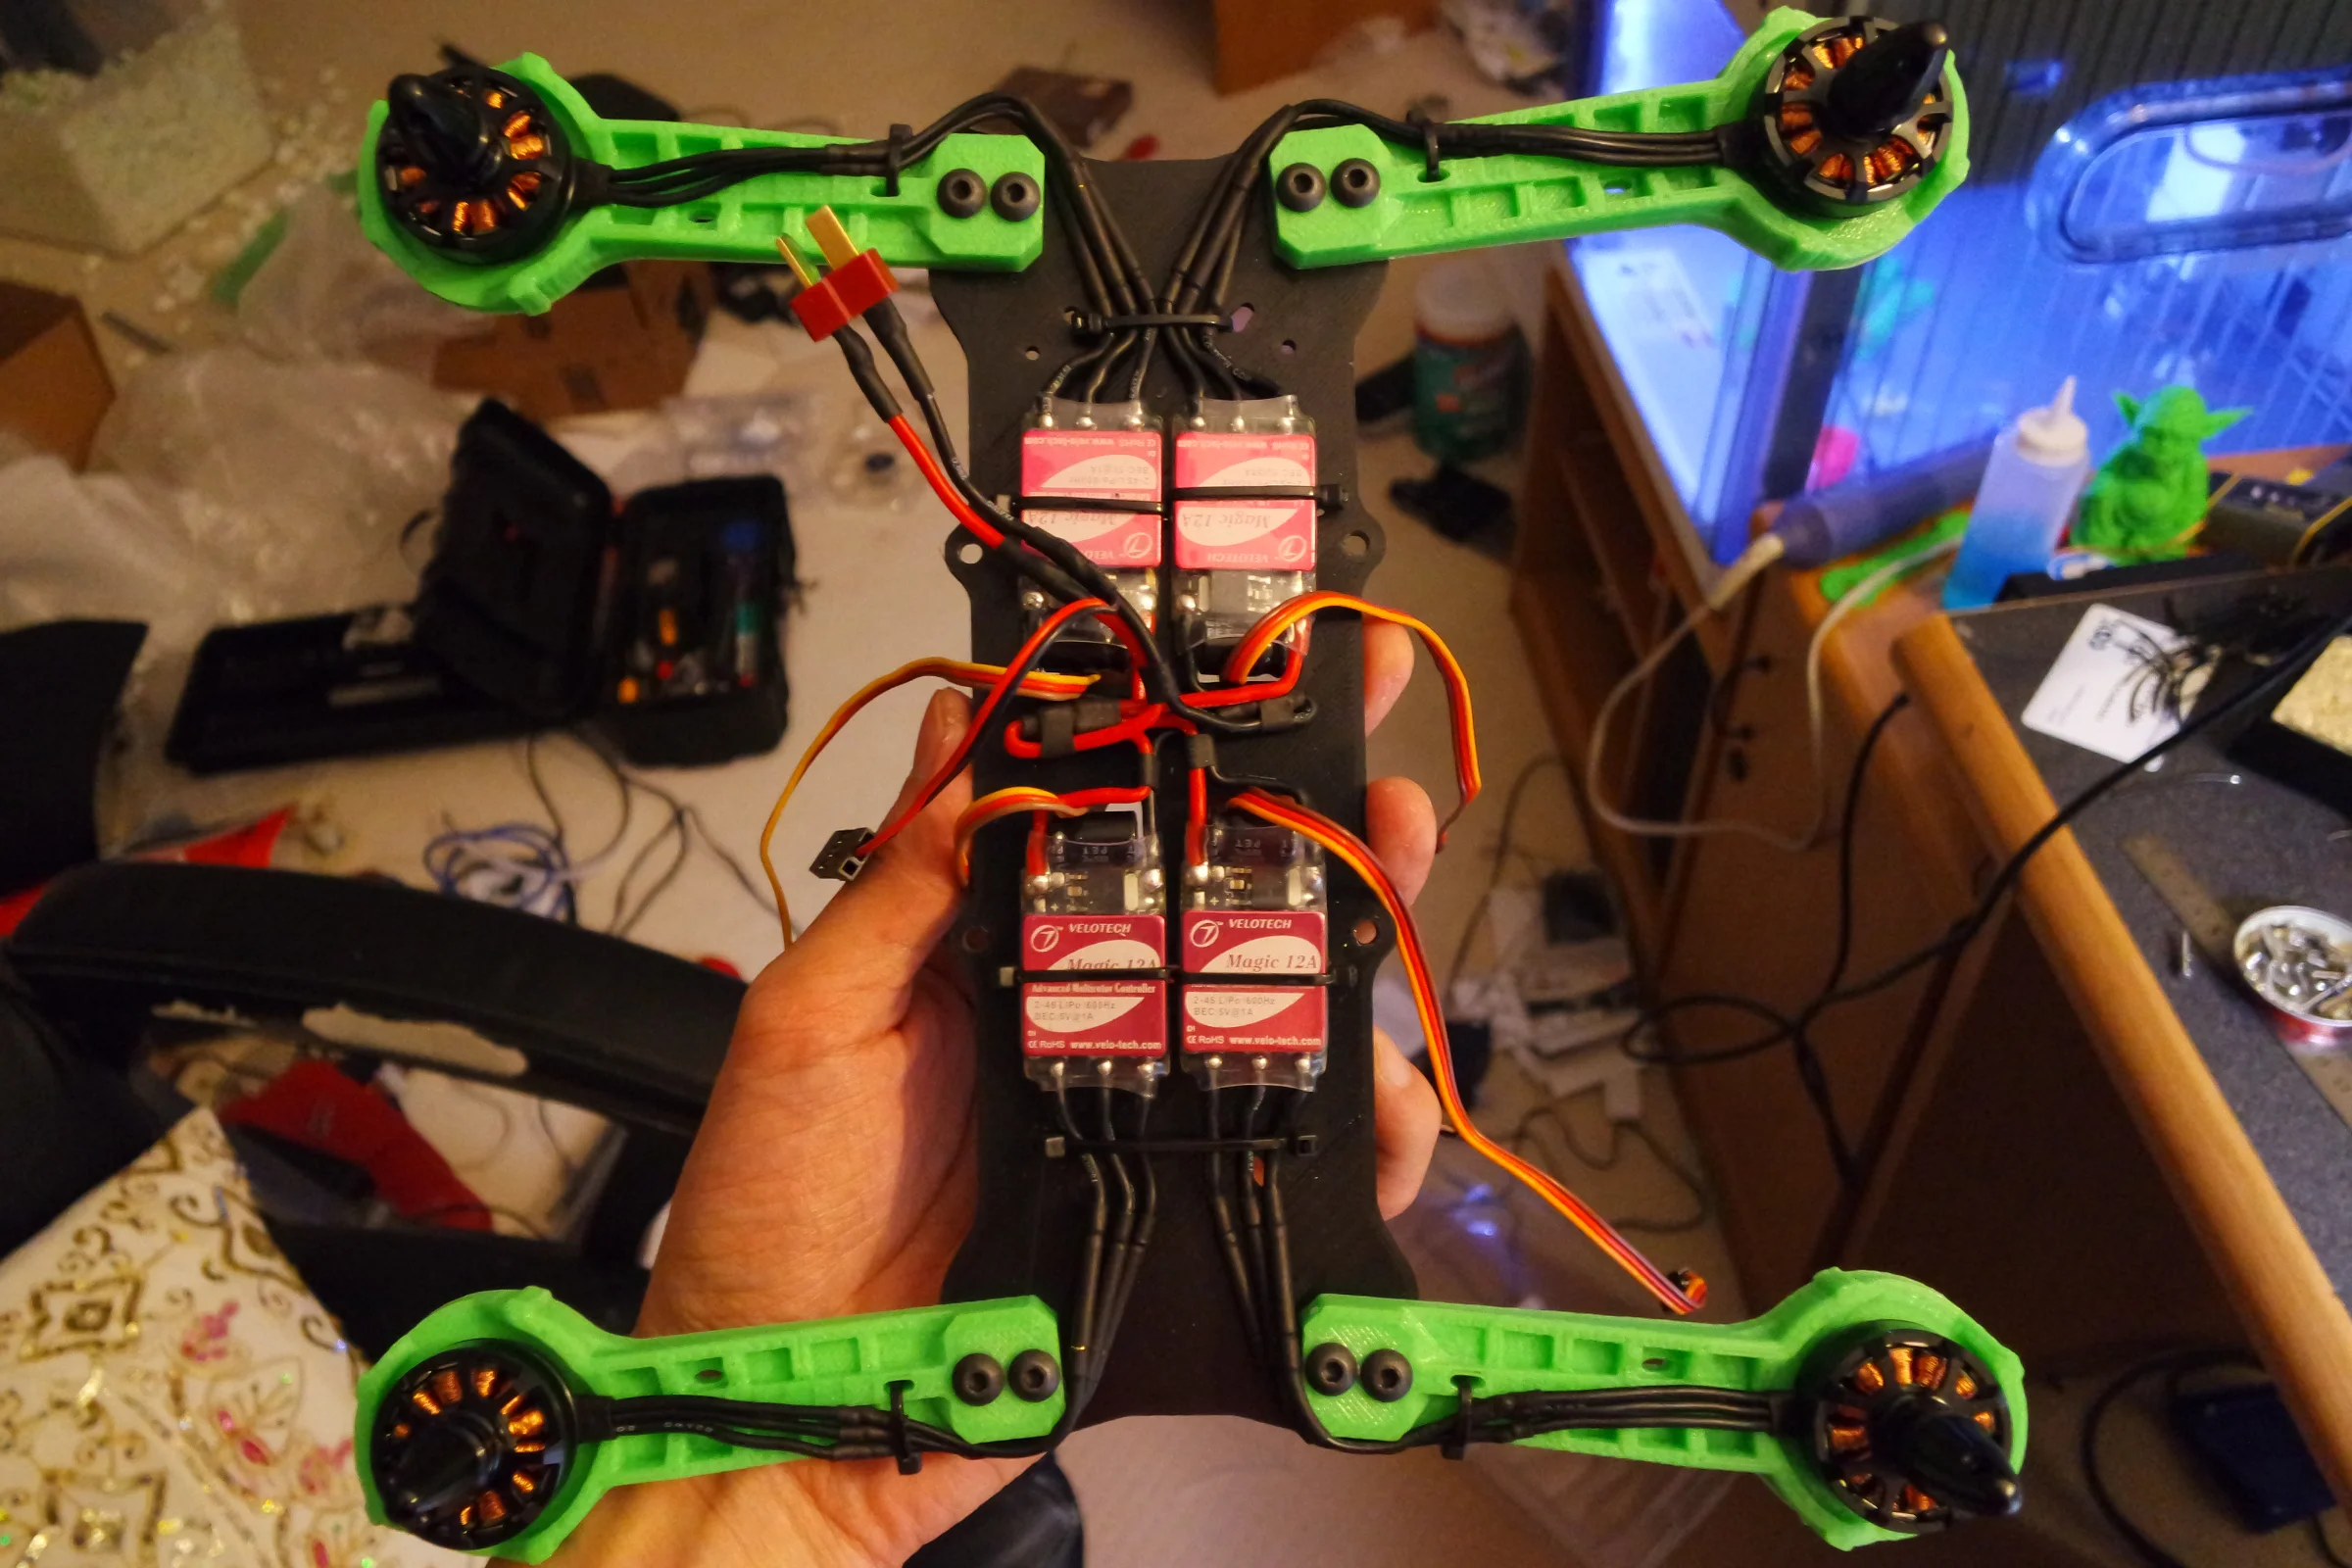
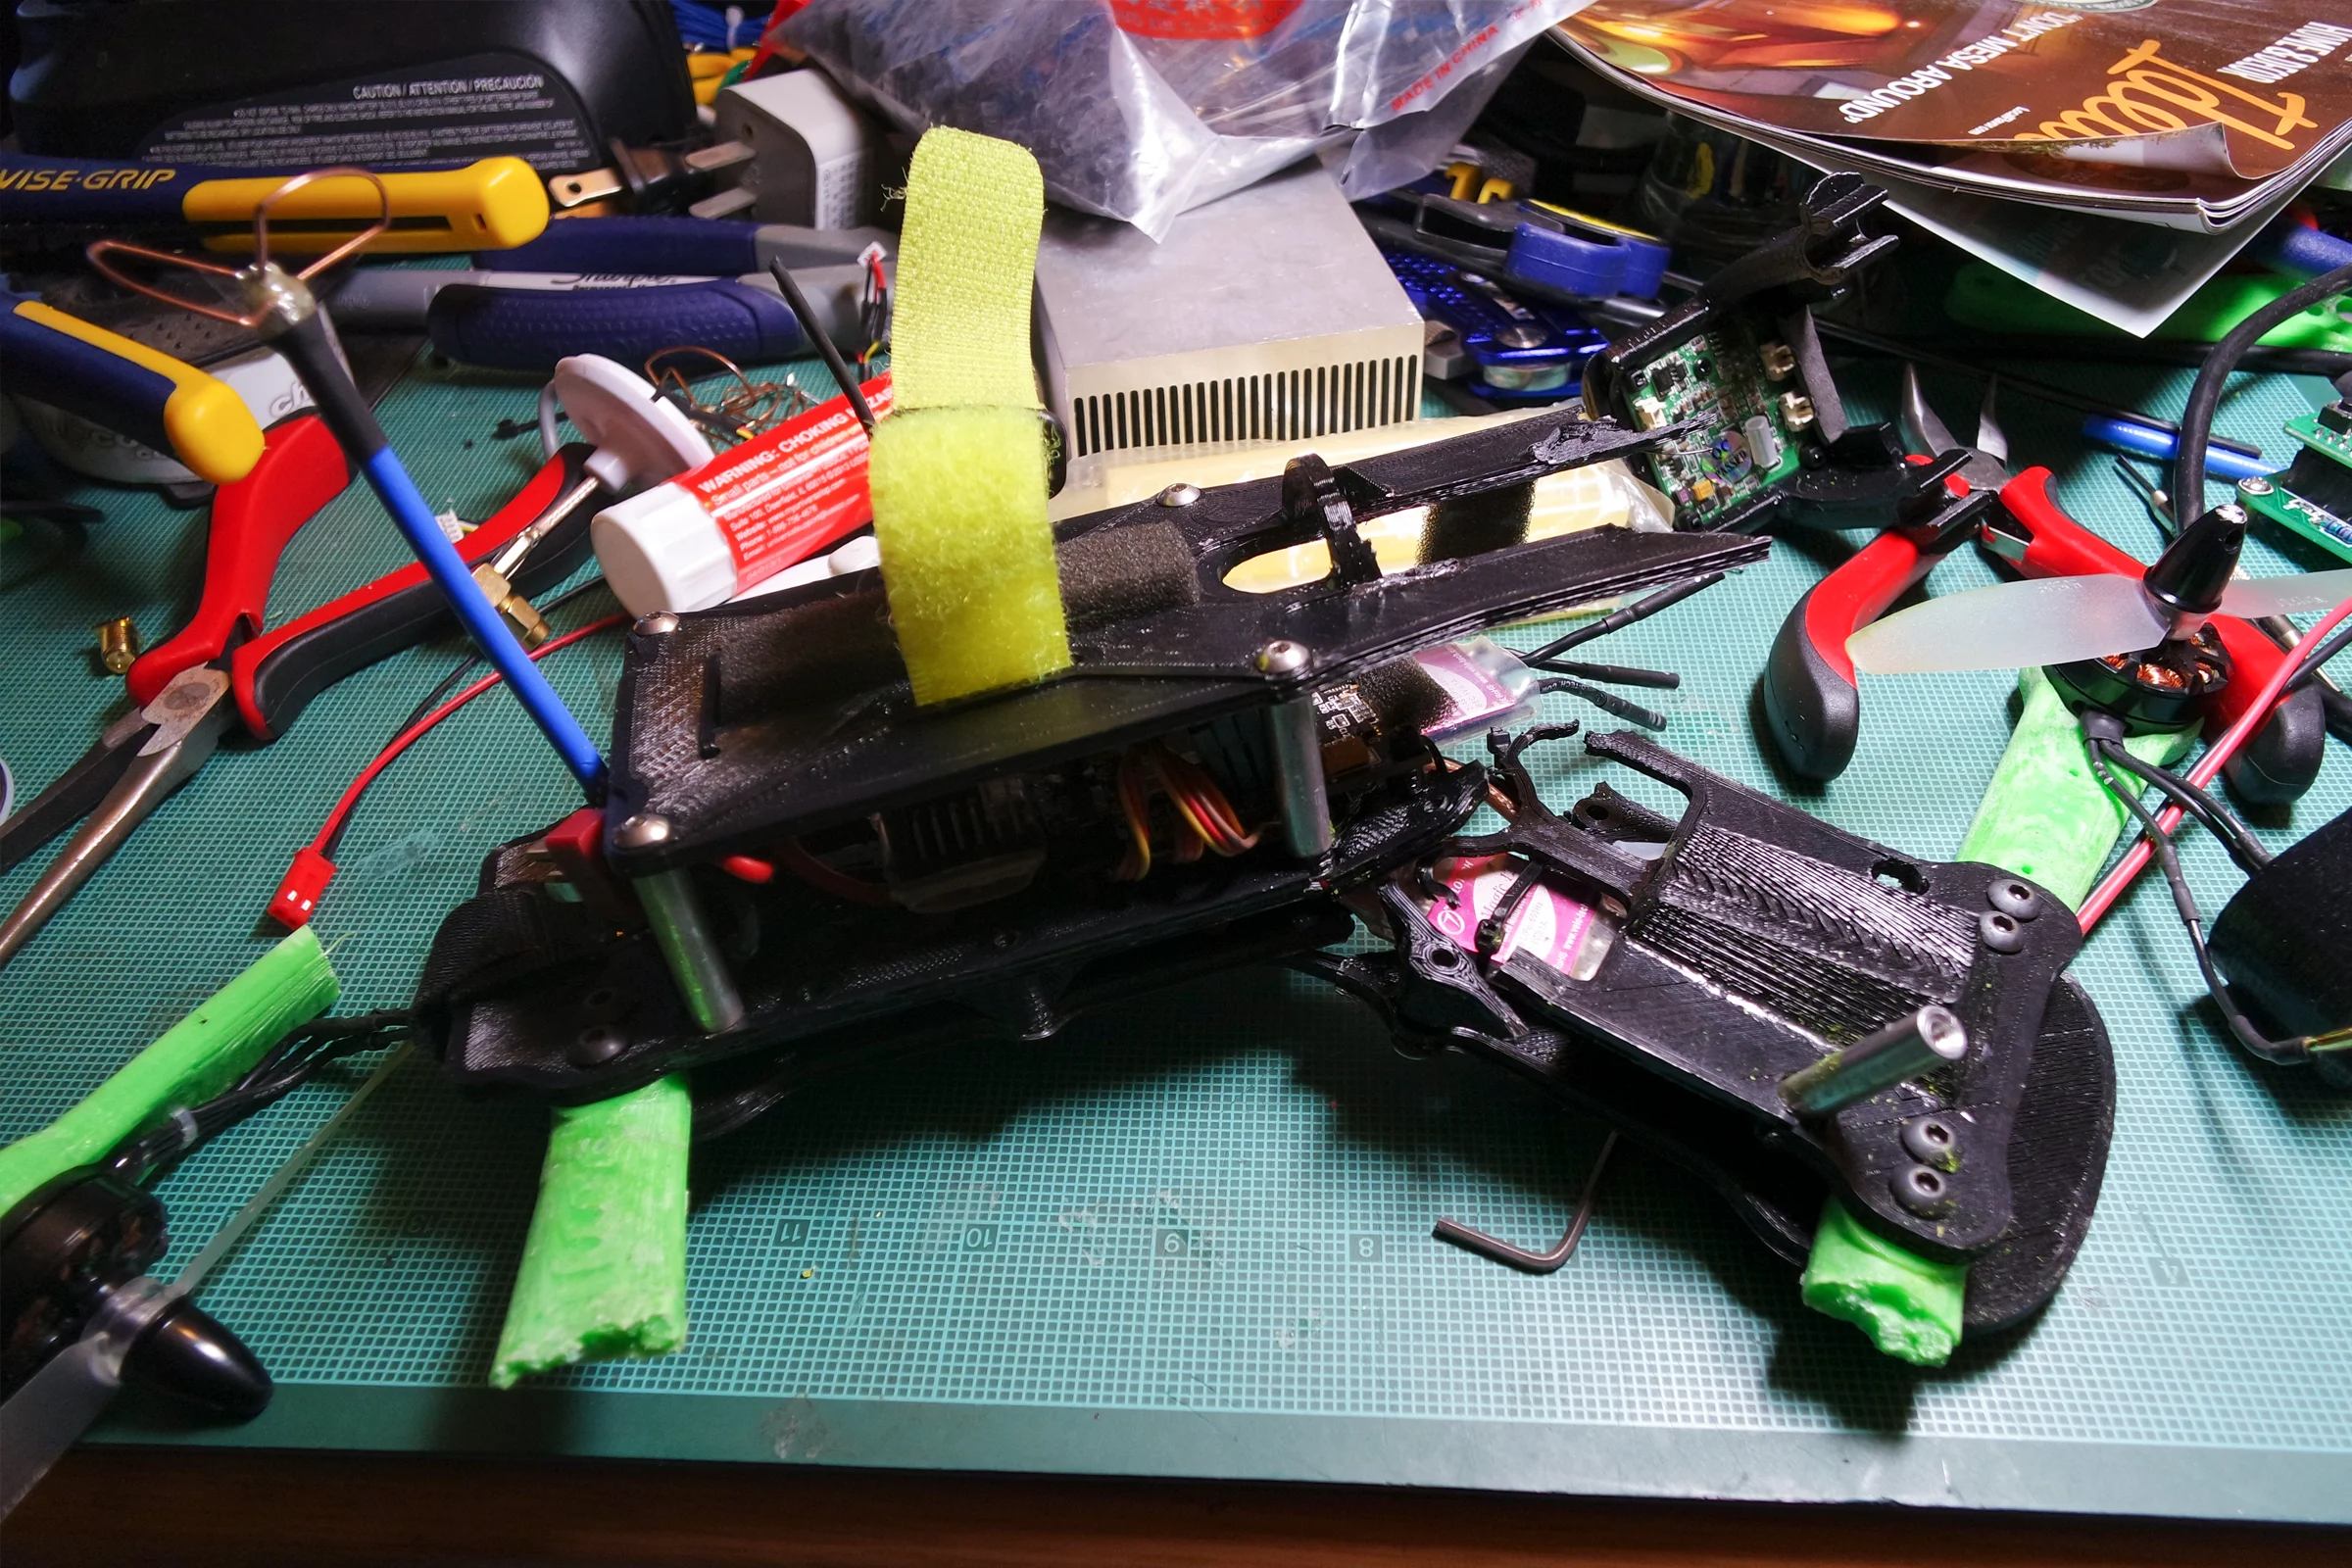
The H-frame geometry was the starting point. The central body was three stacked decks: ESCs sandwiched between the lower and middle deck, radio receiver and battery between middle and upper, flight controller sitting on top where its screen and program buttons stayed accessible. The four motor arms screwed in and sandwiched between the lower and middle deck — replacing a broken arm meant removing two screws, printing a replacement, and reassembling. Free to reproduce and done in minutes.
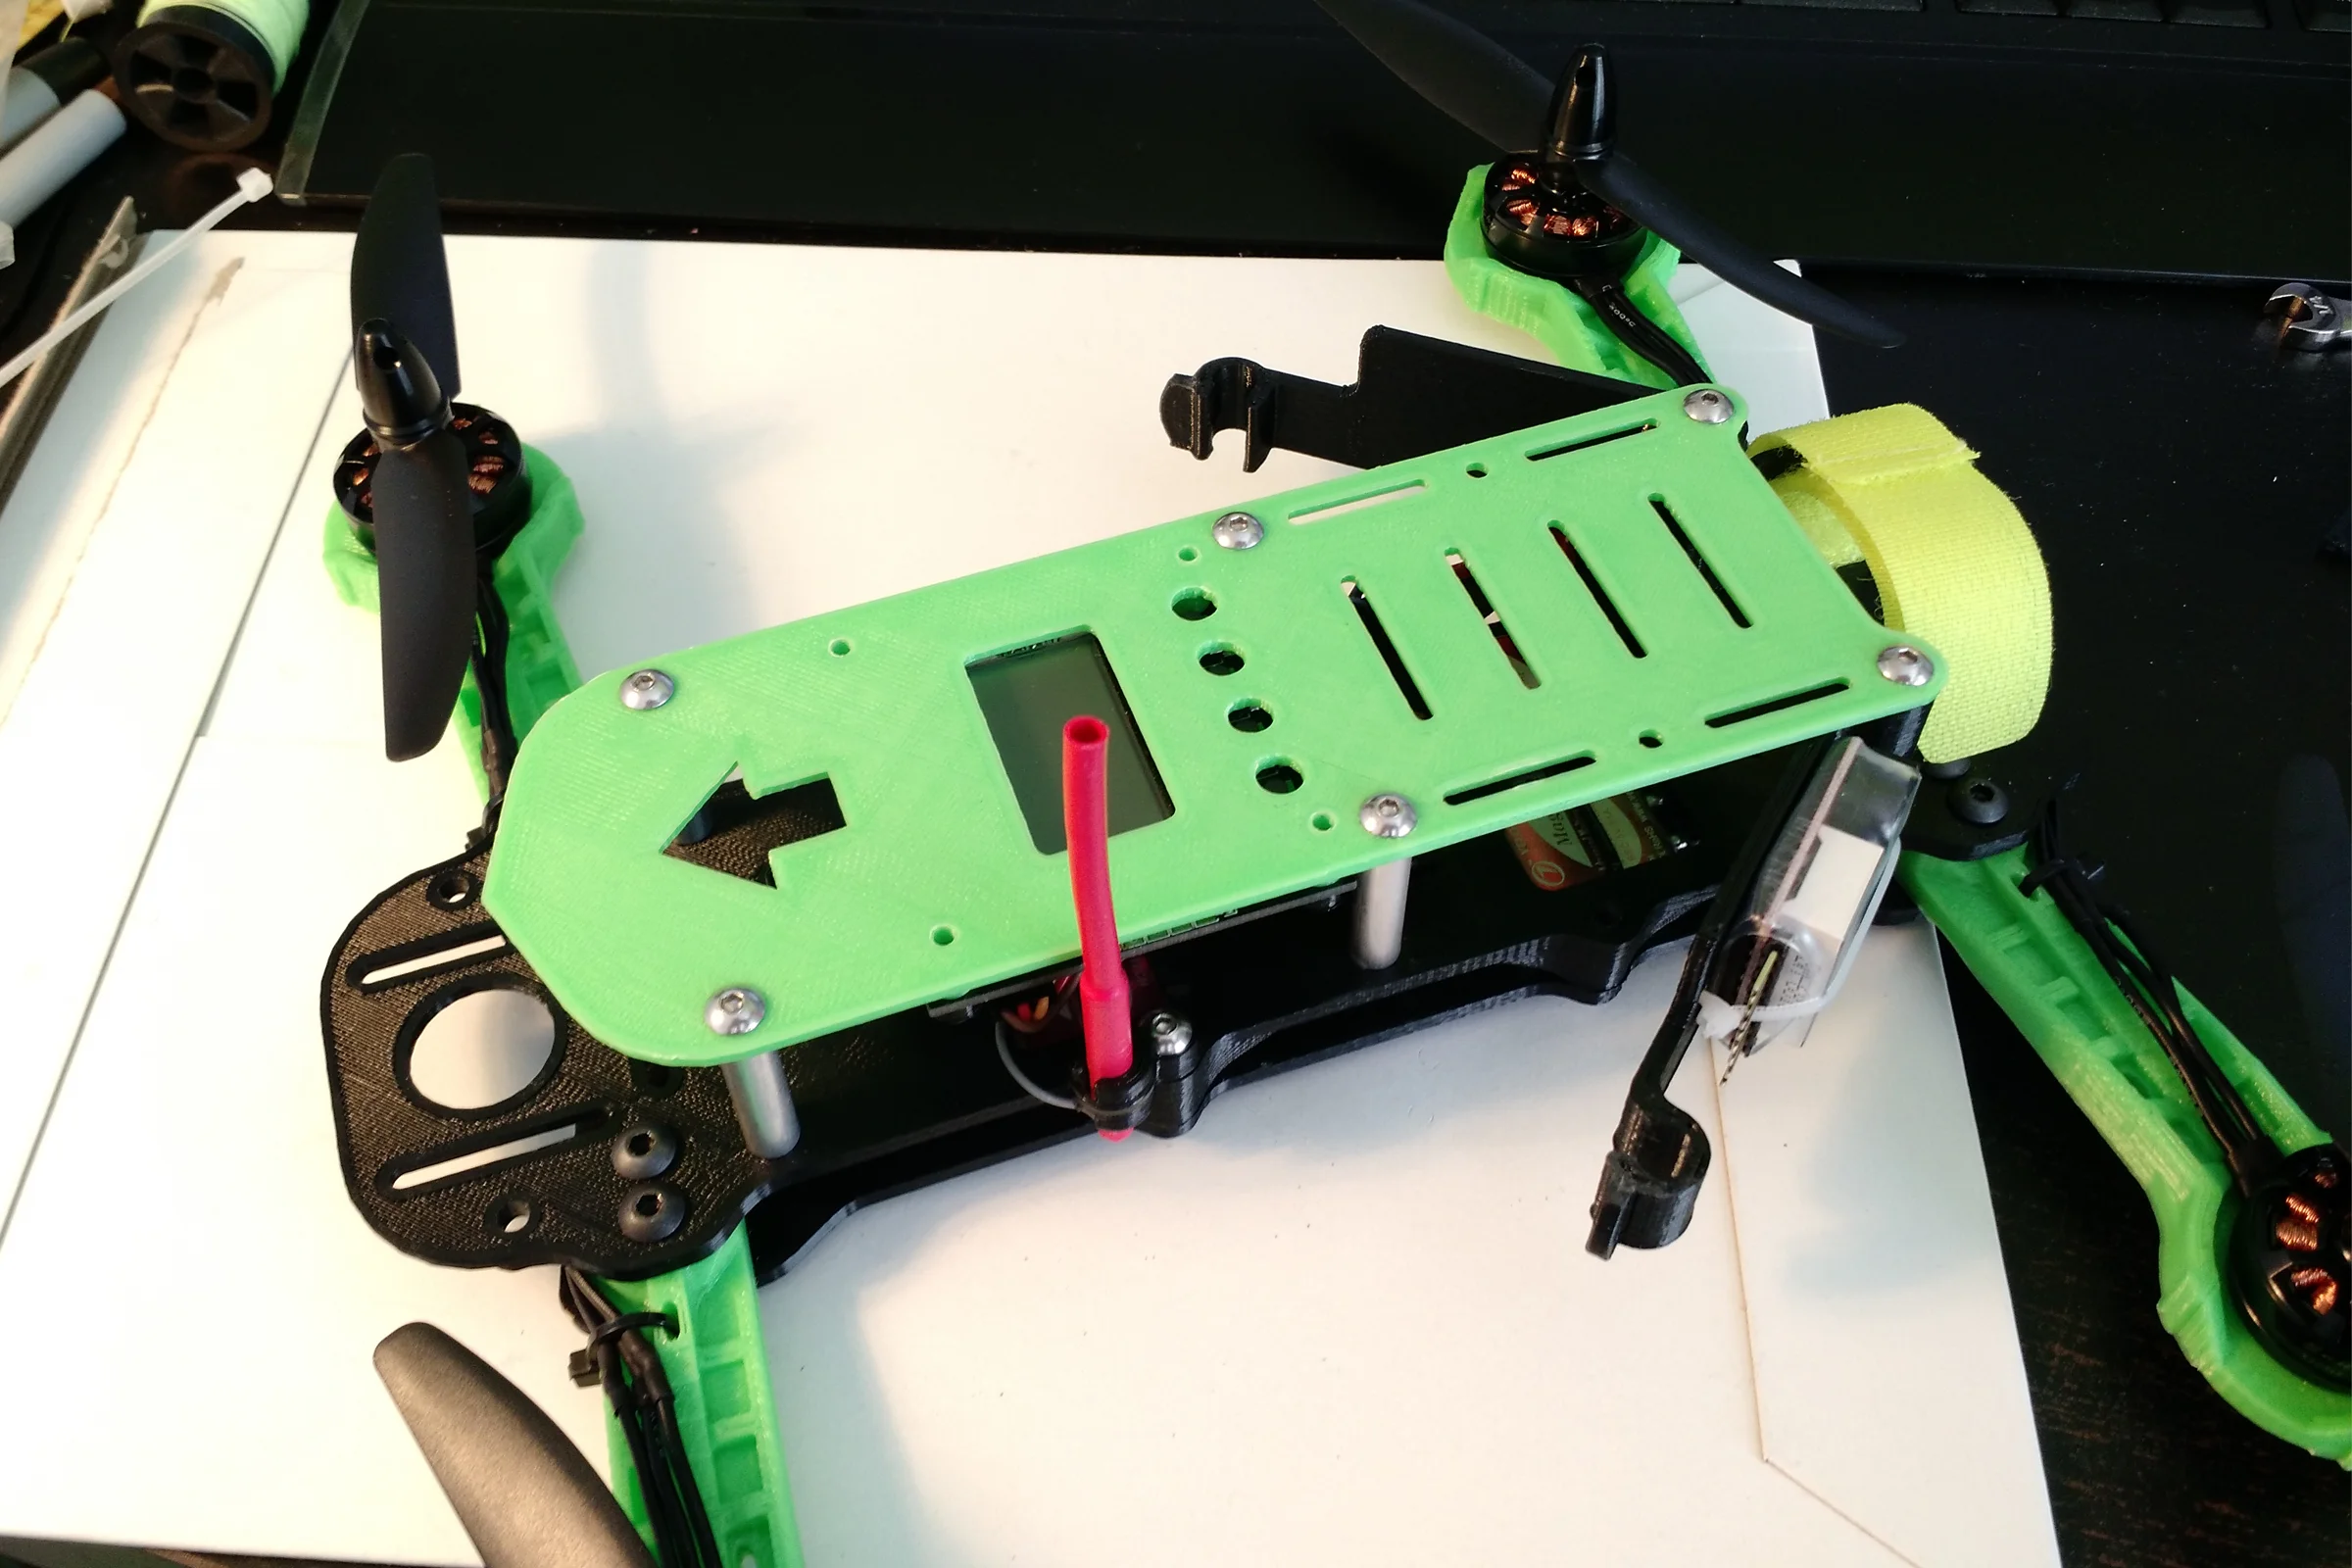
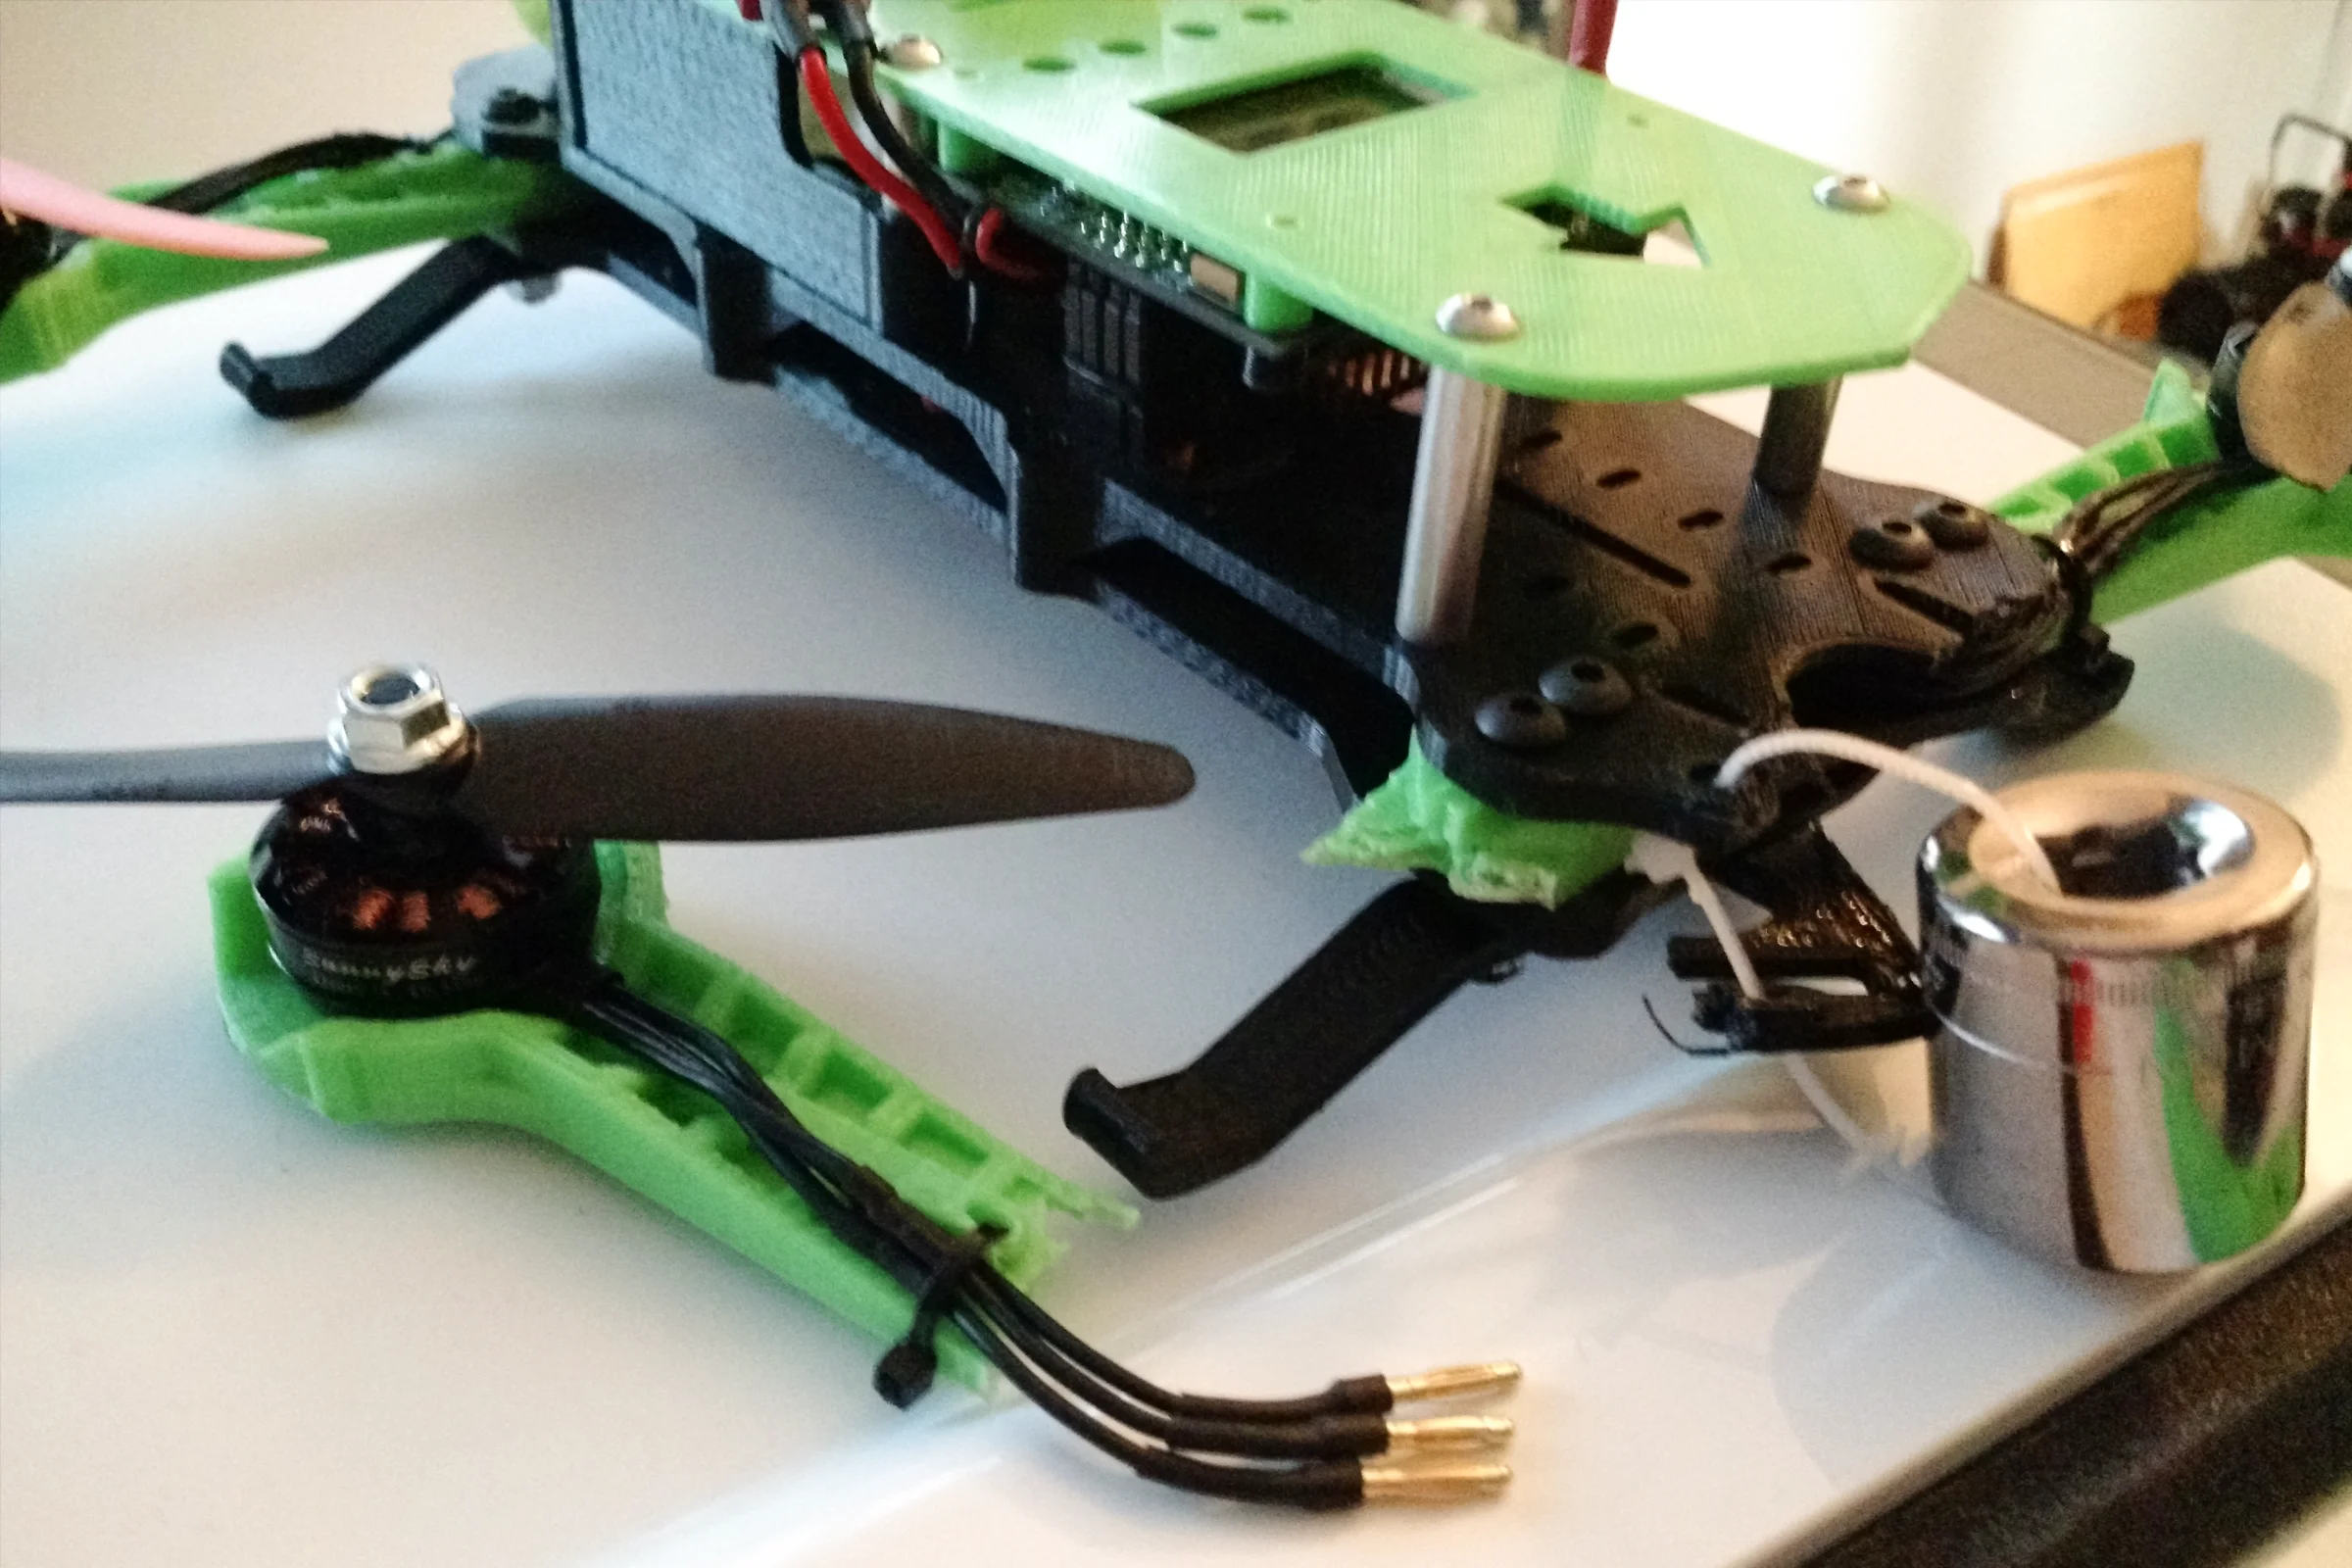
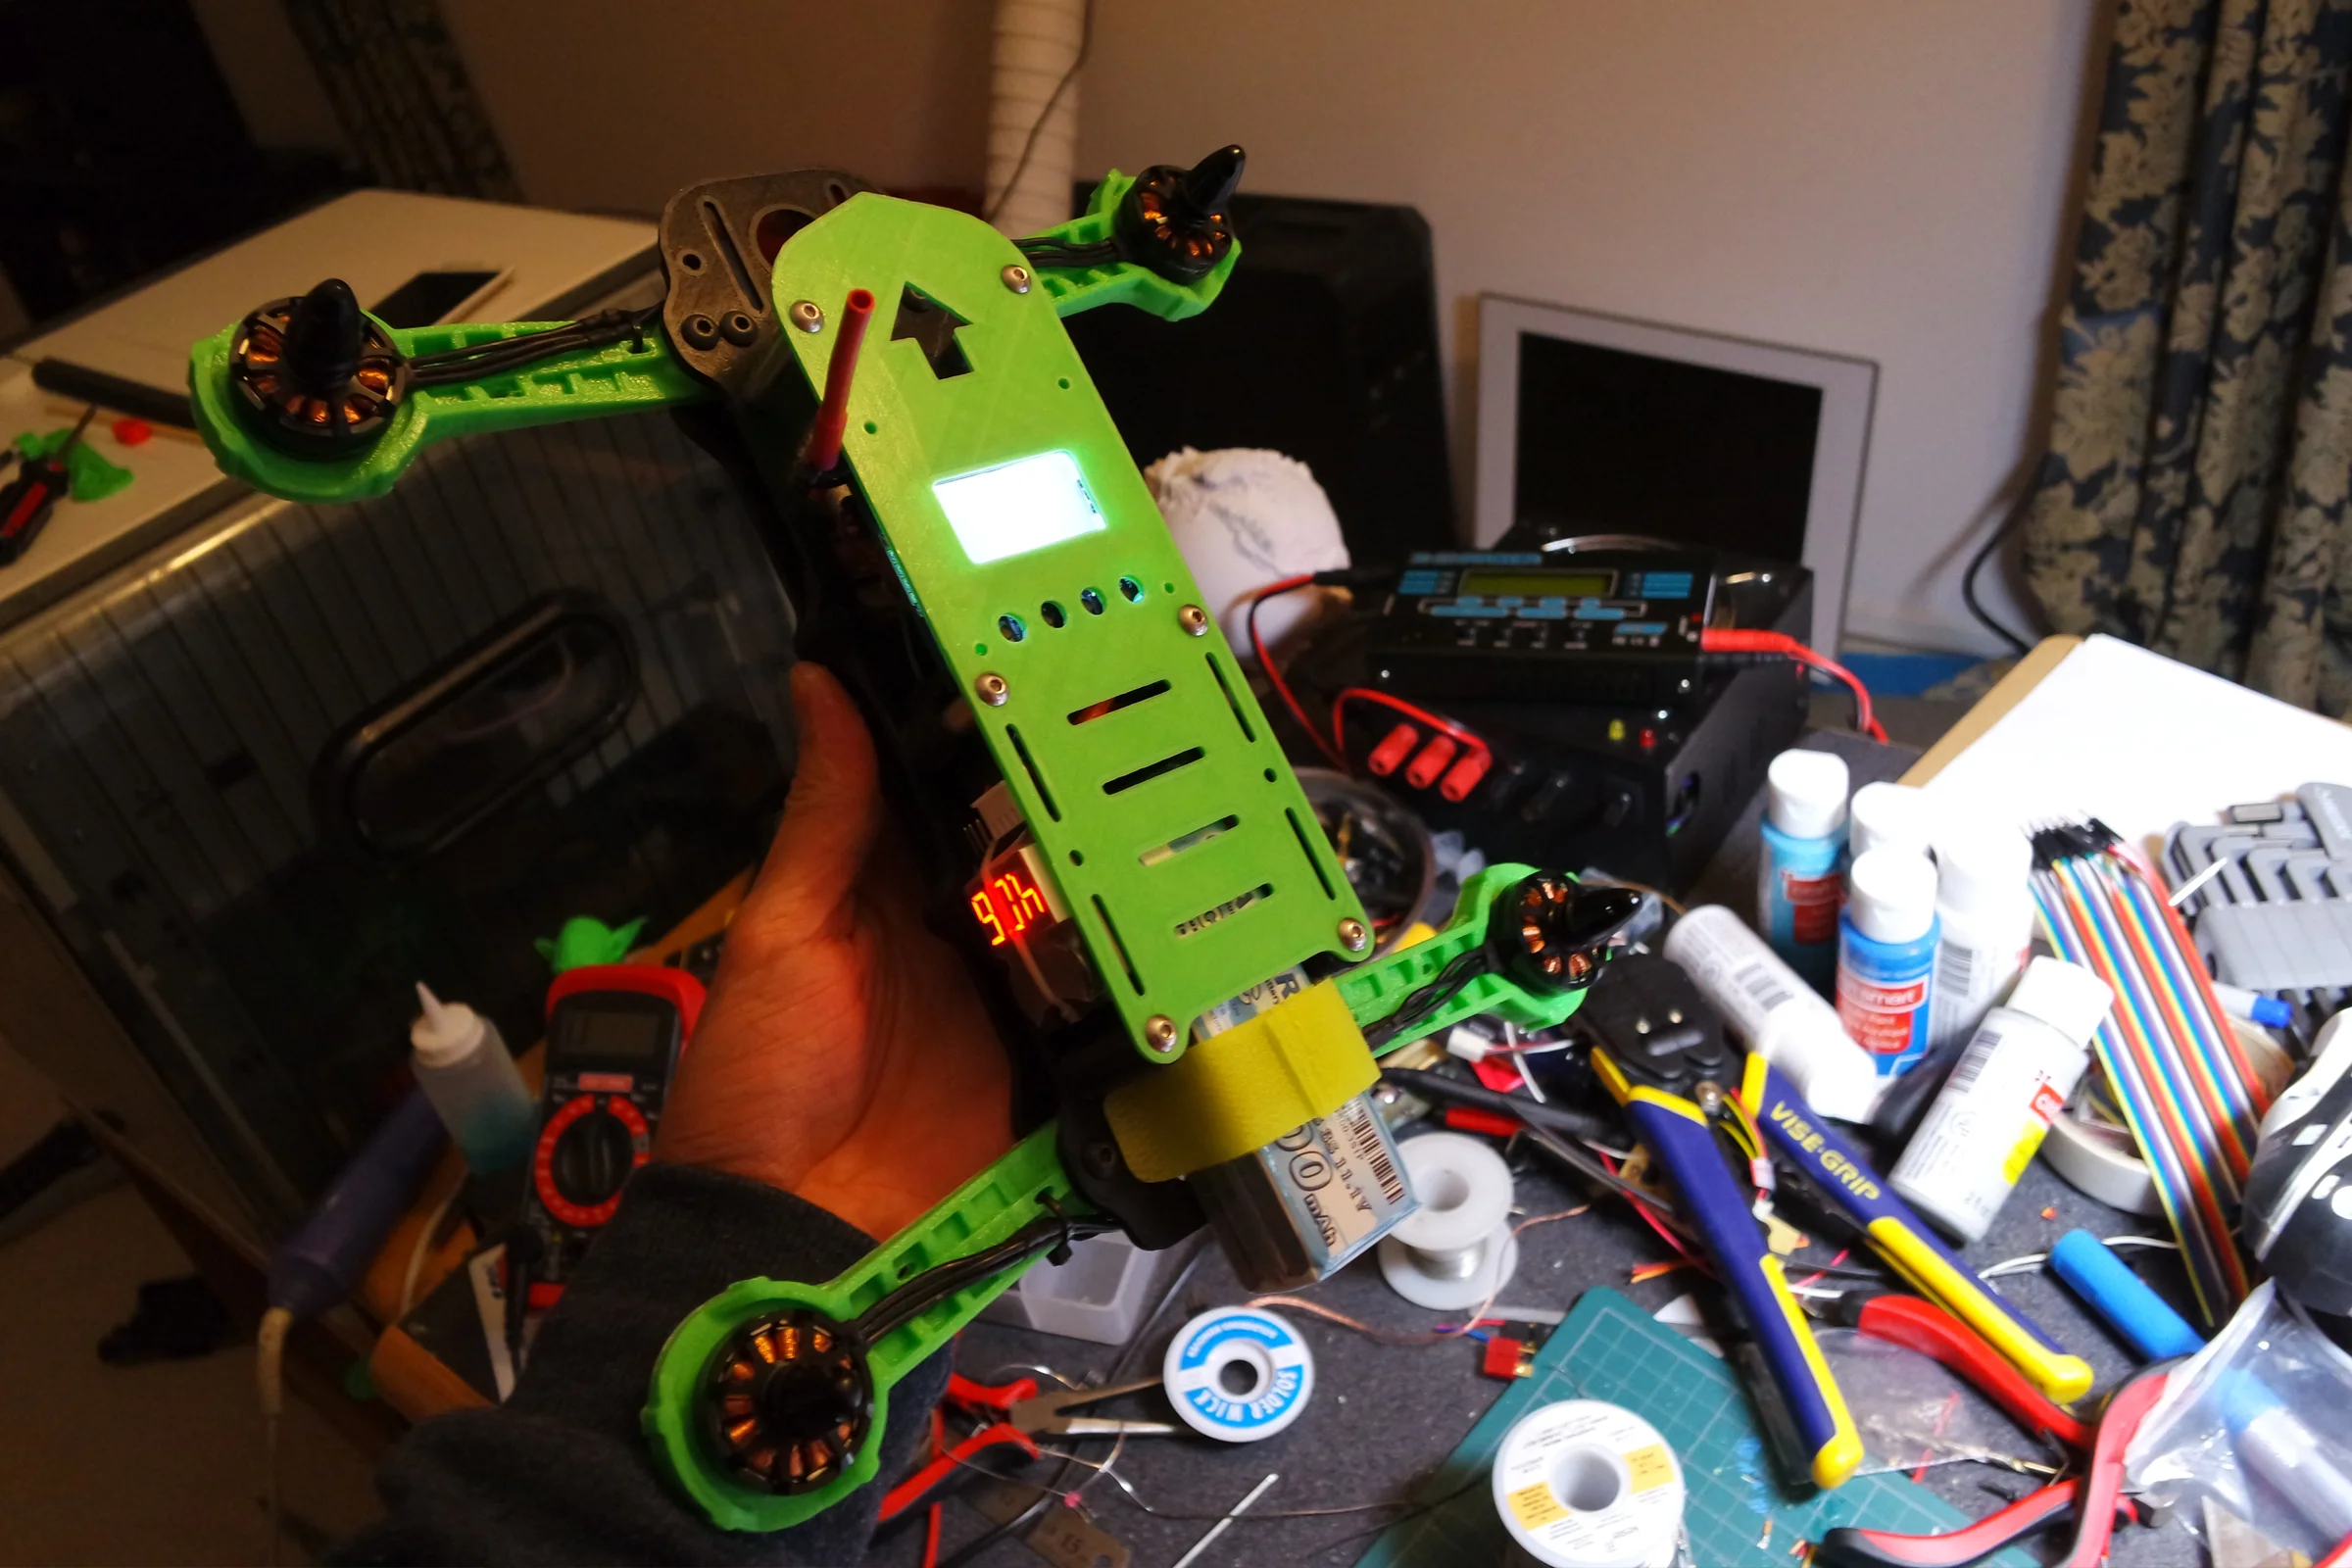
The first iteration established the baseline platform architecture. I designed two pivoting swing doors to protect the electronics and serve as a quick-release mount for the voltage monitor. Because the monitor needed to be removed with the battery after every flight, the doors allowed it to be unclipped and removed in one motion. I purposely reserved the front volume of the frame for a future toolless Actioncam bay. To manage the center of gravity for this future layout, I kept the battery, the heaviest component, at the rear where it was expected to stay in later iterations. To simulate the missing camera during testing, I zip-tied a metal socket of equivalent weight to the front as a mass simulator. This allowed me to tune the PID loops and verify handling against the approximate center of gravity the final integrated system would eventually require.
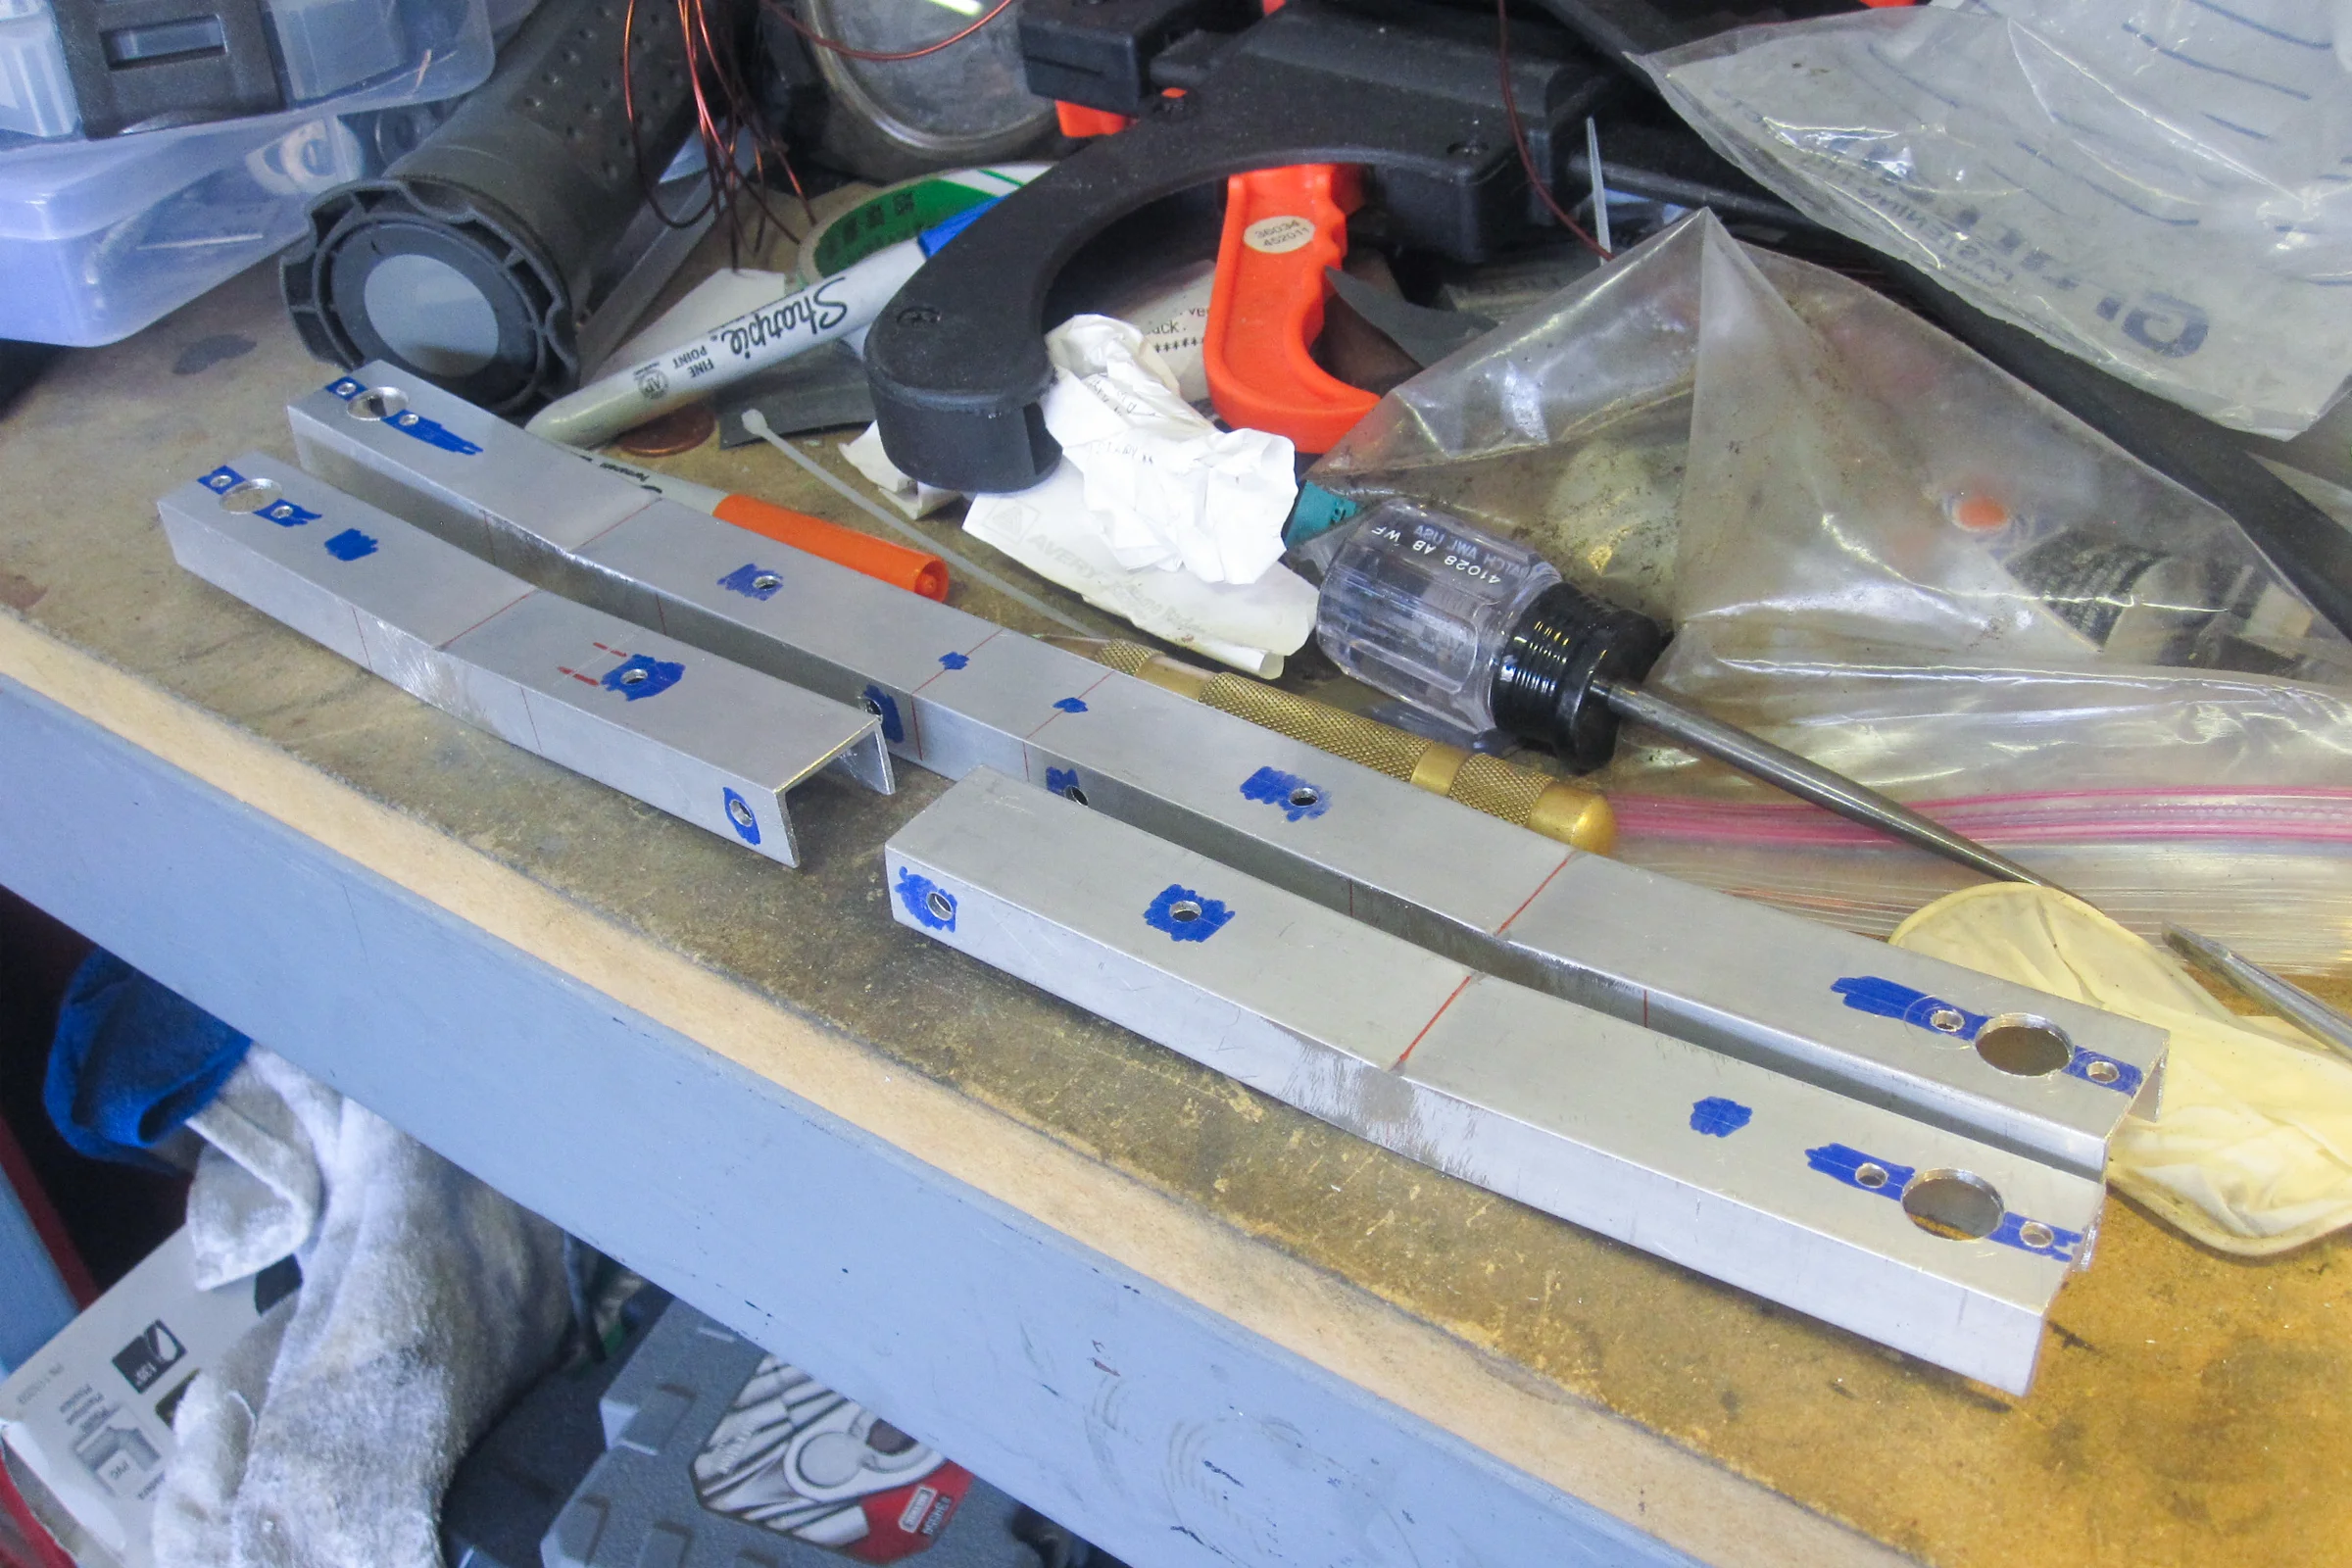
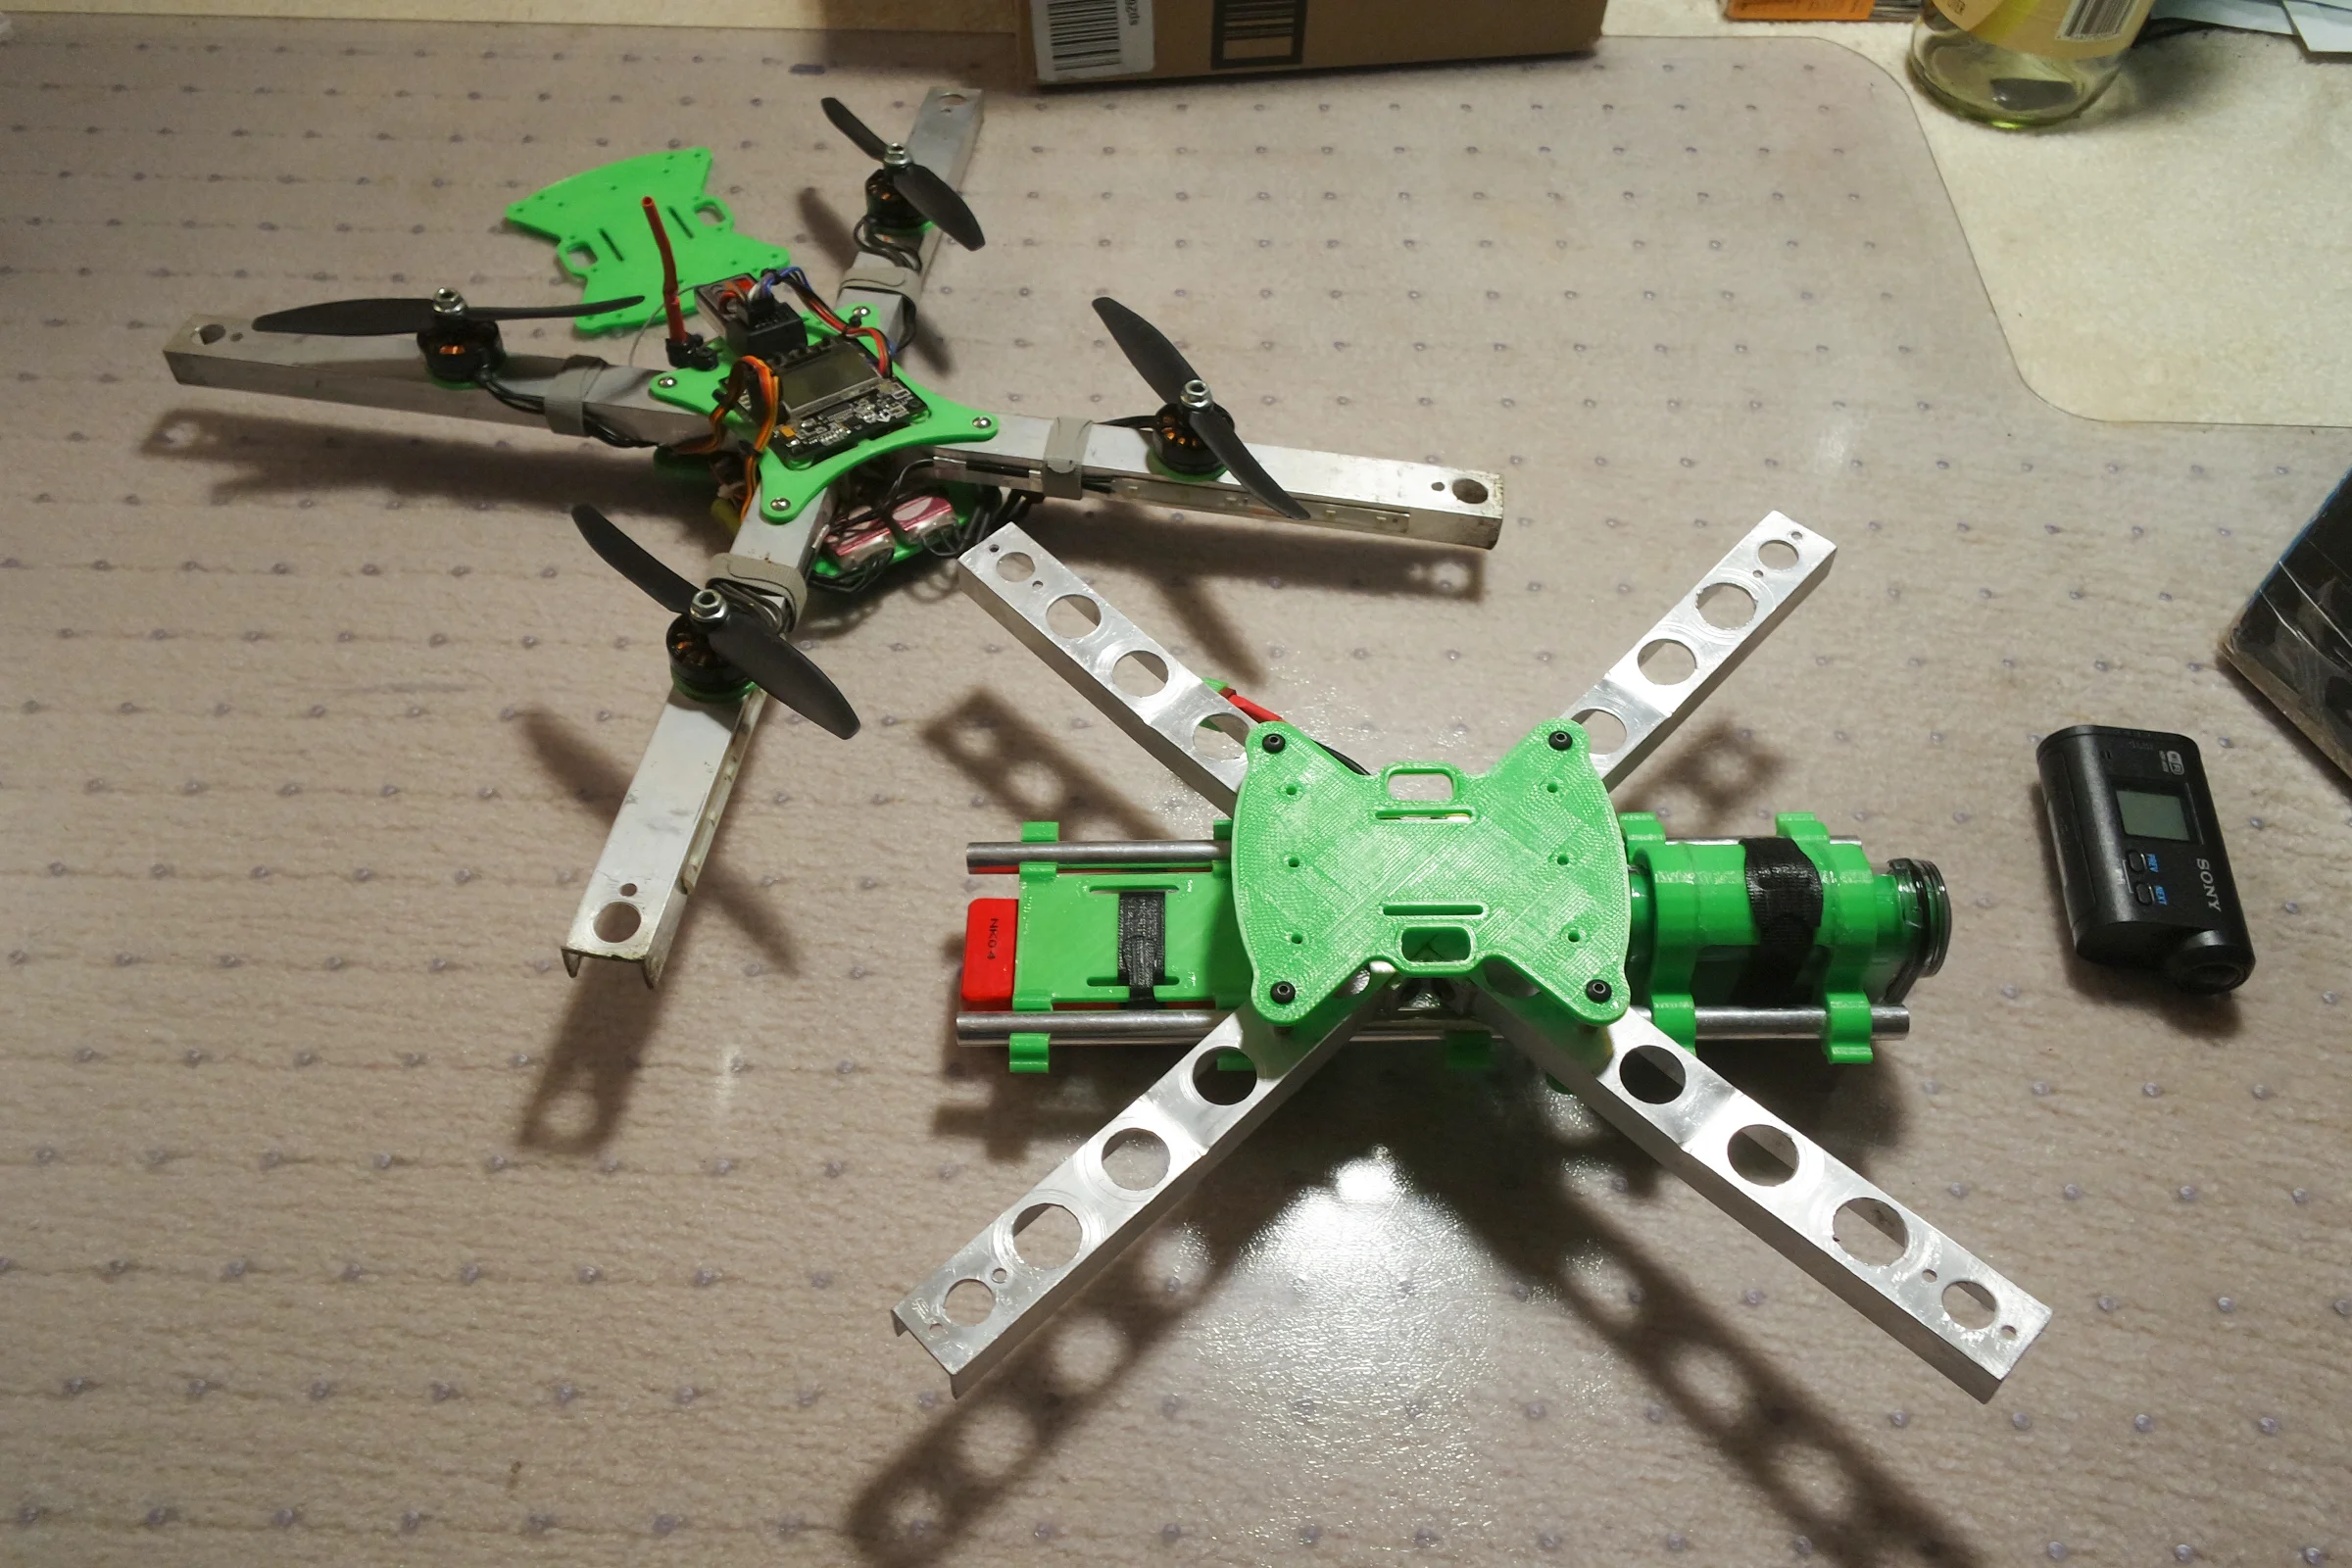
Drone 2: Aluminum X-Frame — Crash-Proof Experiment Platform
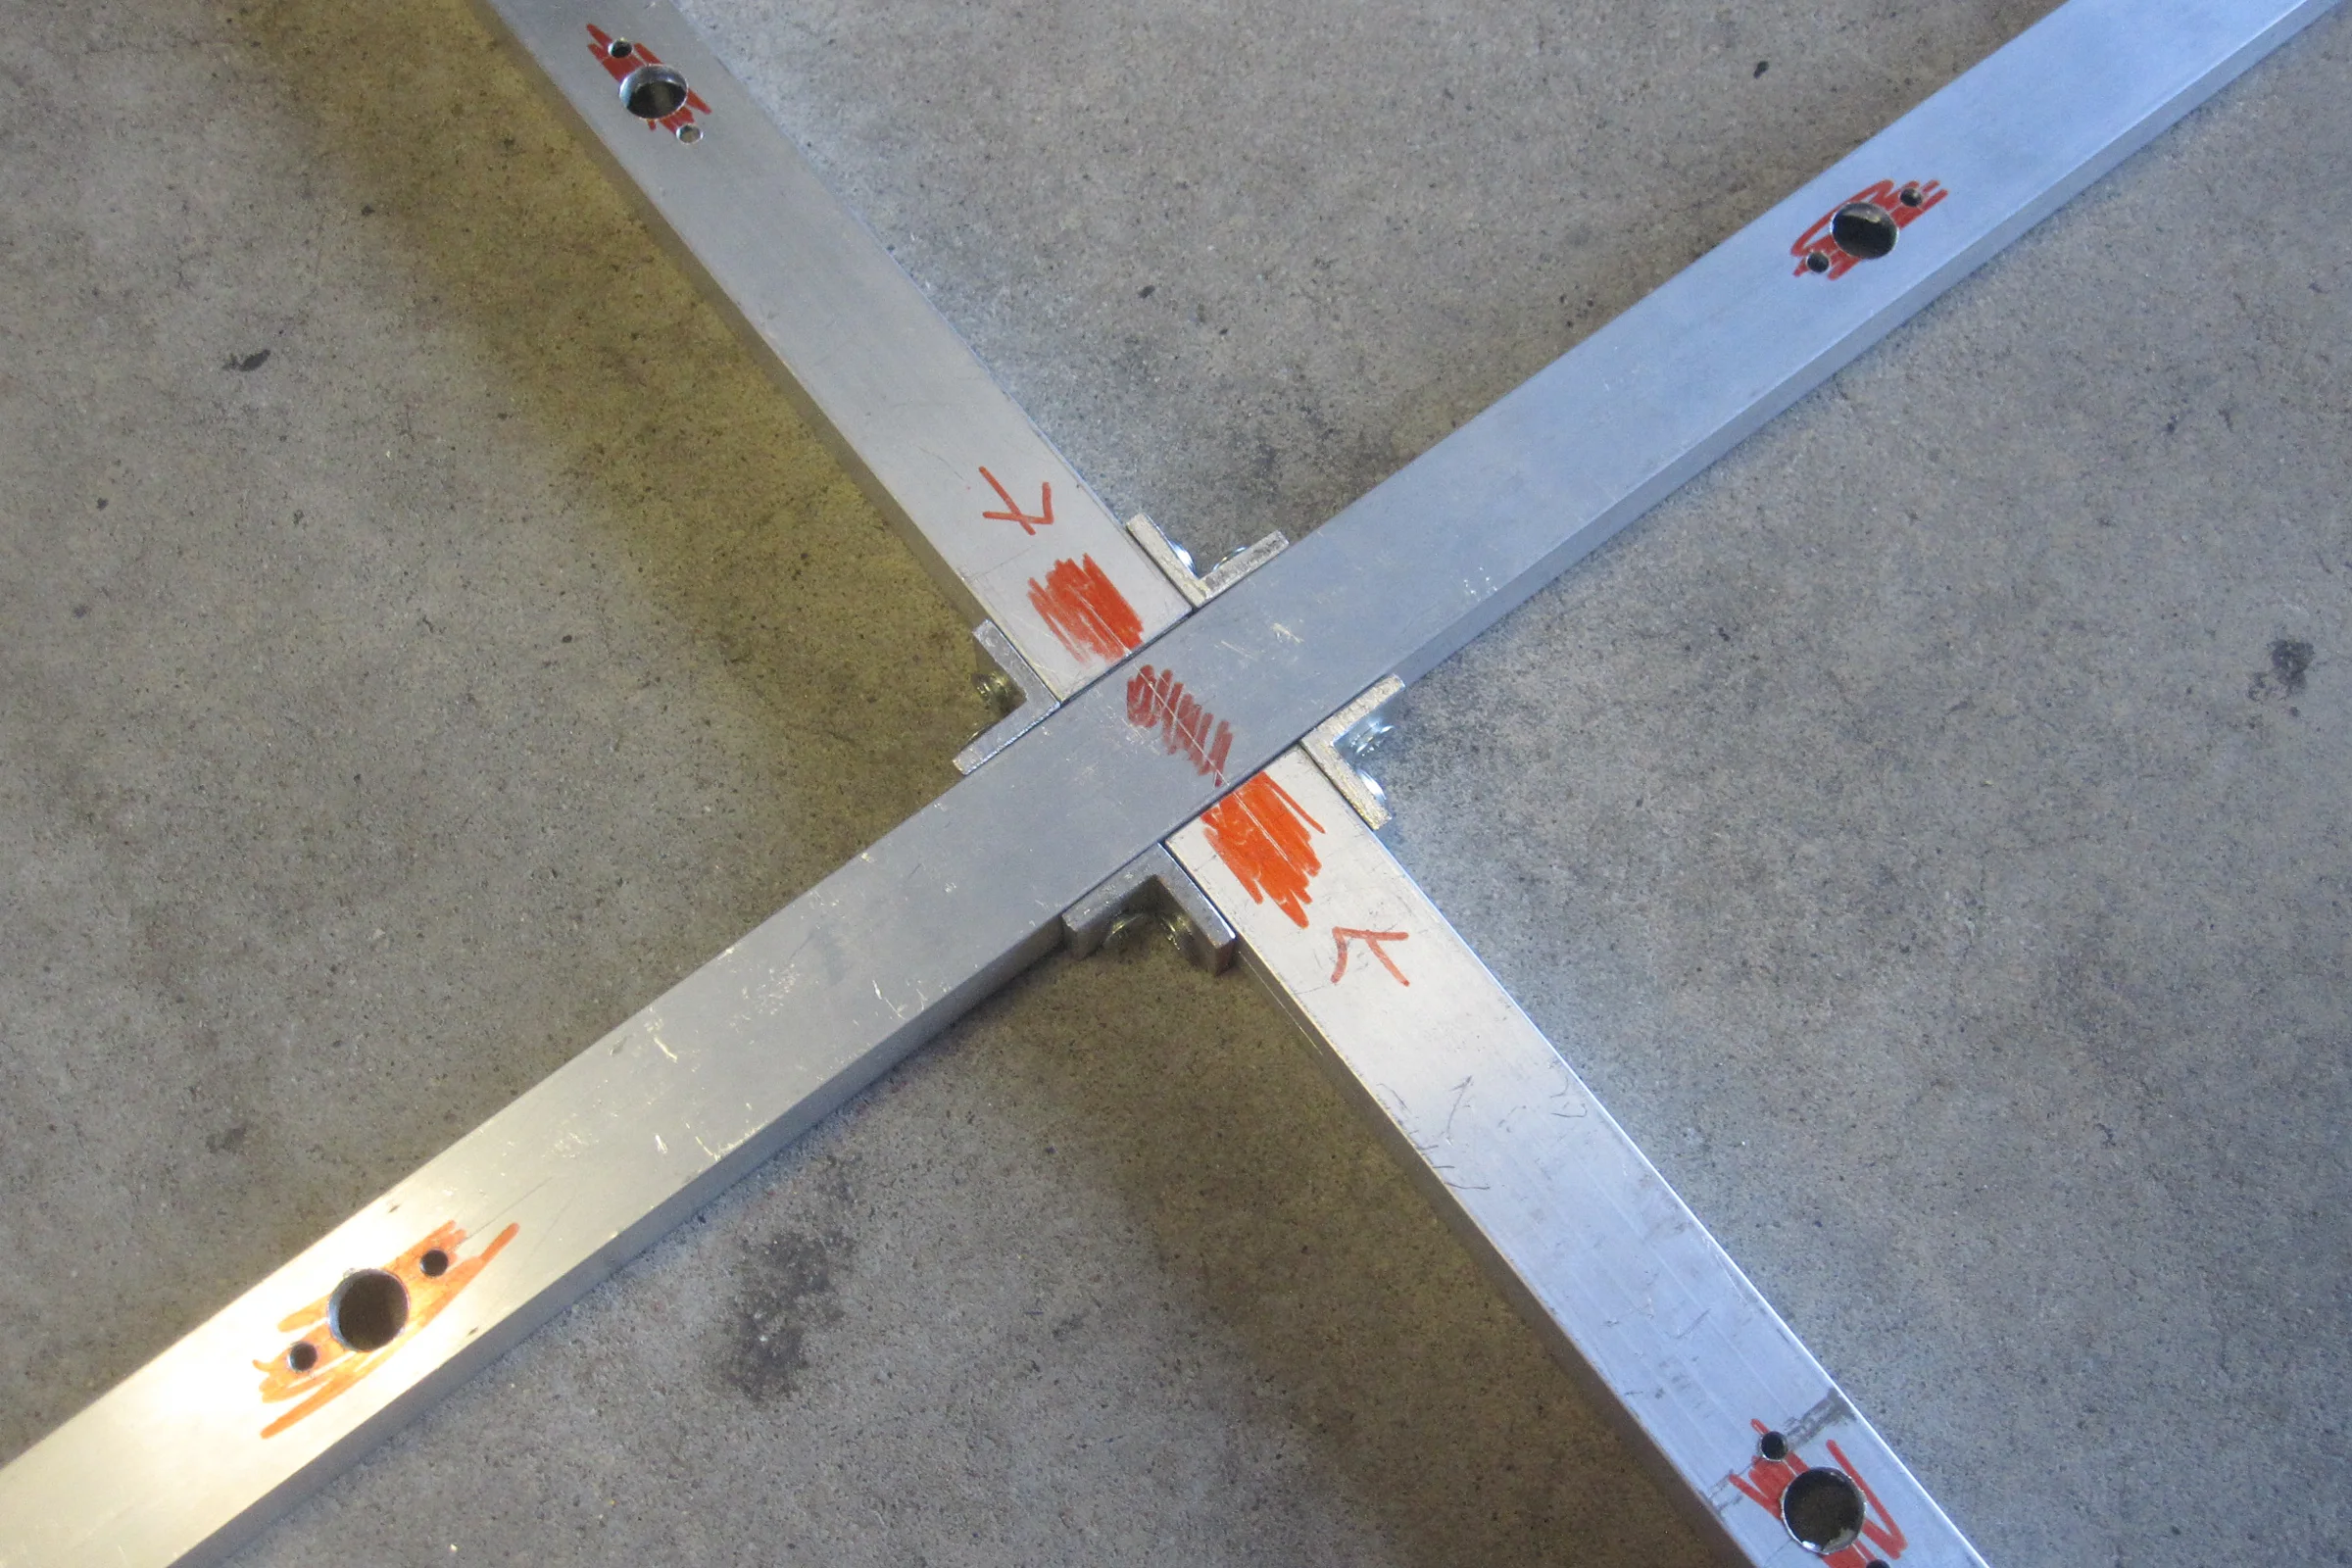
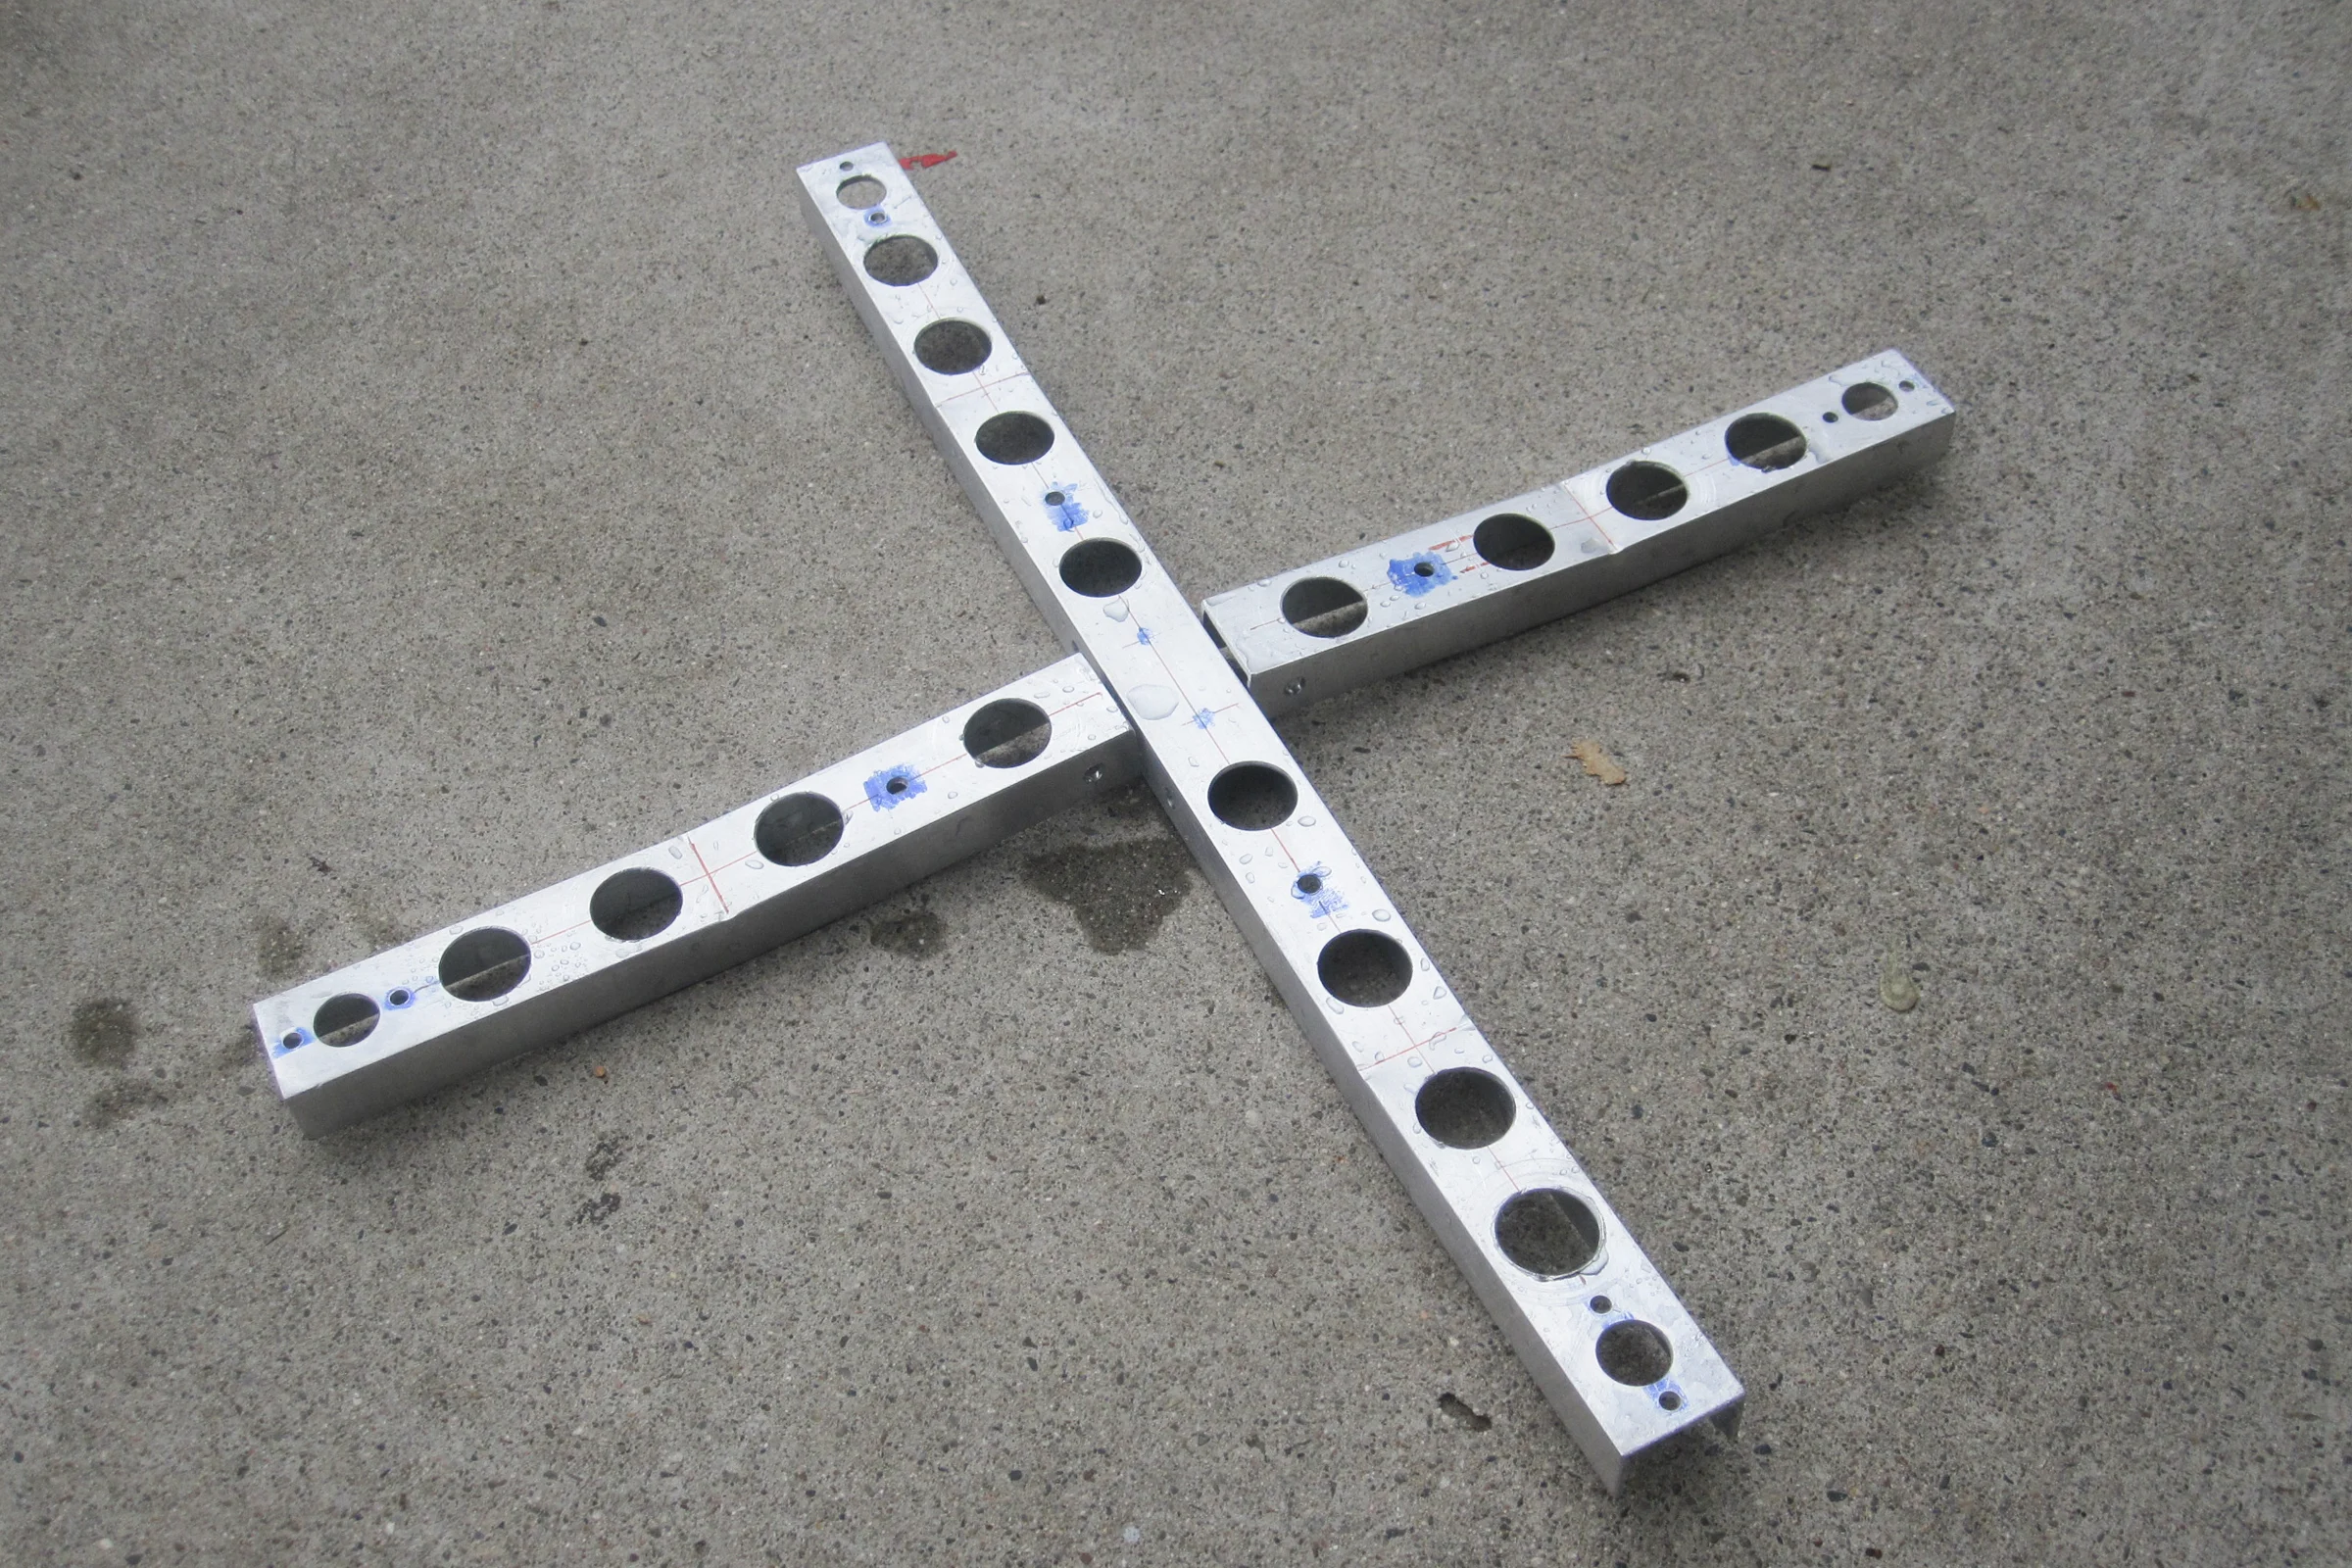
Drone 1 served its purpose. Flying skills had improved and the next goal was to fly higher, faster, and through tighter spaces while building toward carrying camera and FPV payload. The 3D printed H-frame was too fragile for that level of abuse. The answer was extruded 6061 aluminum channel bolted into a rigid X configuration.

Every design decision on Drone 2 was about crash survivability and mass centralization. Battery hung underneath a 3D printed underdeck below the X center — heaviest component at the lowest point. ESCs on top of the underdeck. Flight controller on a 3D printed top deck above the X center. The motors sit in the middle of each arm, not at the tips, which places the propellers fully enclosed within the aluminum channel profile. In a crash the aluminum frame absorbs the impact and the props survive because the frame geometry puts them inside the protection zone.

The frame survived every crash without being rebuilt or replaced. Very few props broke. Heavy and bulky, but it served its purpose as a high-risk skill-building platform. One minor operational frustration: brushless motors are smooth and round with nothing to grip, making field prop changes slow. I designed and printed a custom wrench that locked precisely onto the motor housing geometry to solve it.
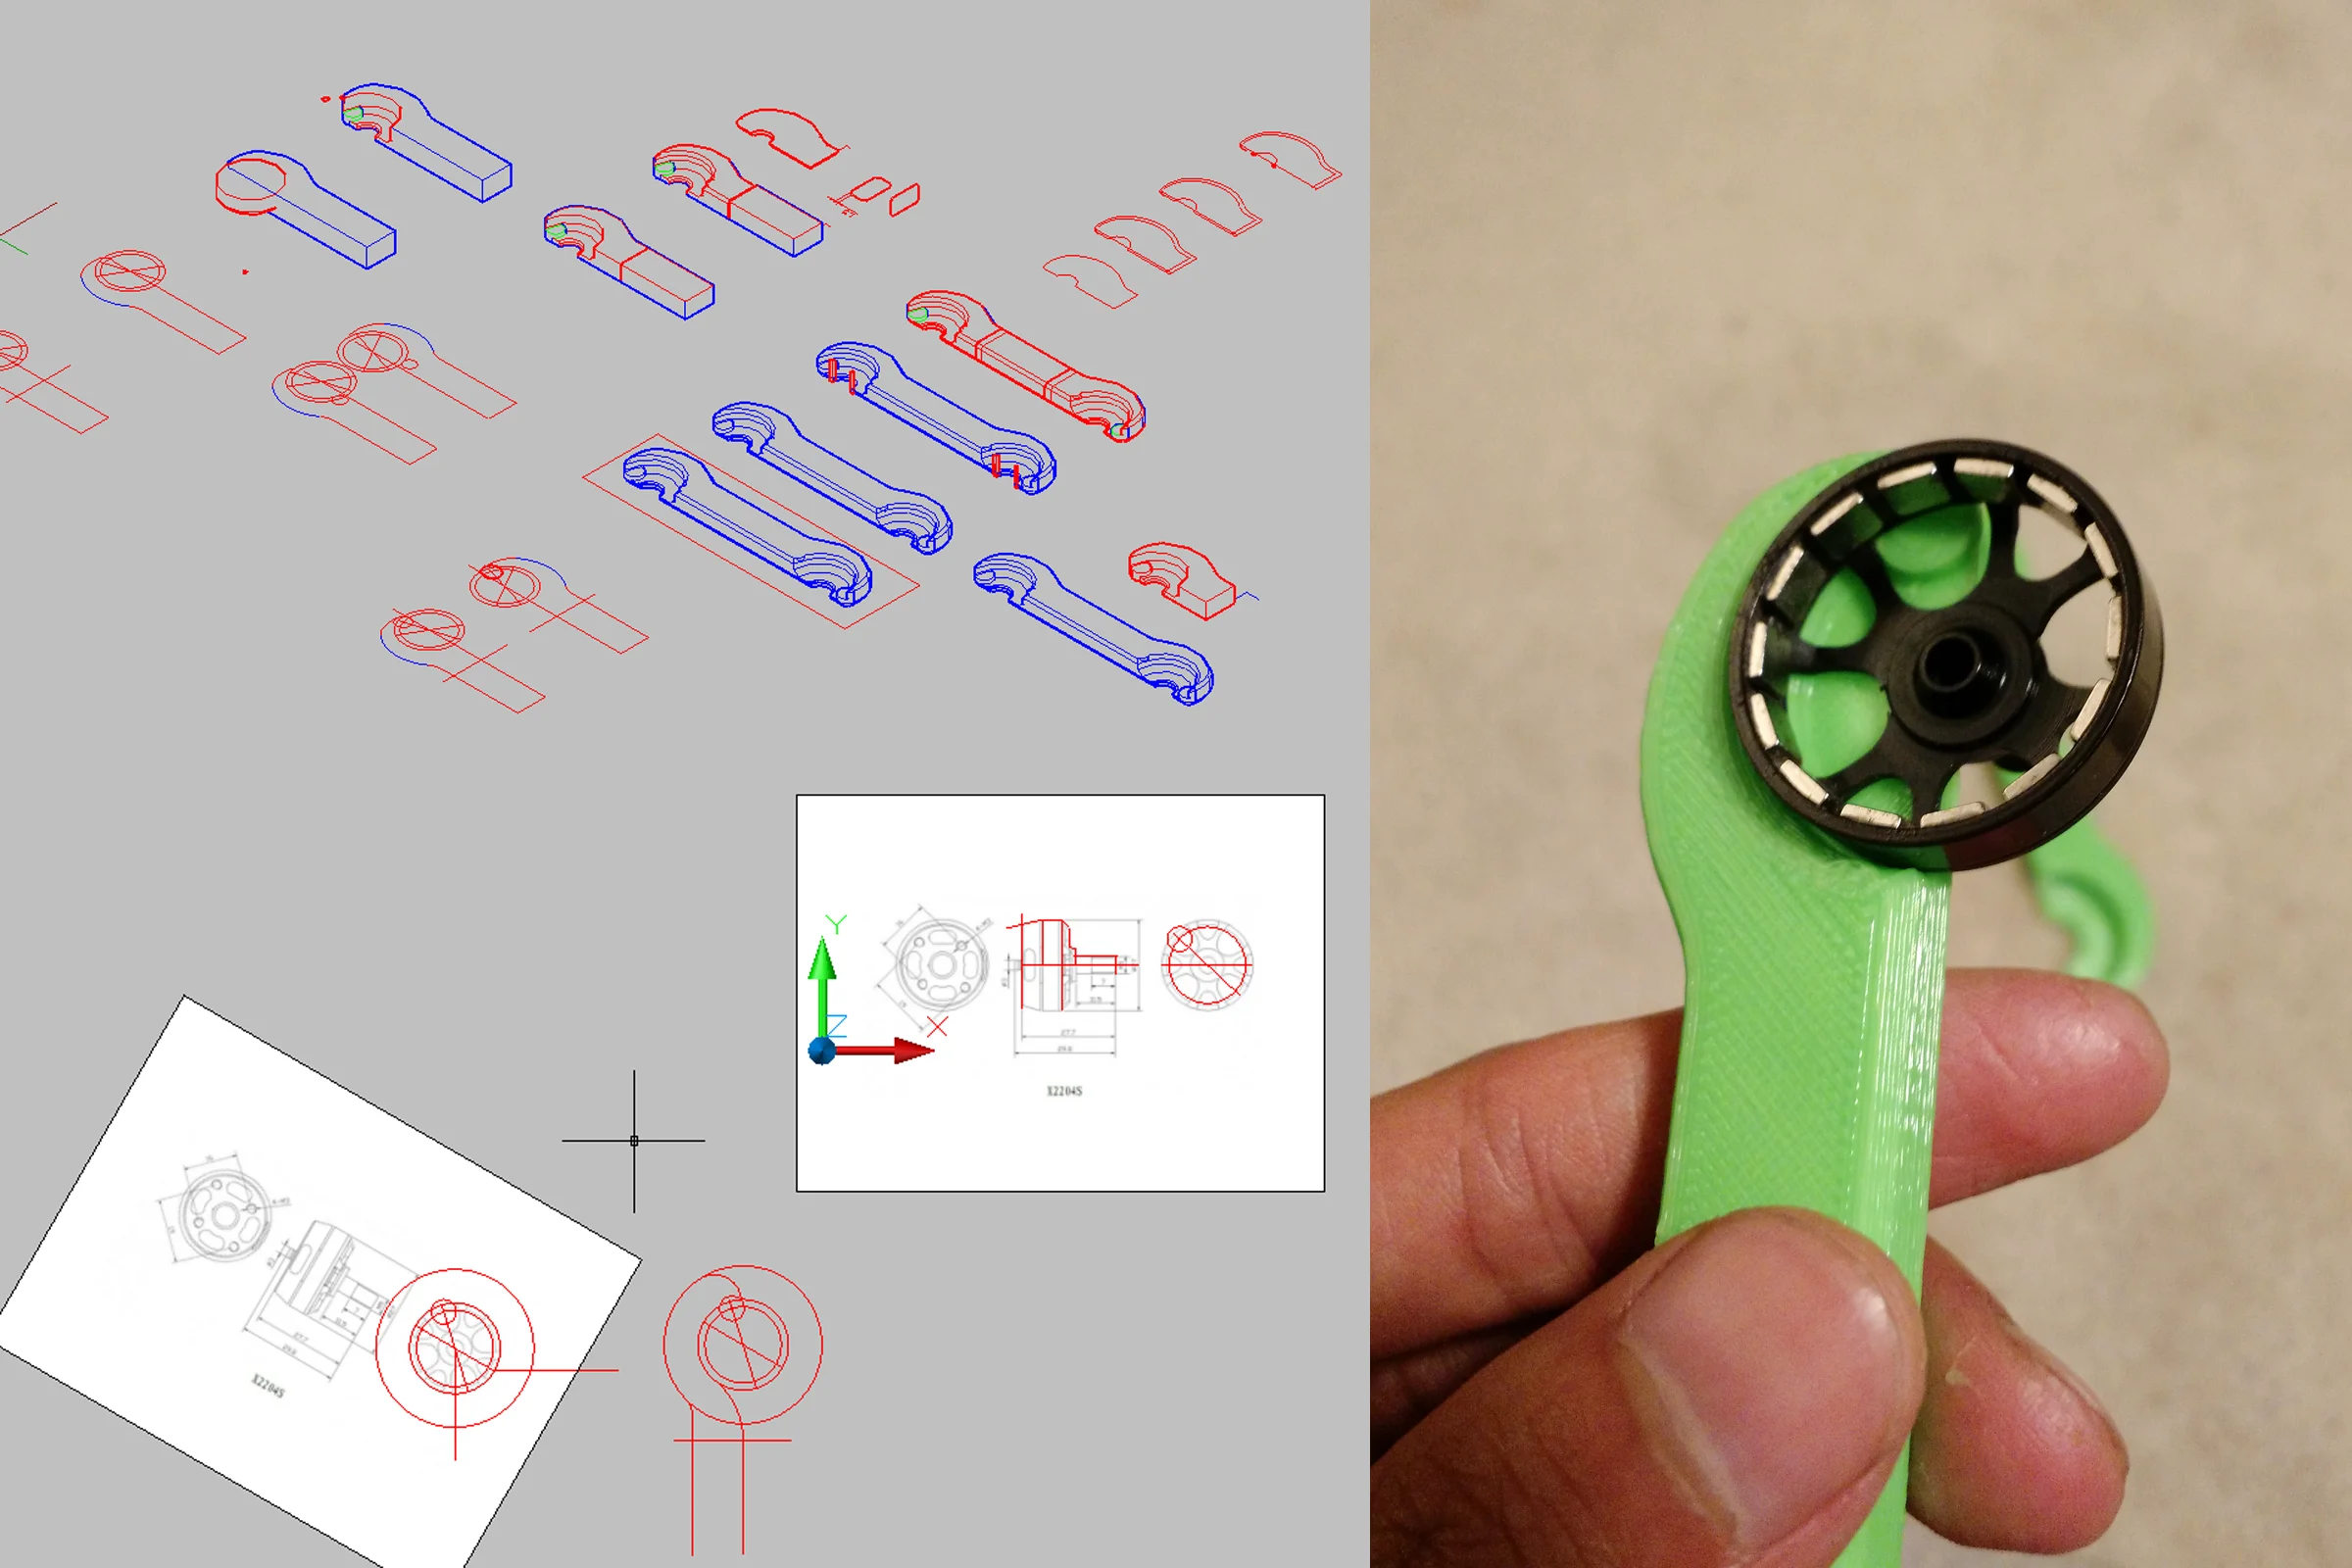
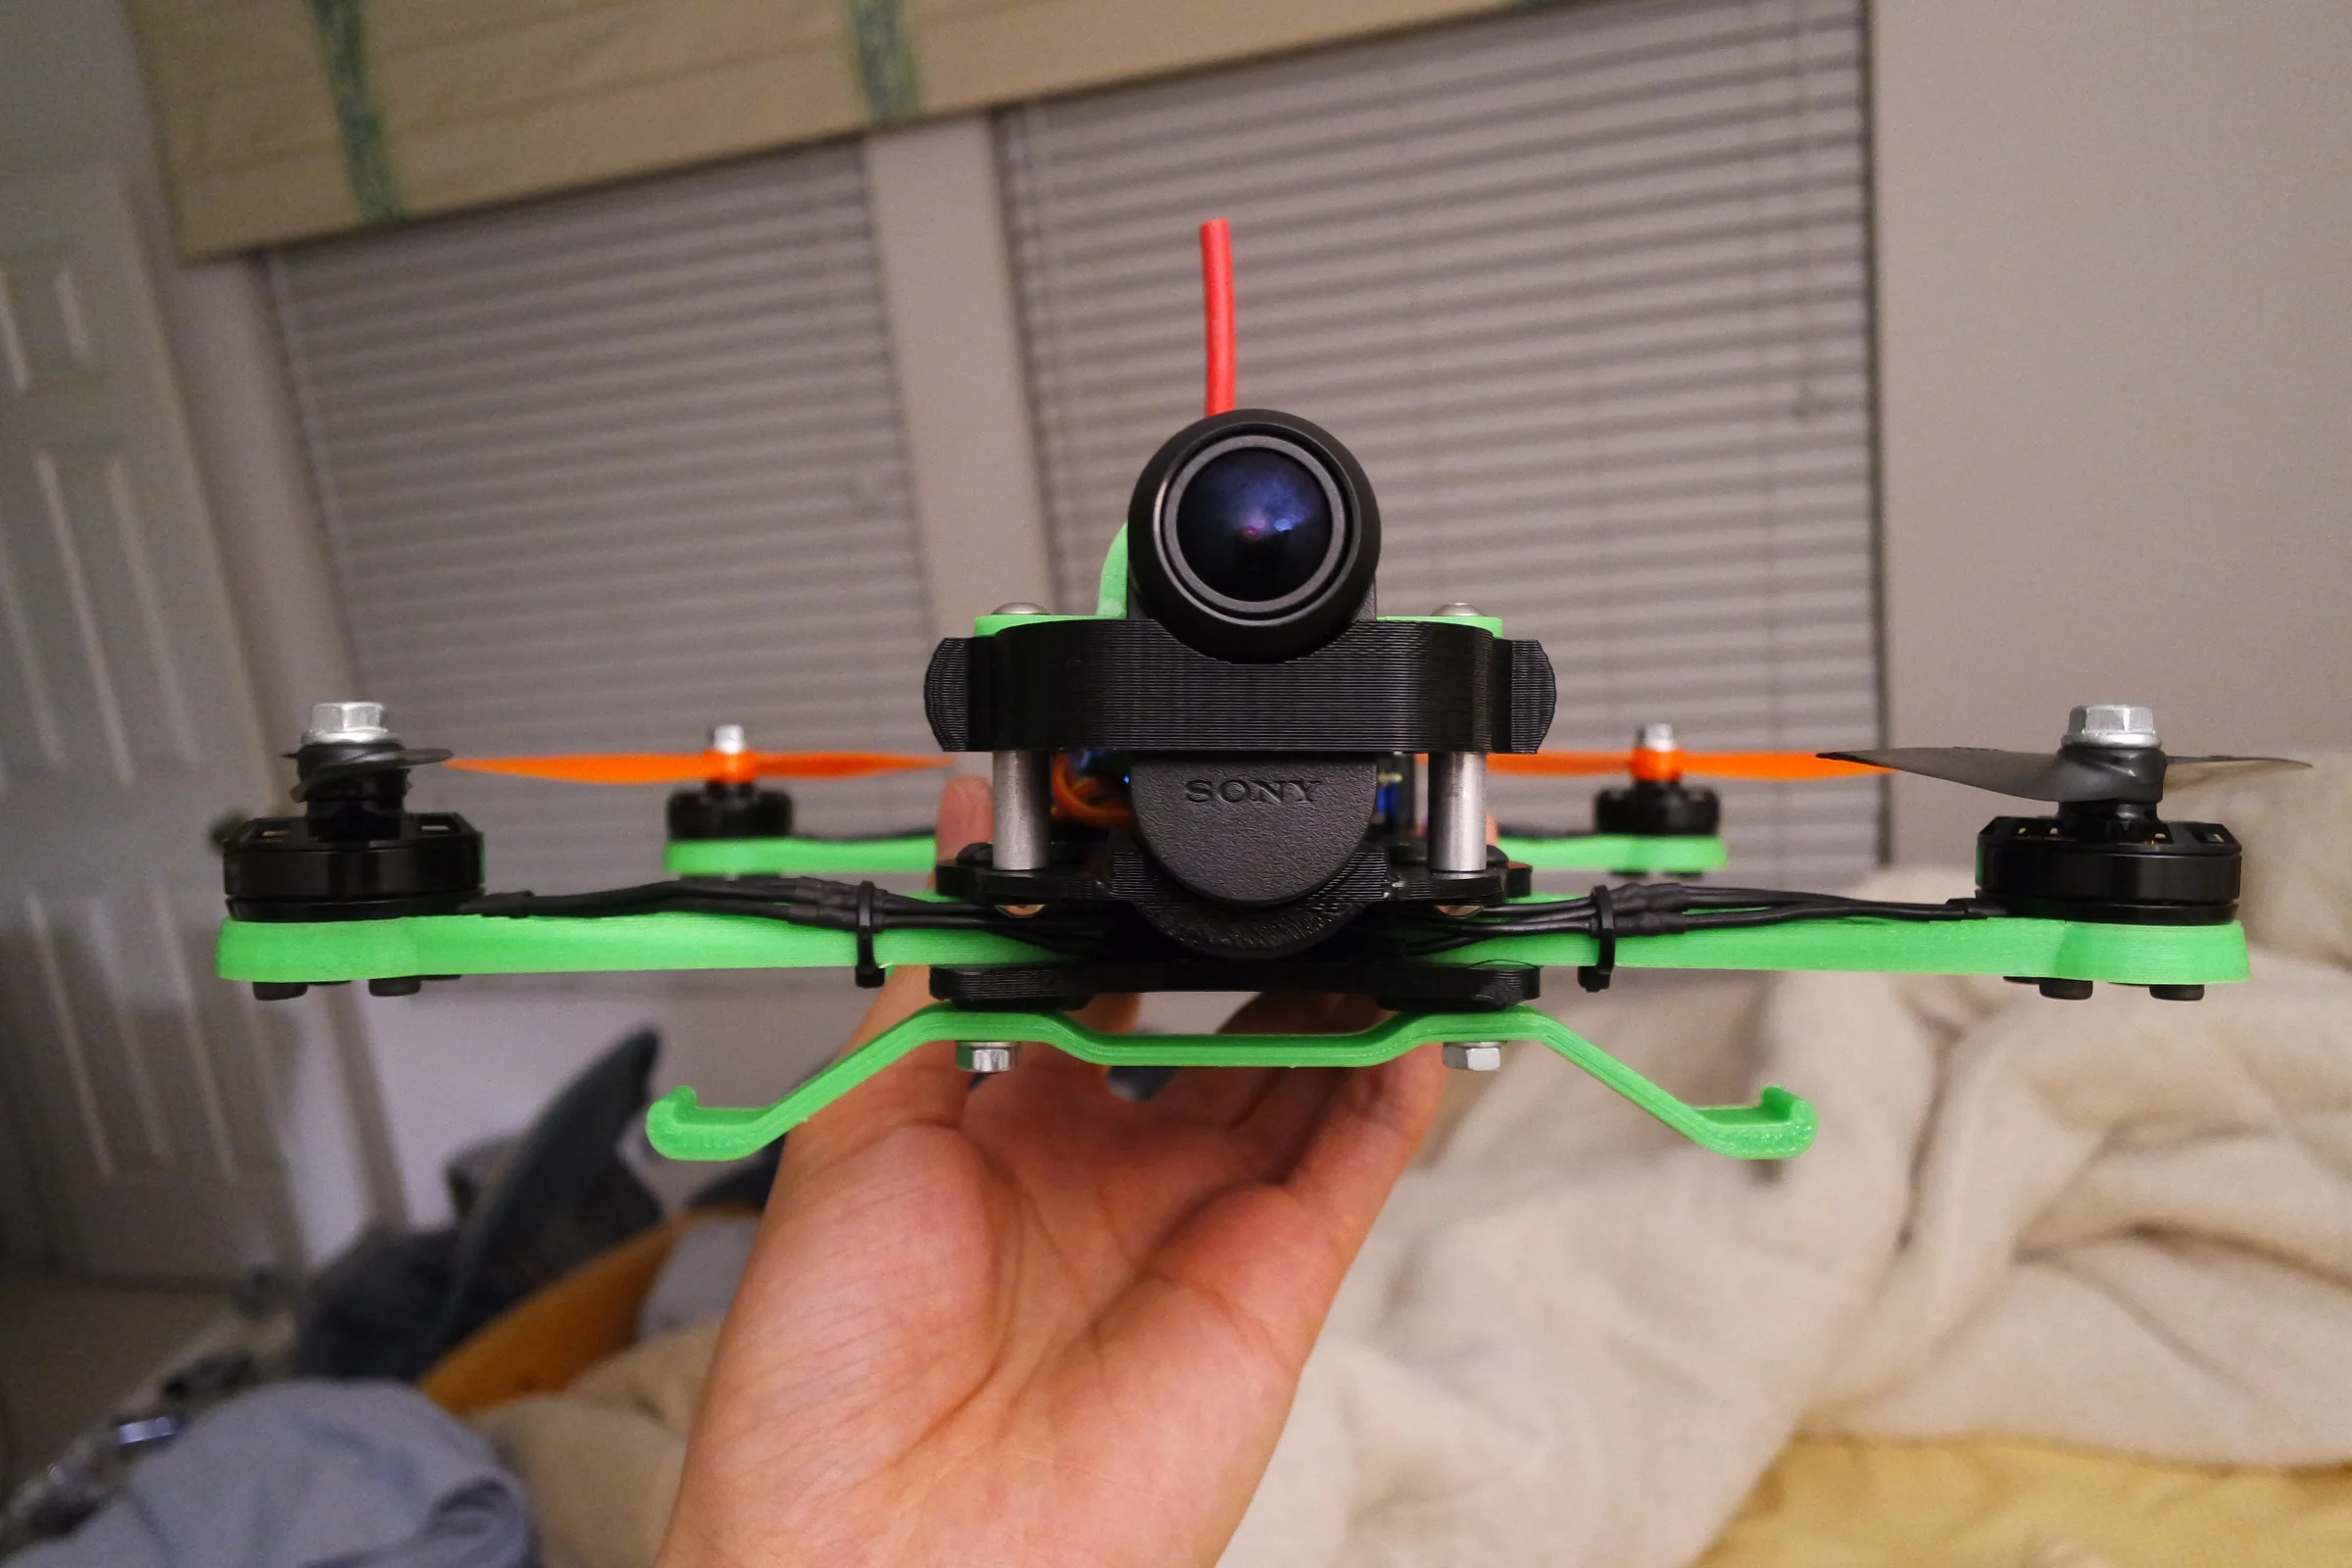
Drone 3: Back to 3D Printed — Camera Integration
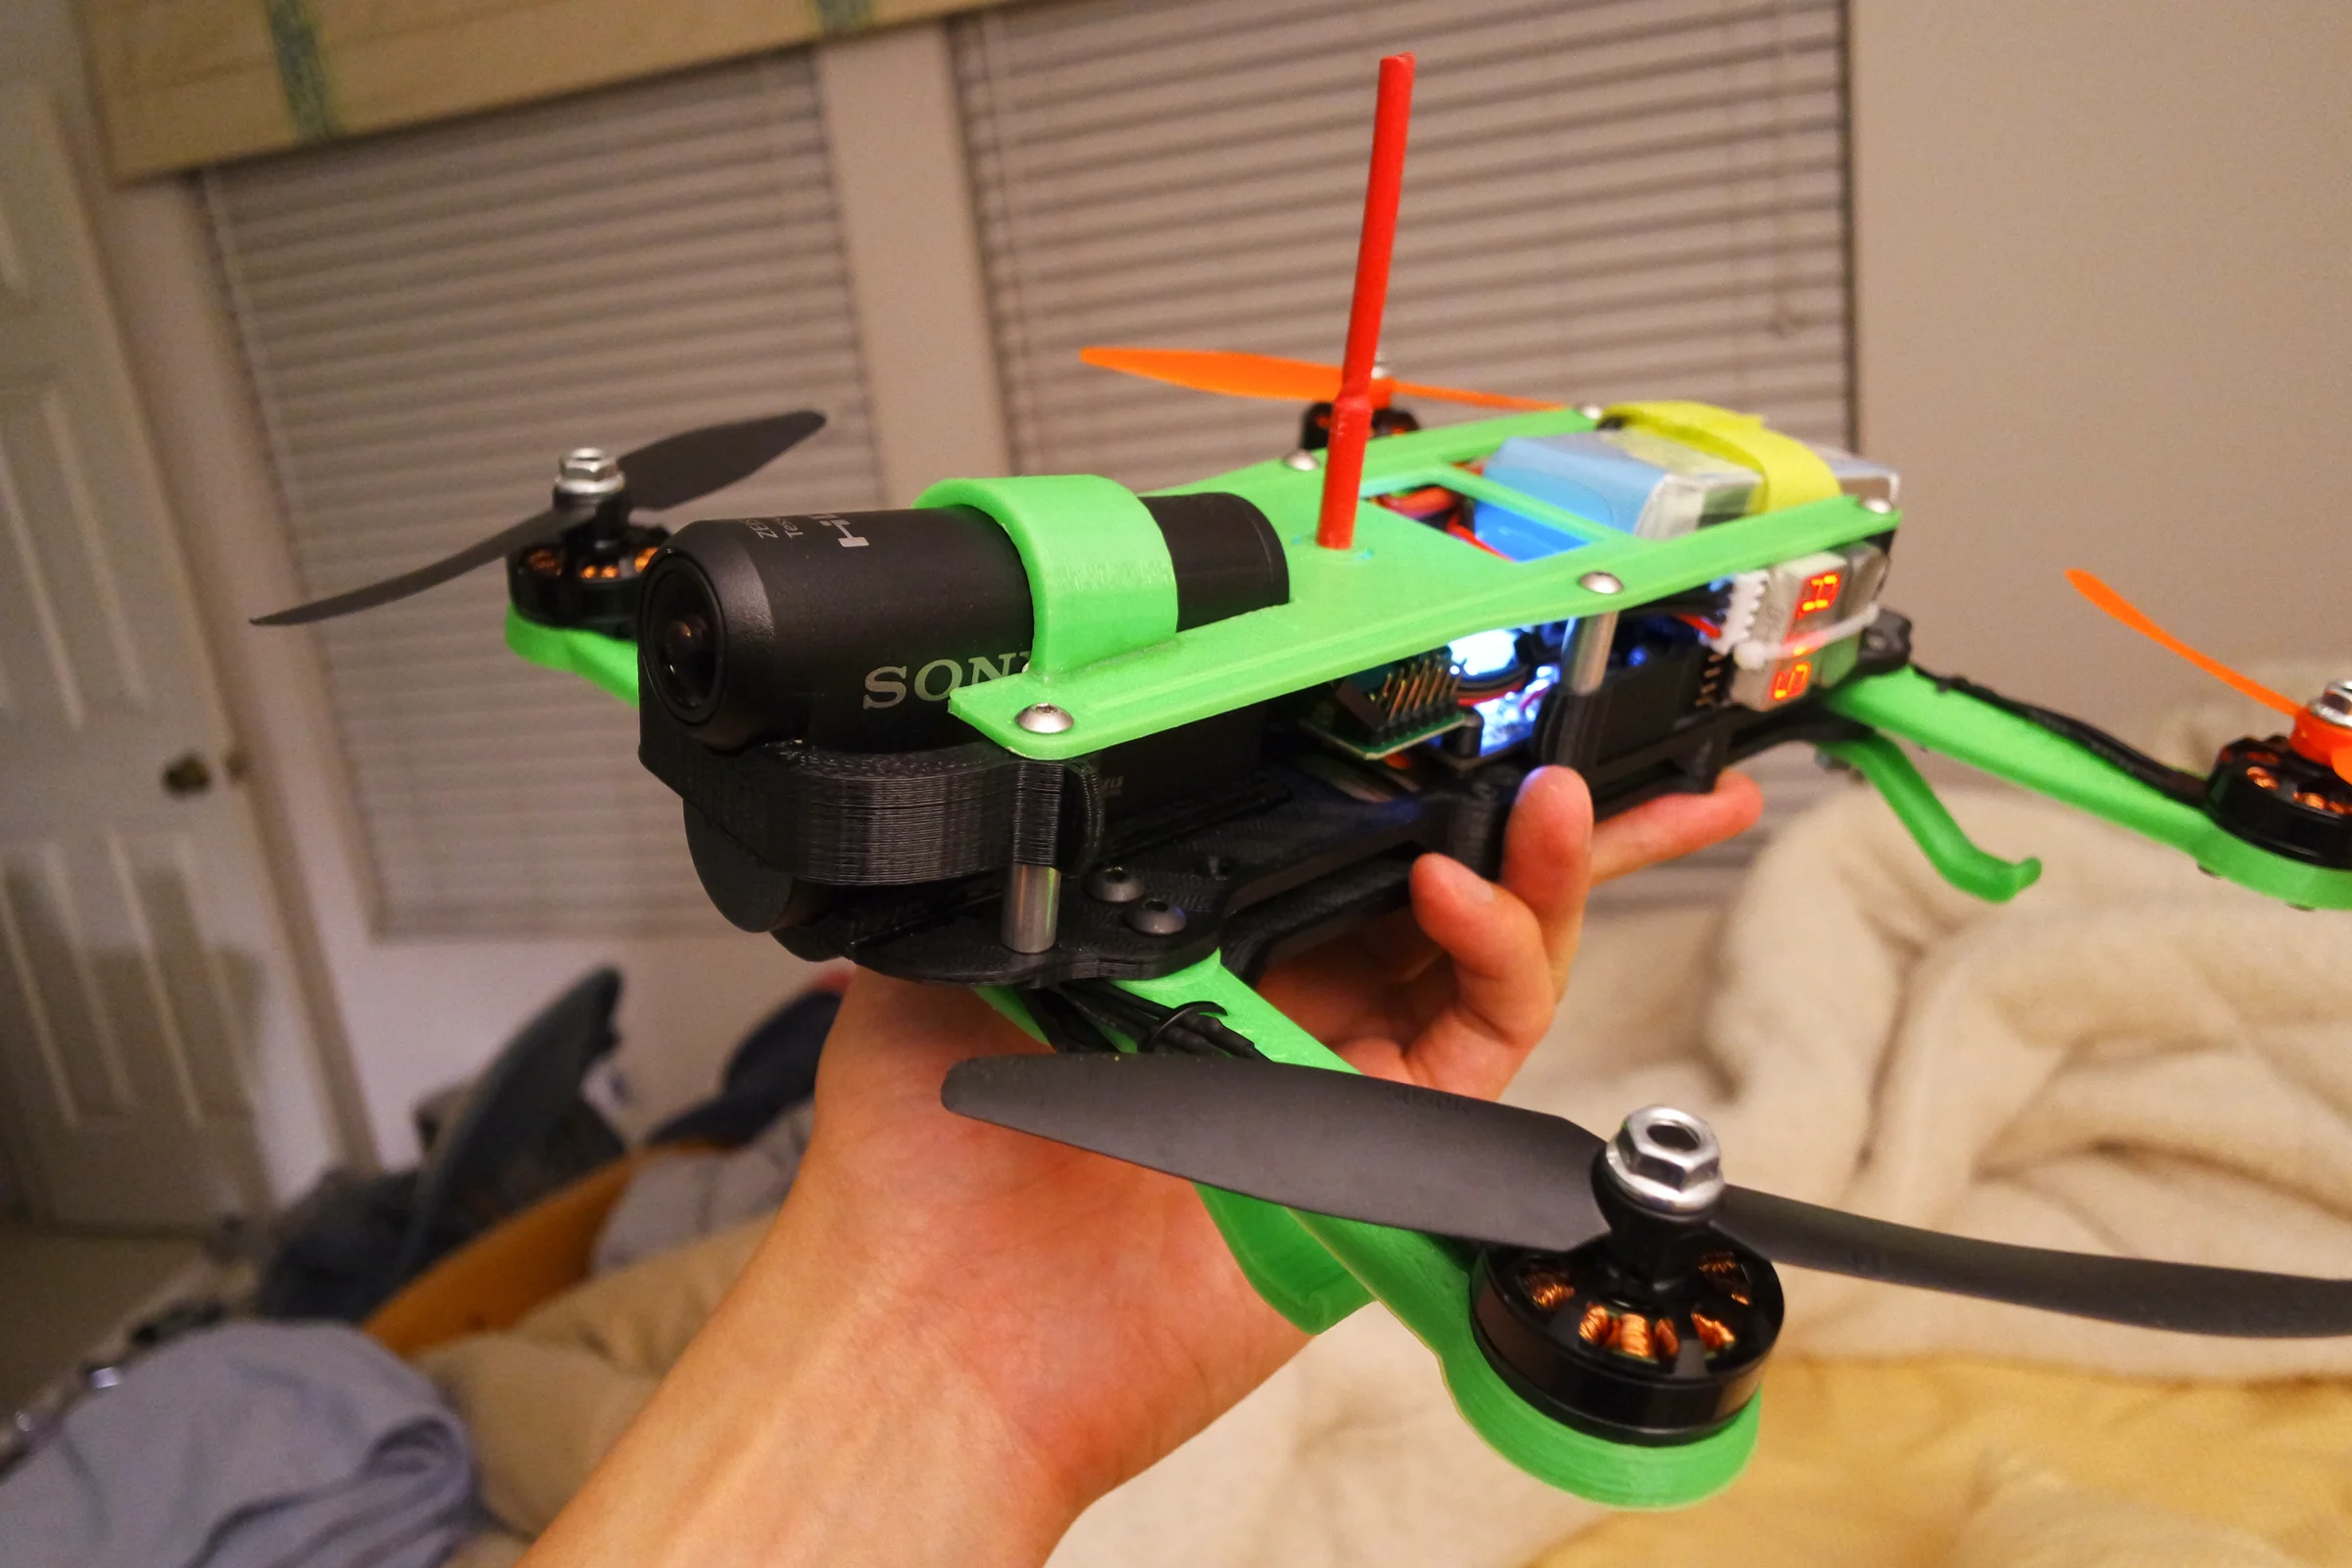
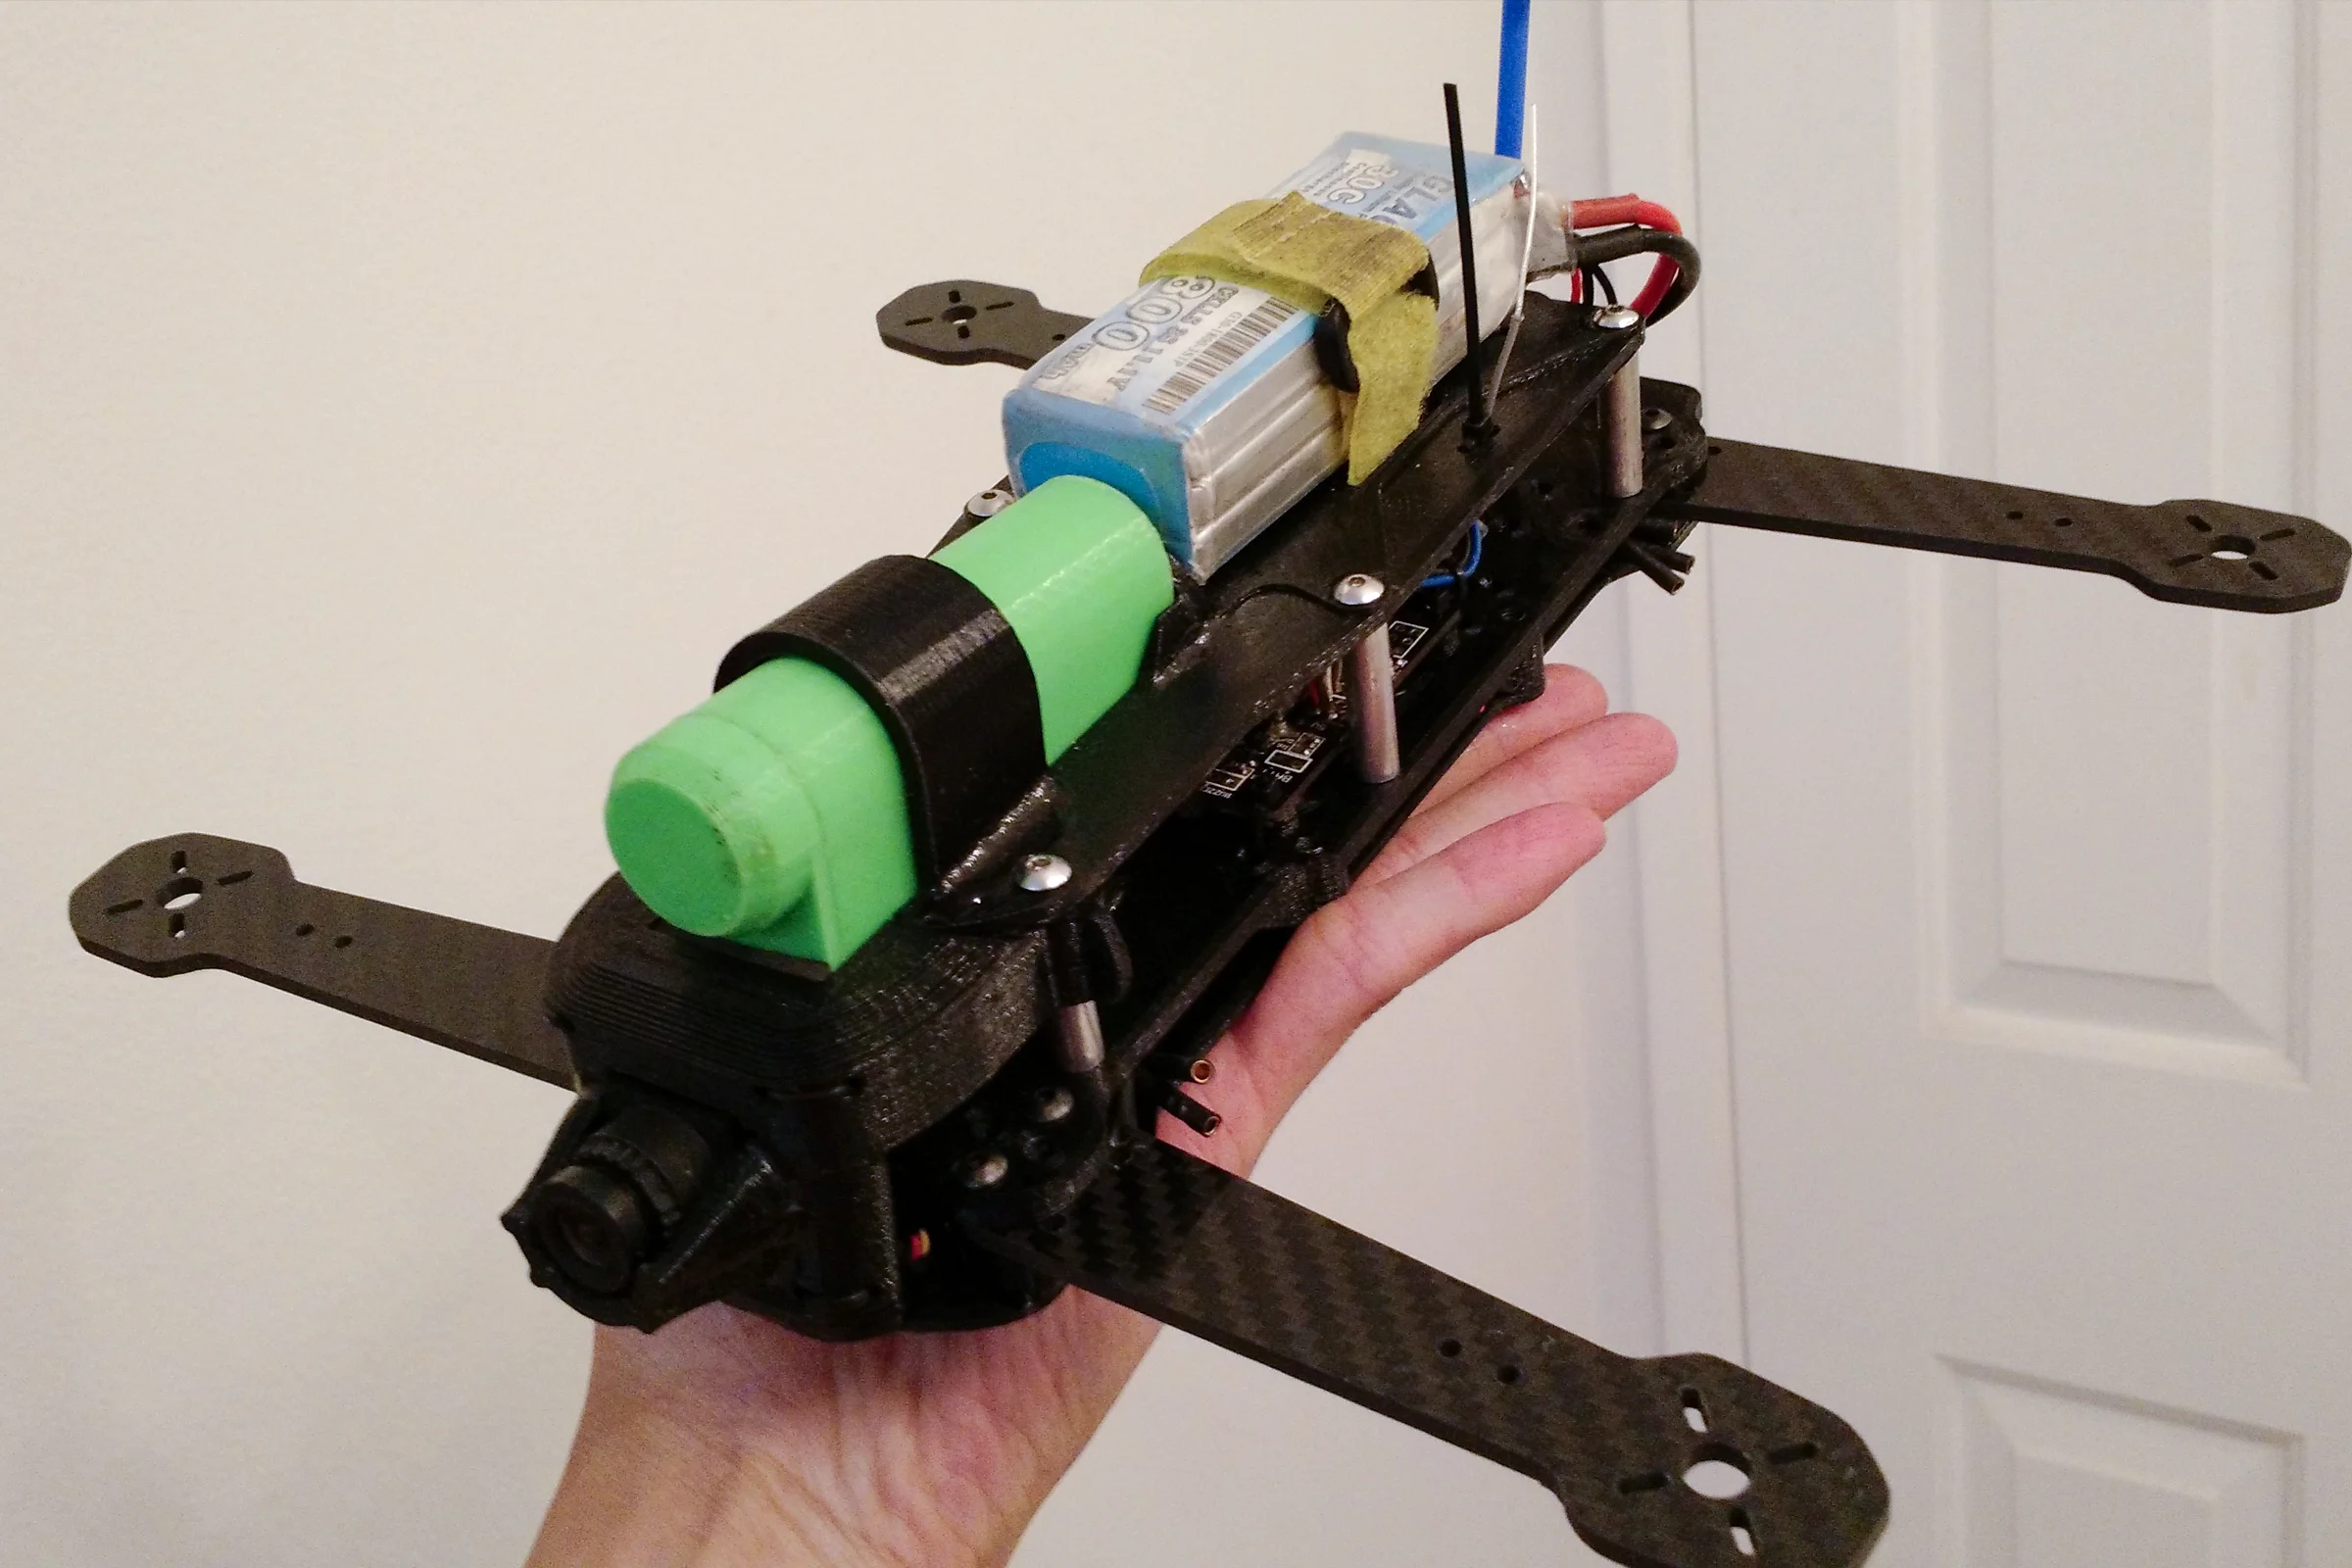
Drone 3 returned to the 3D printed H-frame with a specific new goal: carry a recording camera integrated into the airframe rather than mounted on top like a box. The typical approach bolts a GoPro above the drone — it raises center of gravity, adds frontal area, and looks like an afterthought. I chose the Sony Actioncam for its streamlined profile and minimal frontal area, and designed the front half of the chassis with a cutout the camera slides directly into, flush with the frame profile. A toolless clip snaps into the aluminum standoff spacers to retain it. Battery at the rear at a tilted angle so its front overhang sits above the flight controller, maintaining center of gravity over the frame center. Lower profile overall than Drone 1 — the two largest payloads, Actioncam and battery, protrude through deck cutouts rather than stacking above the frame.
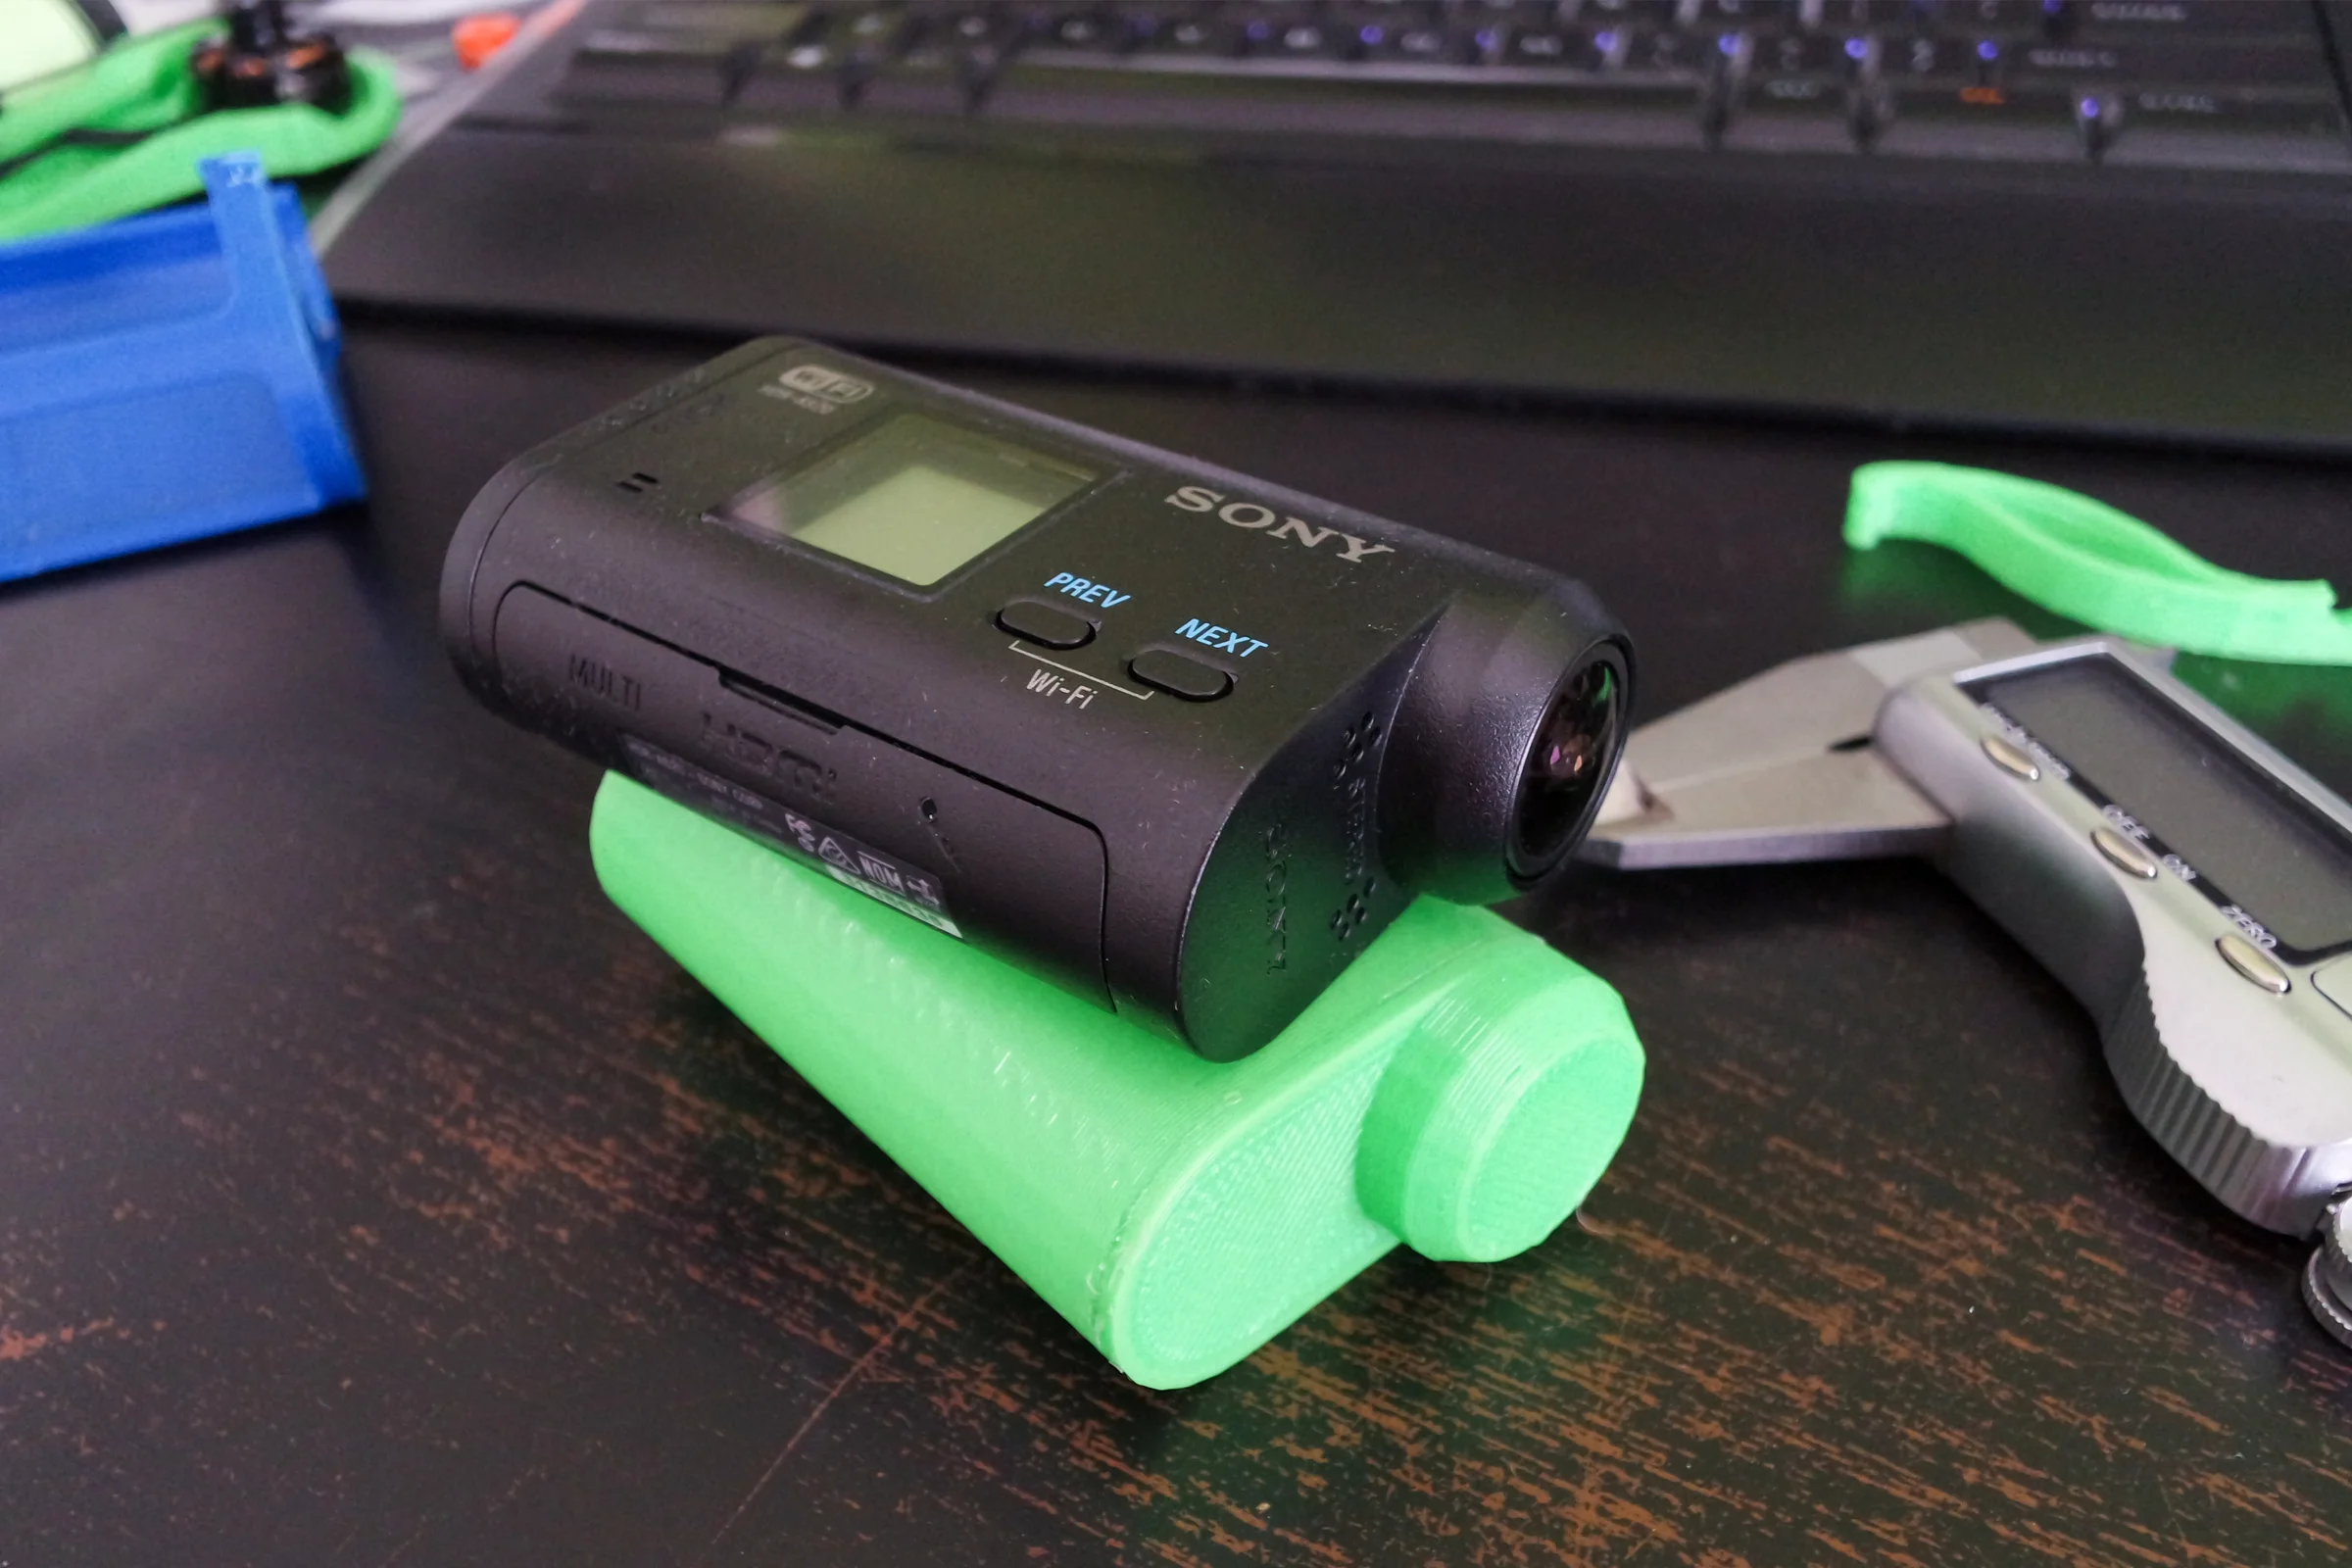
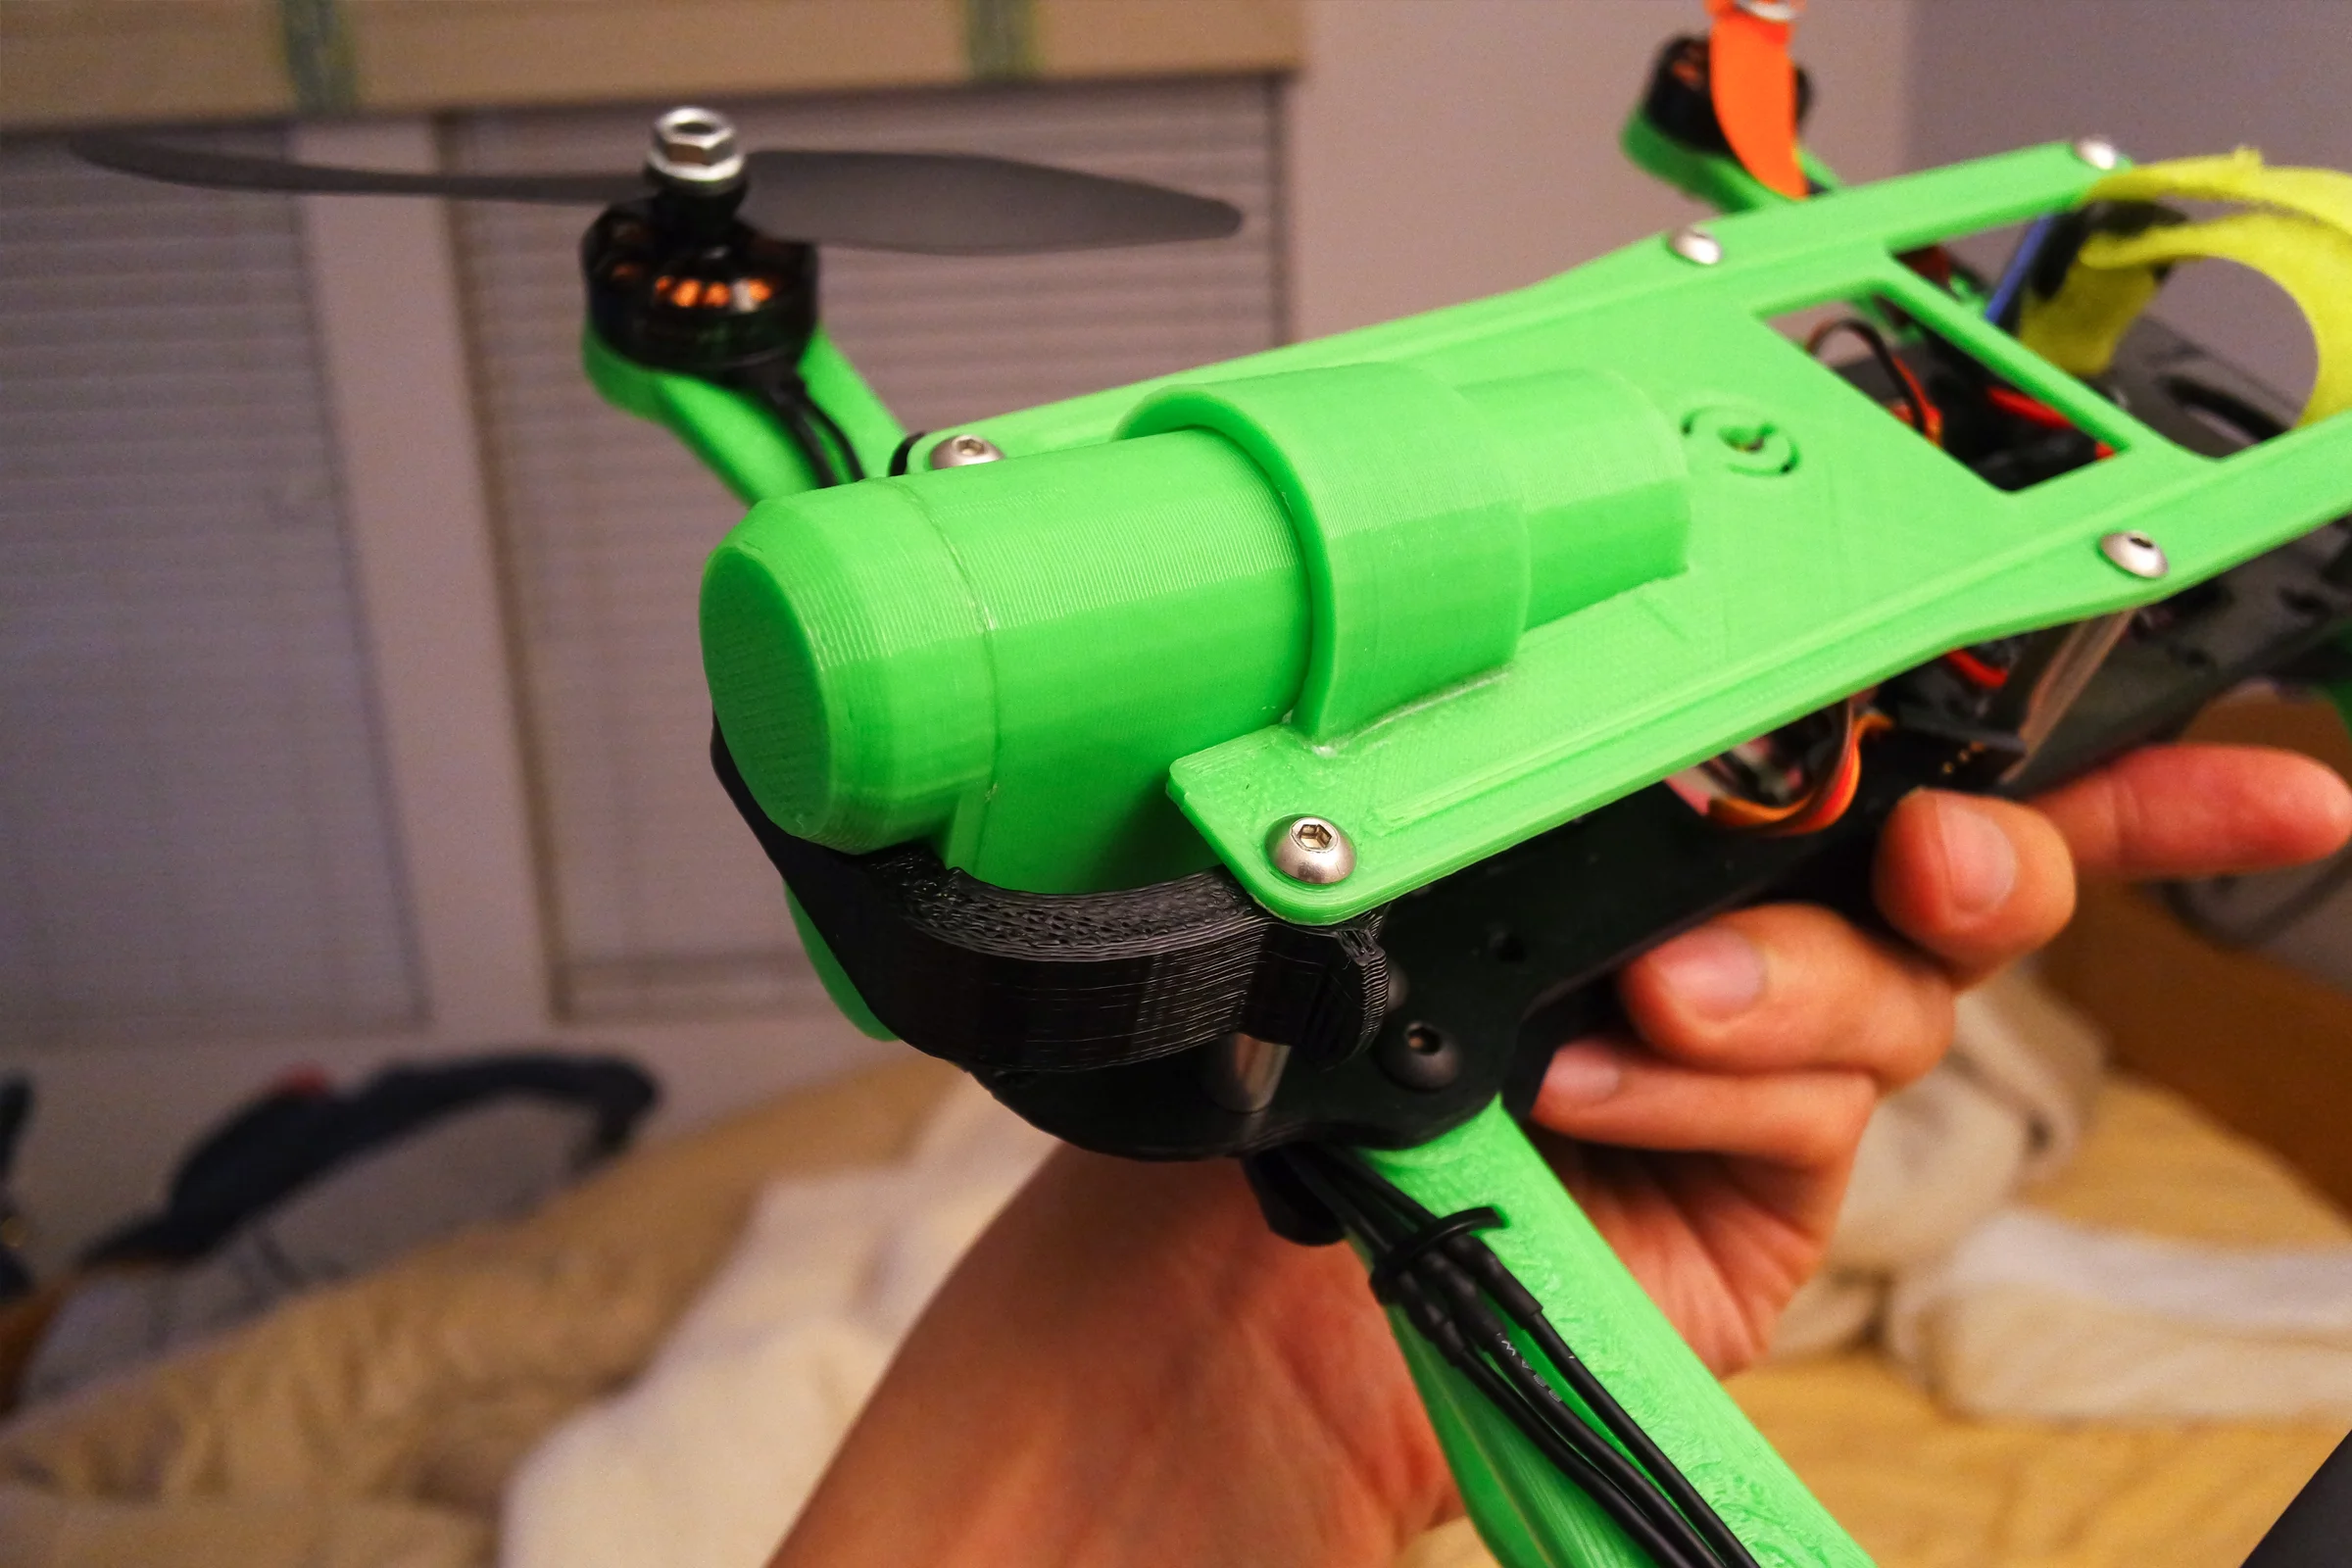
The camera was not cheap and there was no reason to risk it on test flights. I modeled the exact Actioncam dimensions in CAD and printed a hollow dummy shell, then hotglued pennies inside to match the camera's actual weight. Every test flight ran with the weighted dummy until the airframe was validated. Only then did the real camera fly. The swing door concept was extended here too — two much larger doors on each side, just to push the clip-and-pivot idea further.
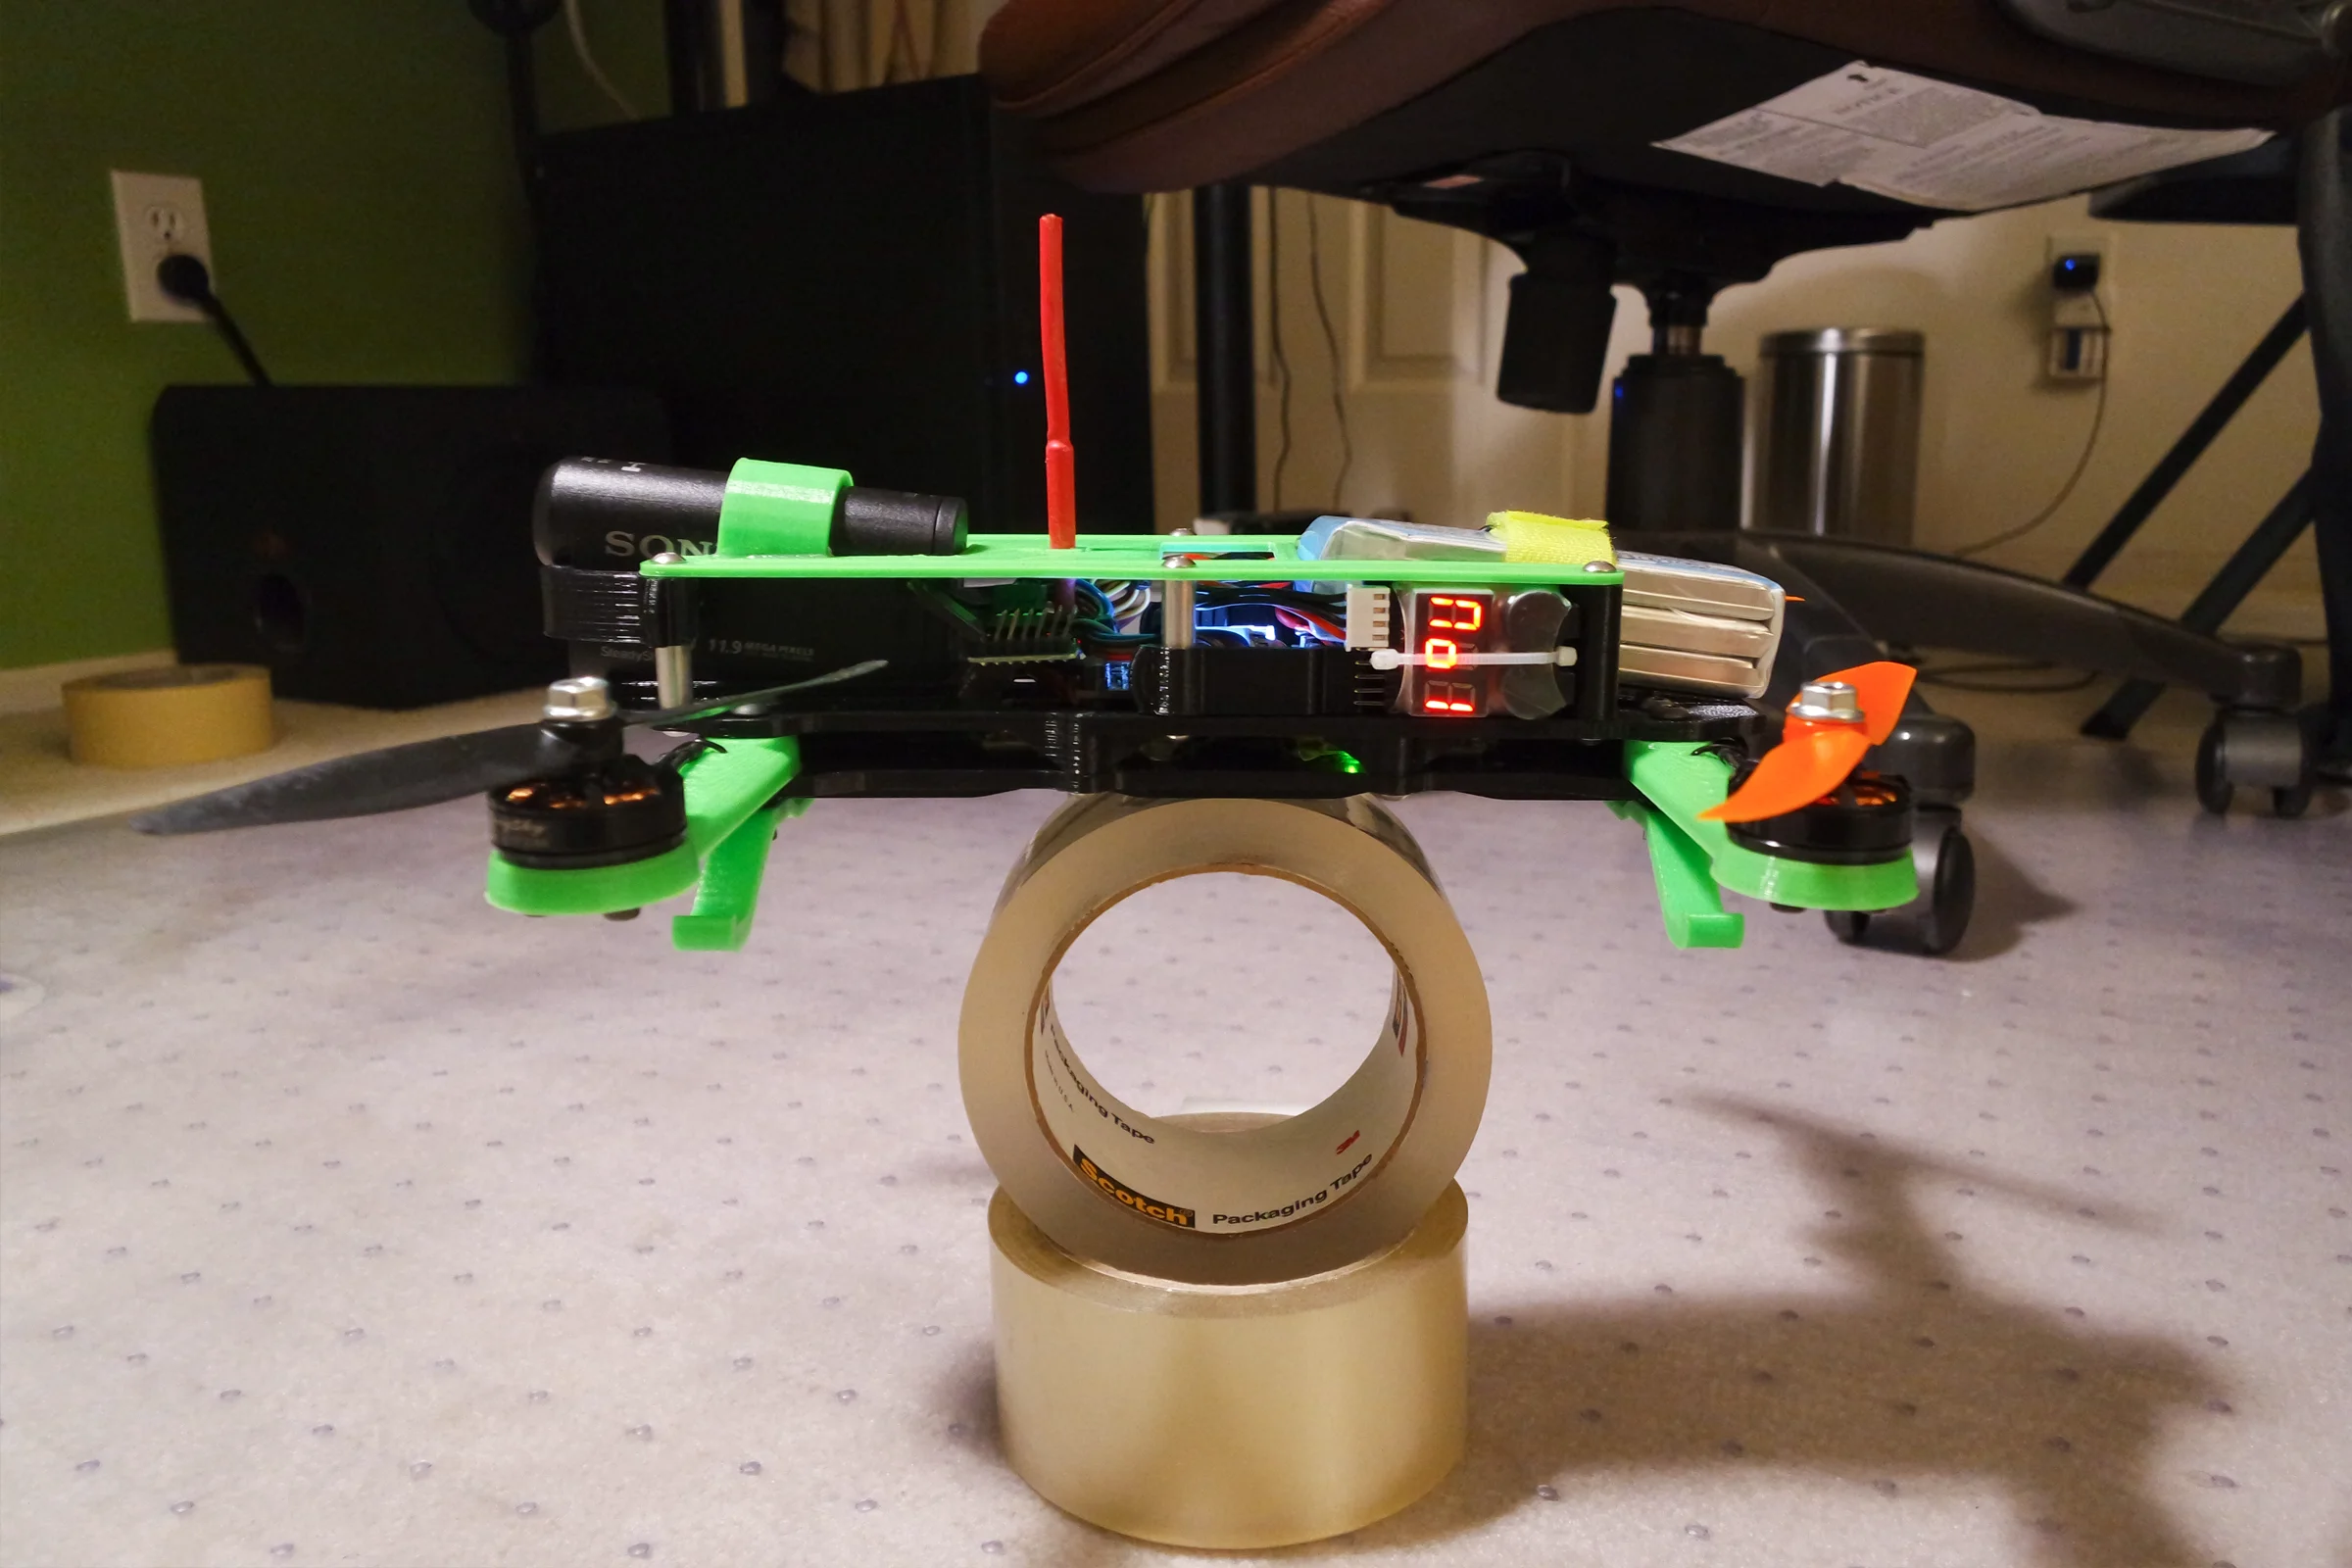
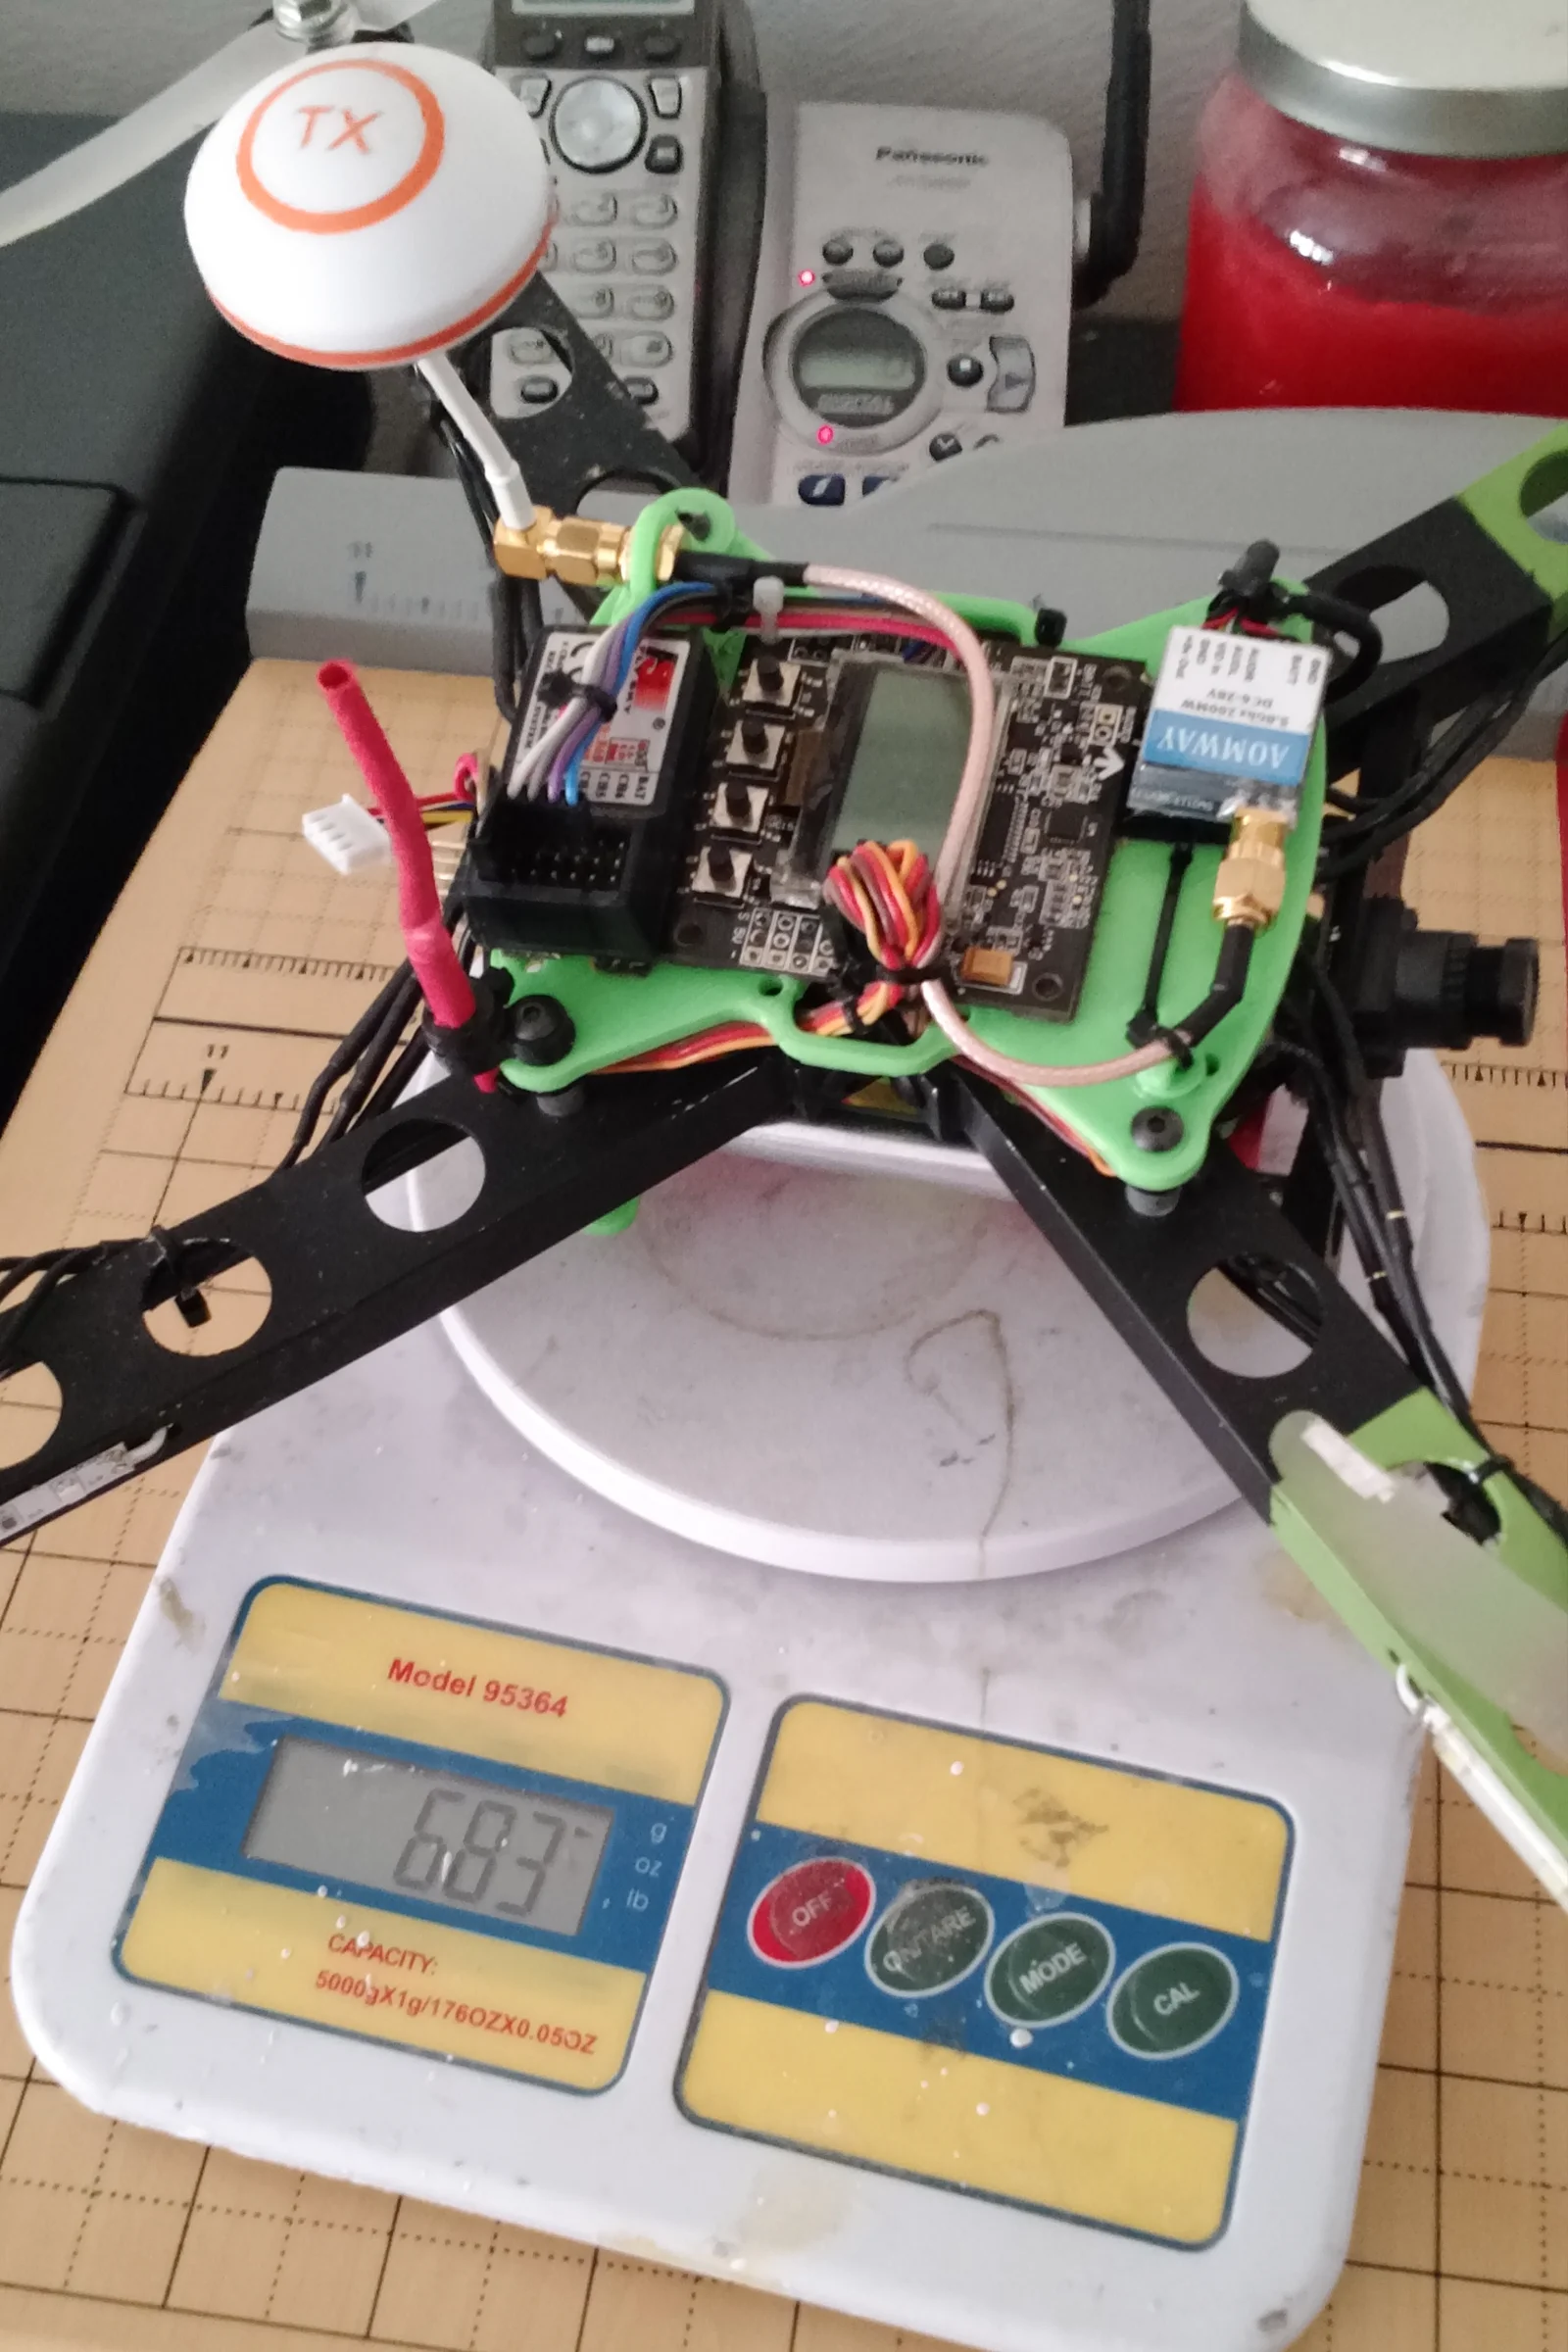
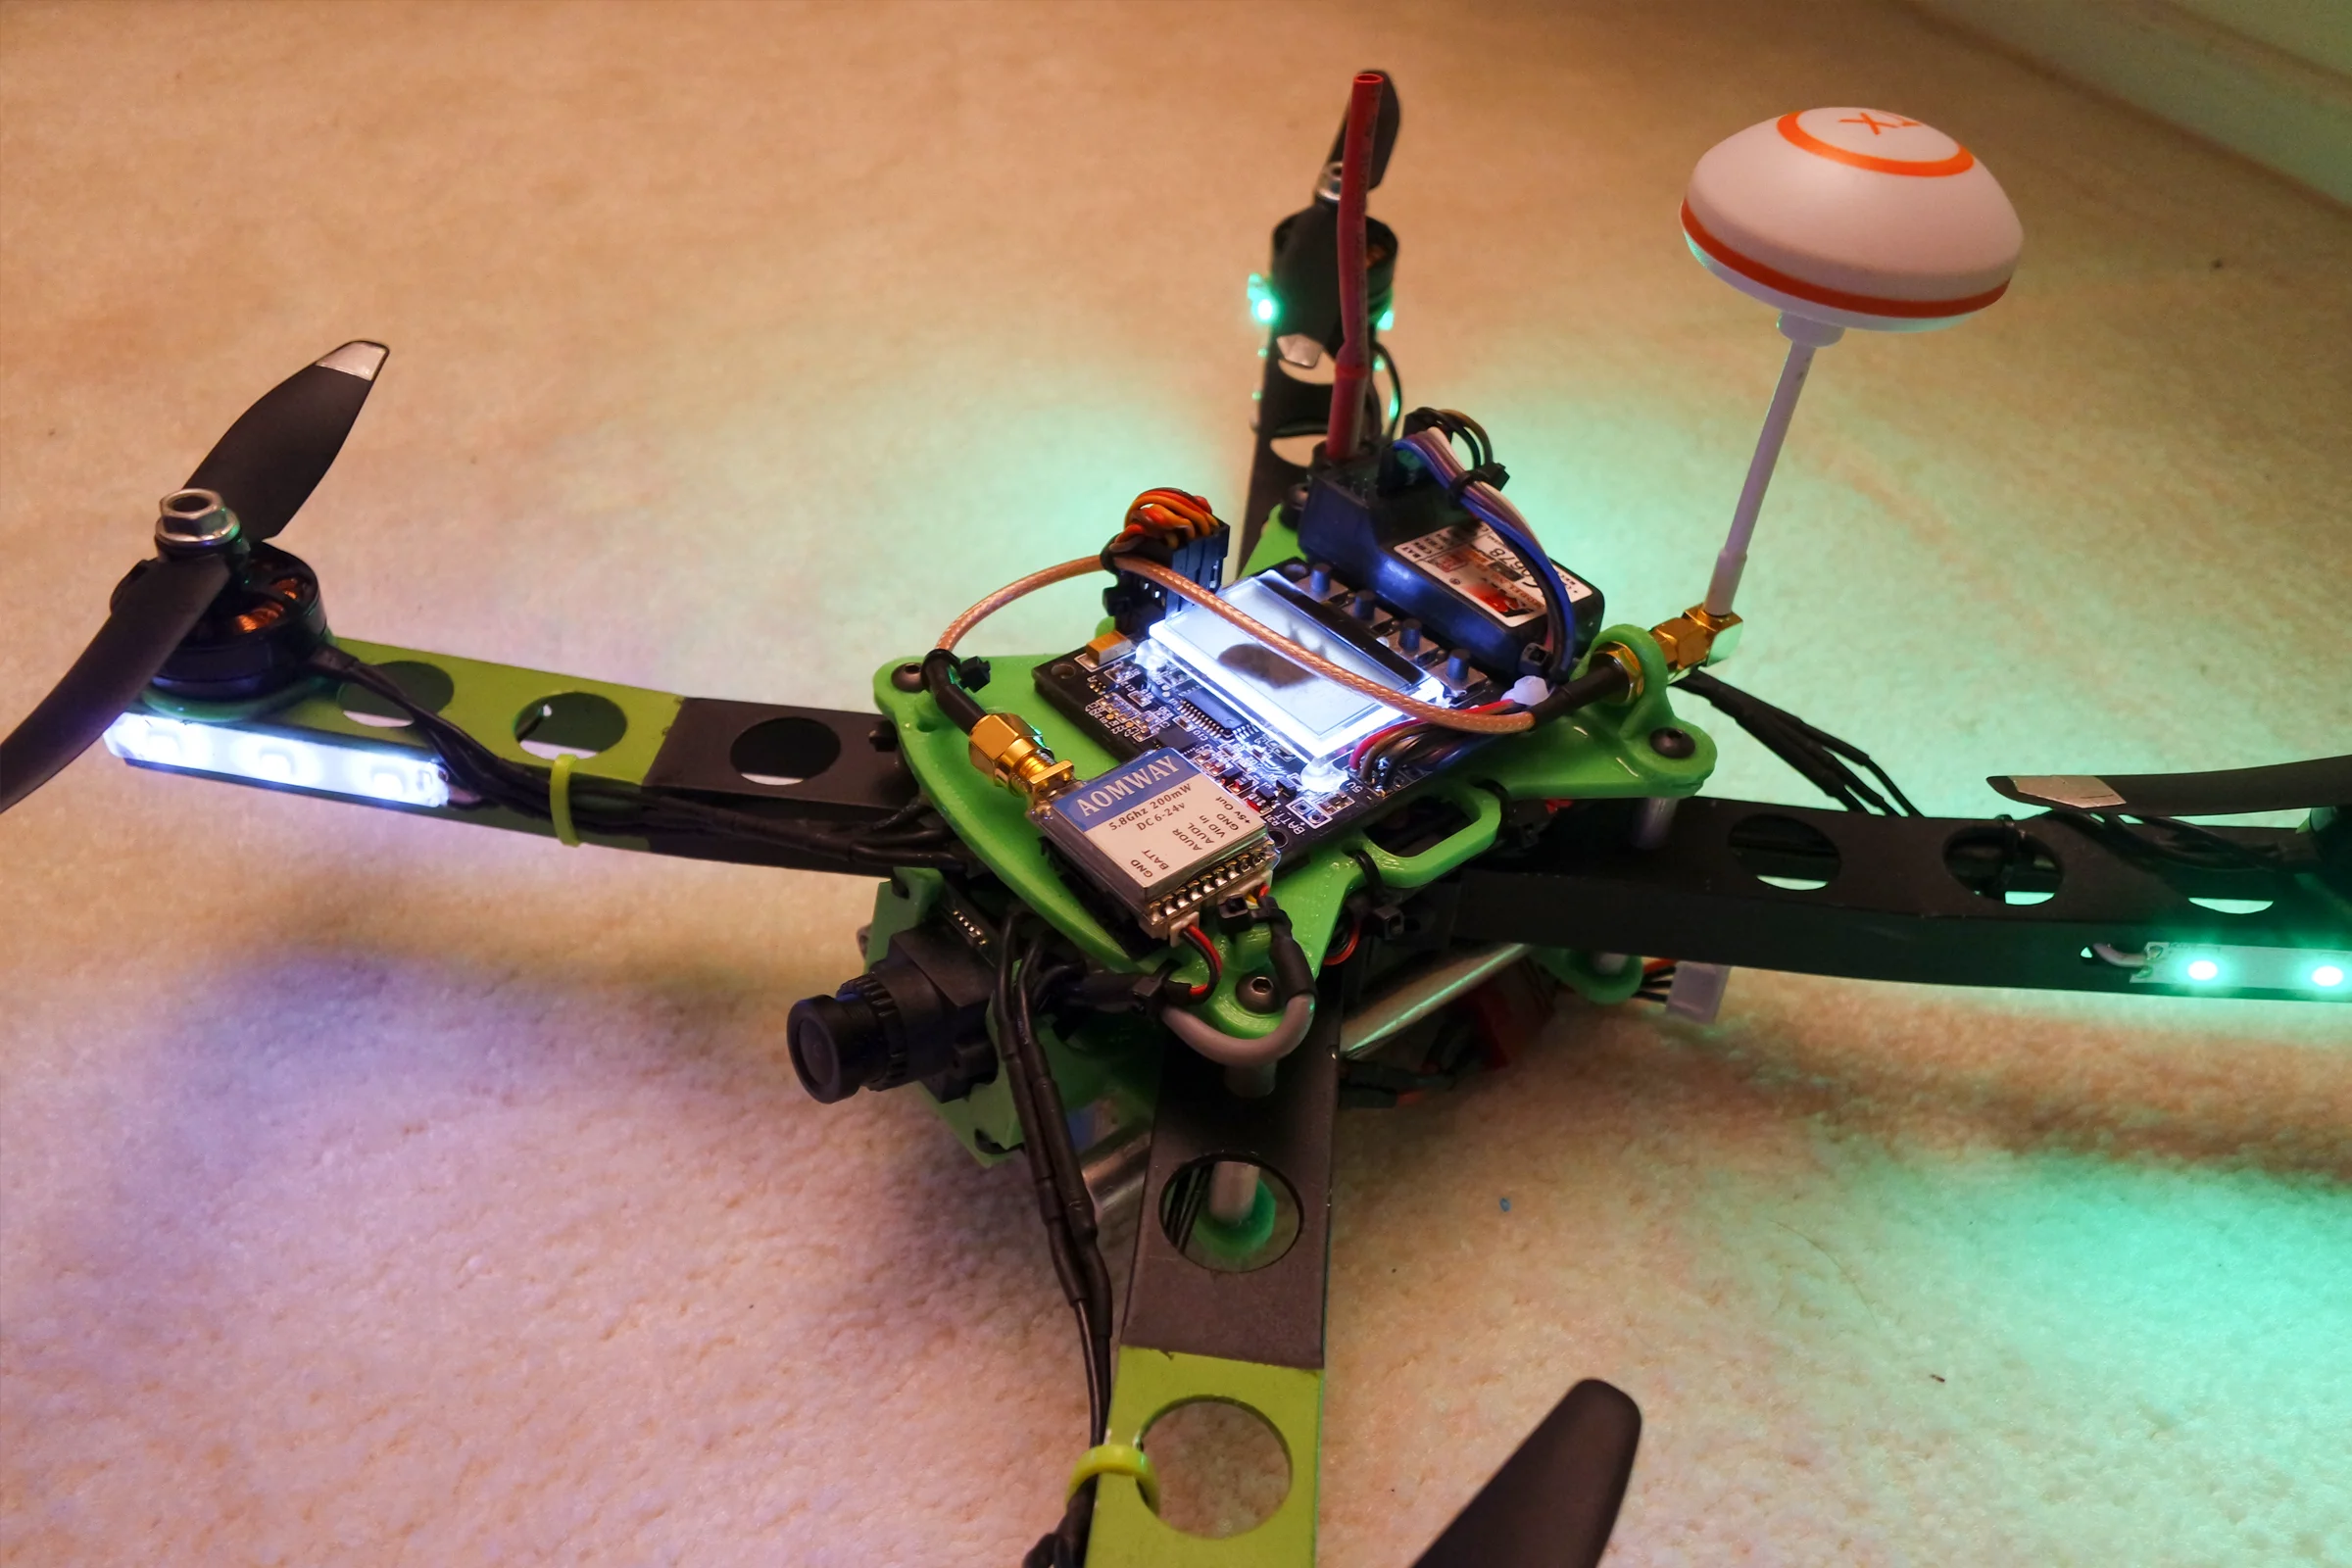
Drone 4: Dihedral Aluminum X-Frame — FPV Learning Platform
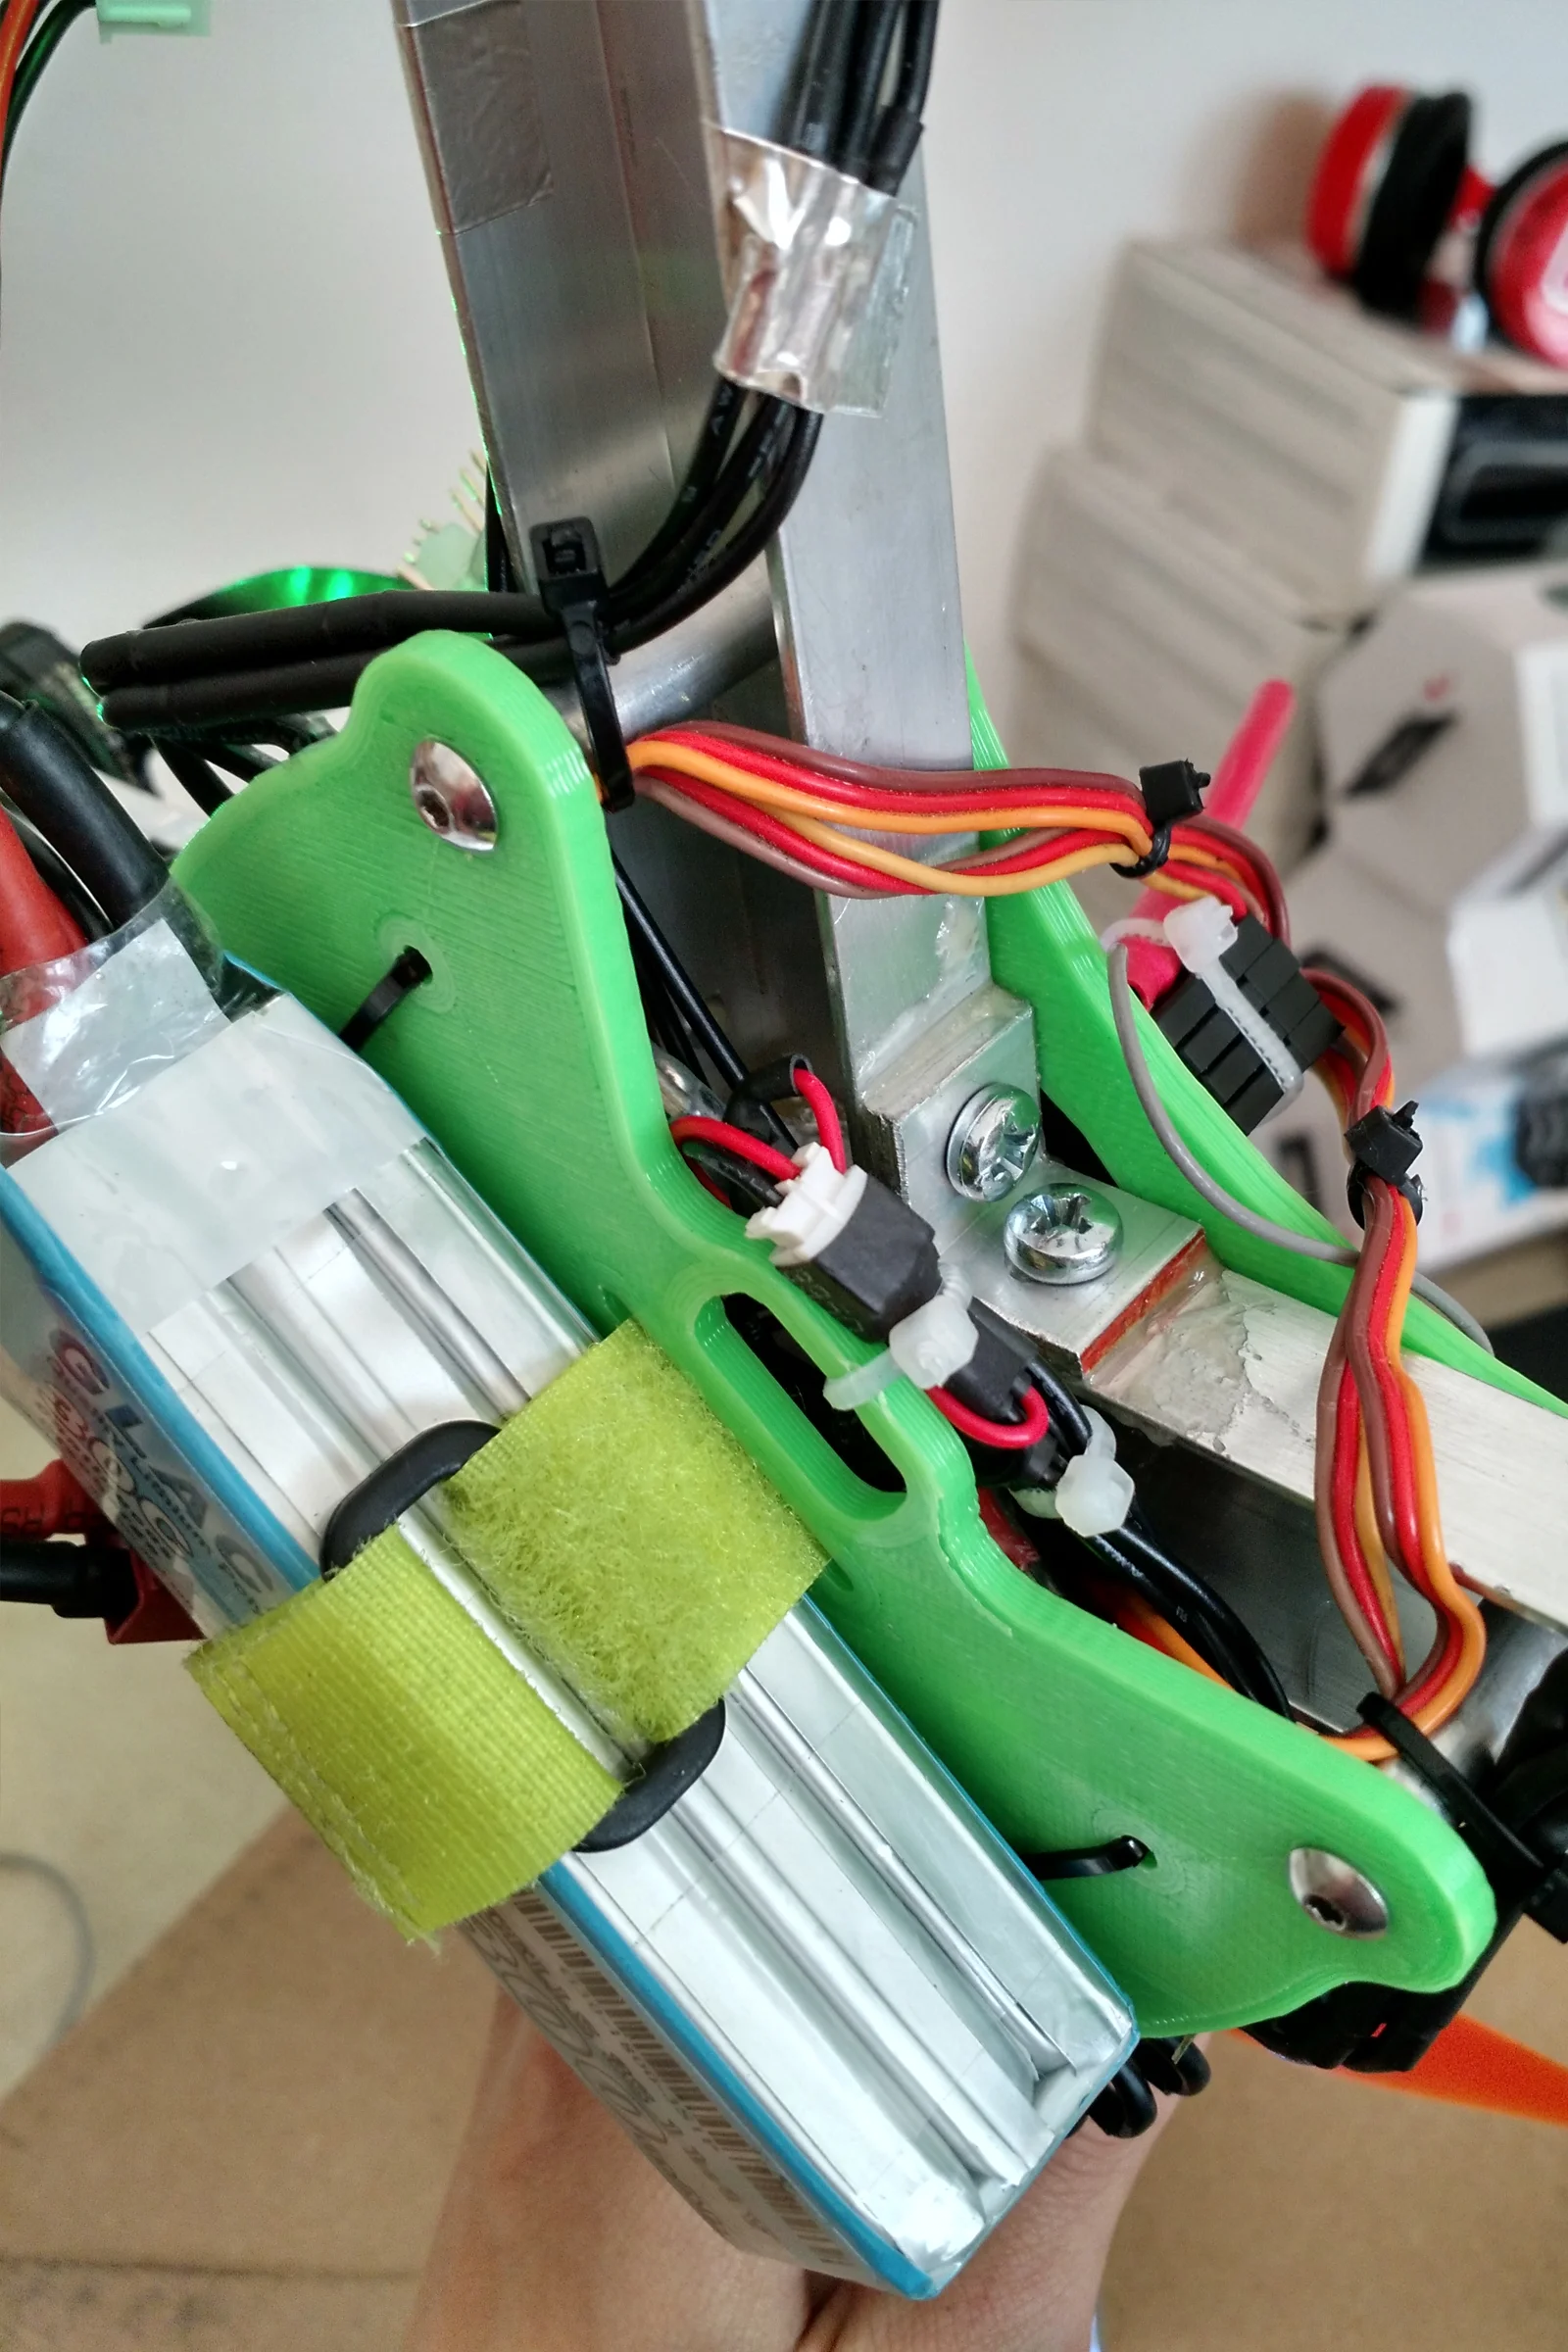
Drone 3 validated the camera integration approach but the 3D printed frame was still too fragile for the next phase: learning to fly FPV. More crashes were expected during the FPV learning curve, and the platform needed to carry significantly more hardware simultaneously. Drone 4 returned to aluminum X-frame for crash survivability while pushing weight reduction much further than Drone 2.

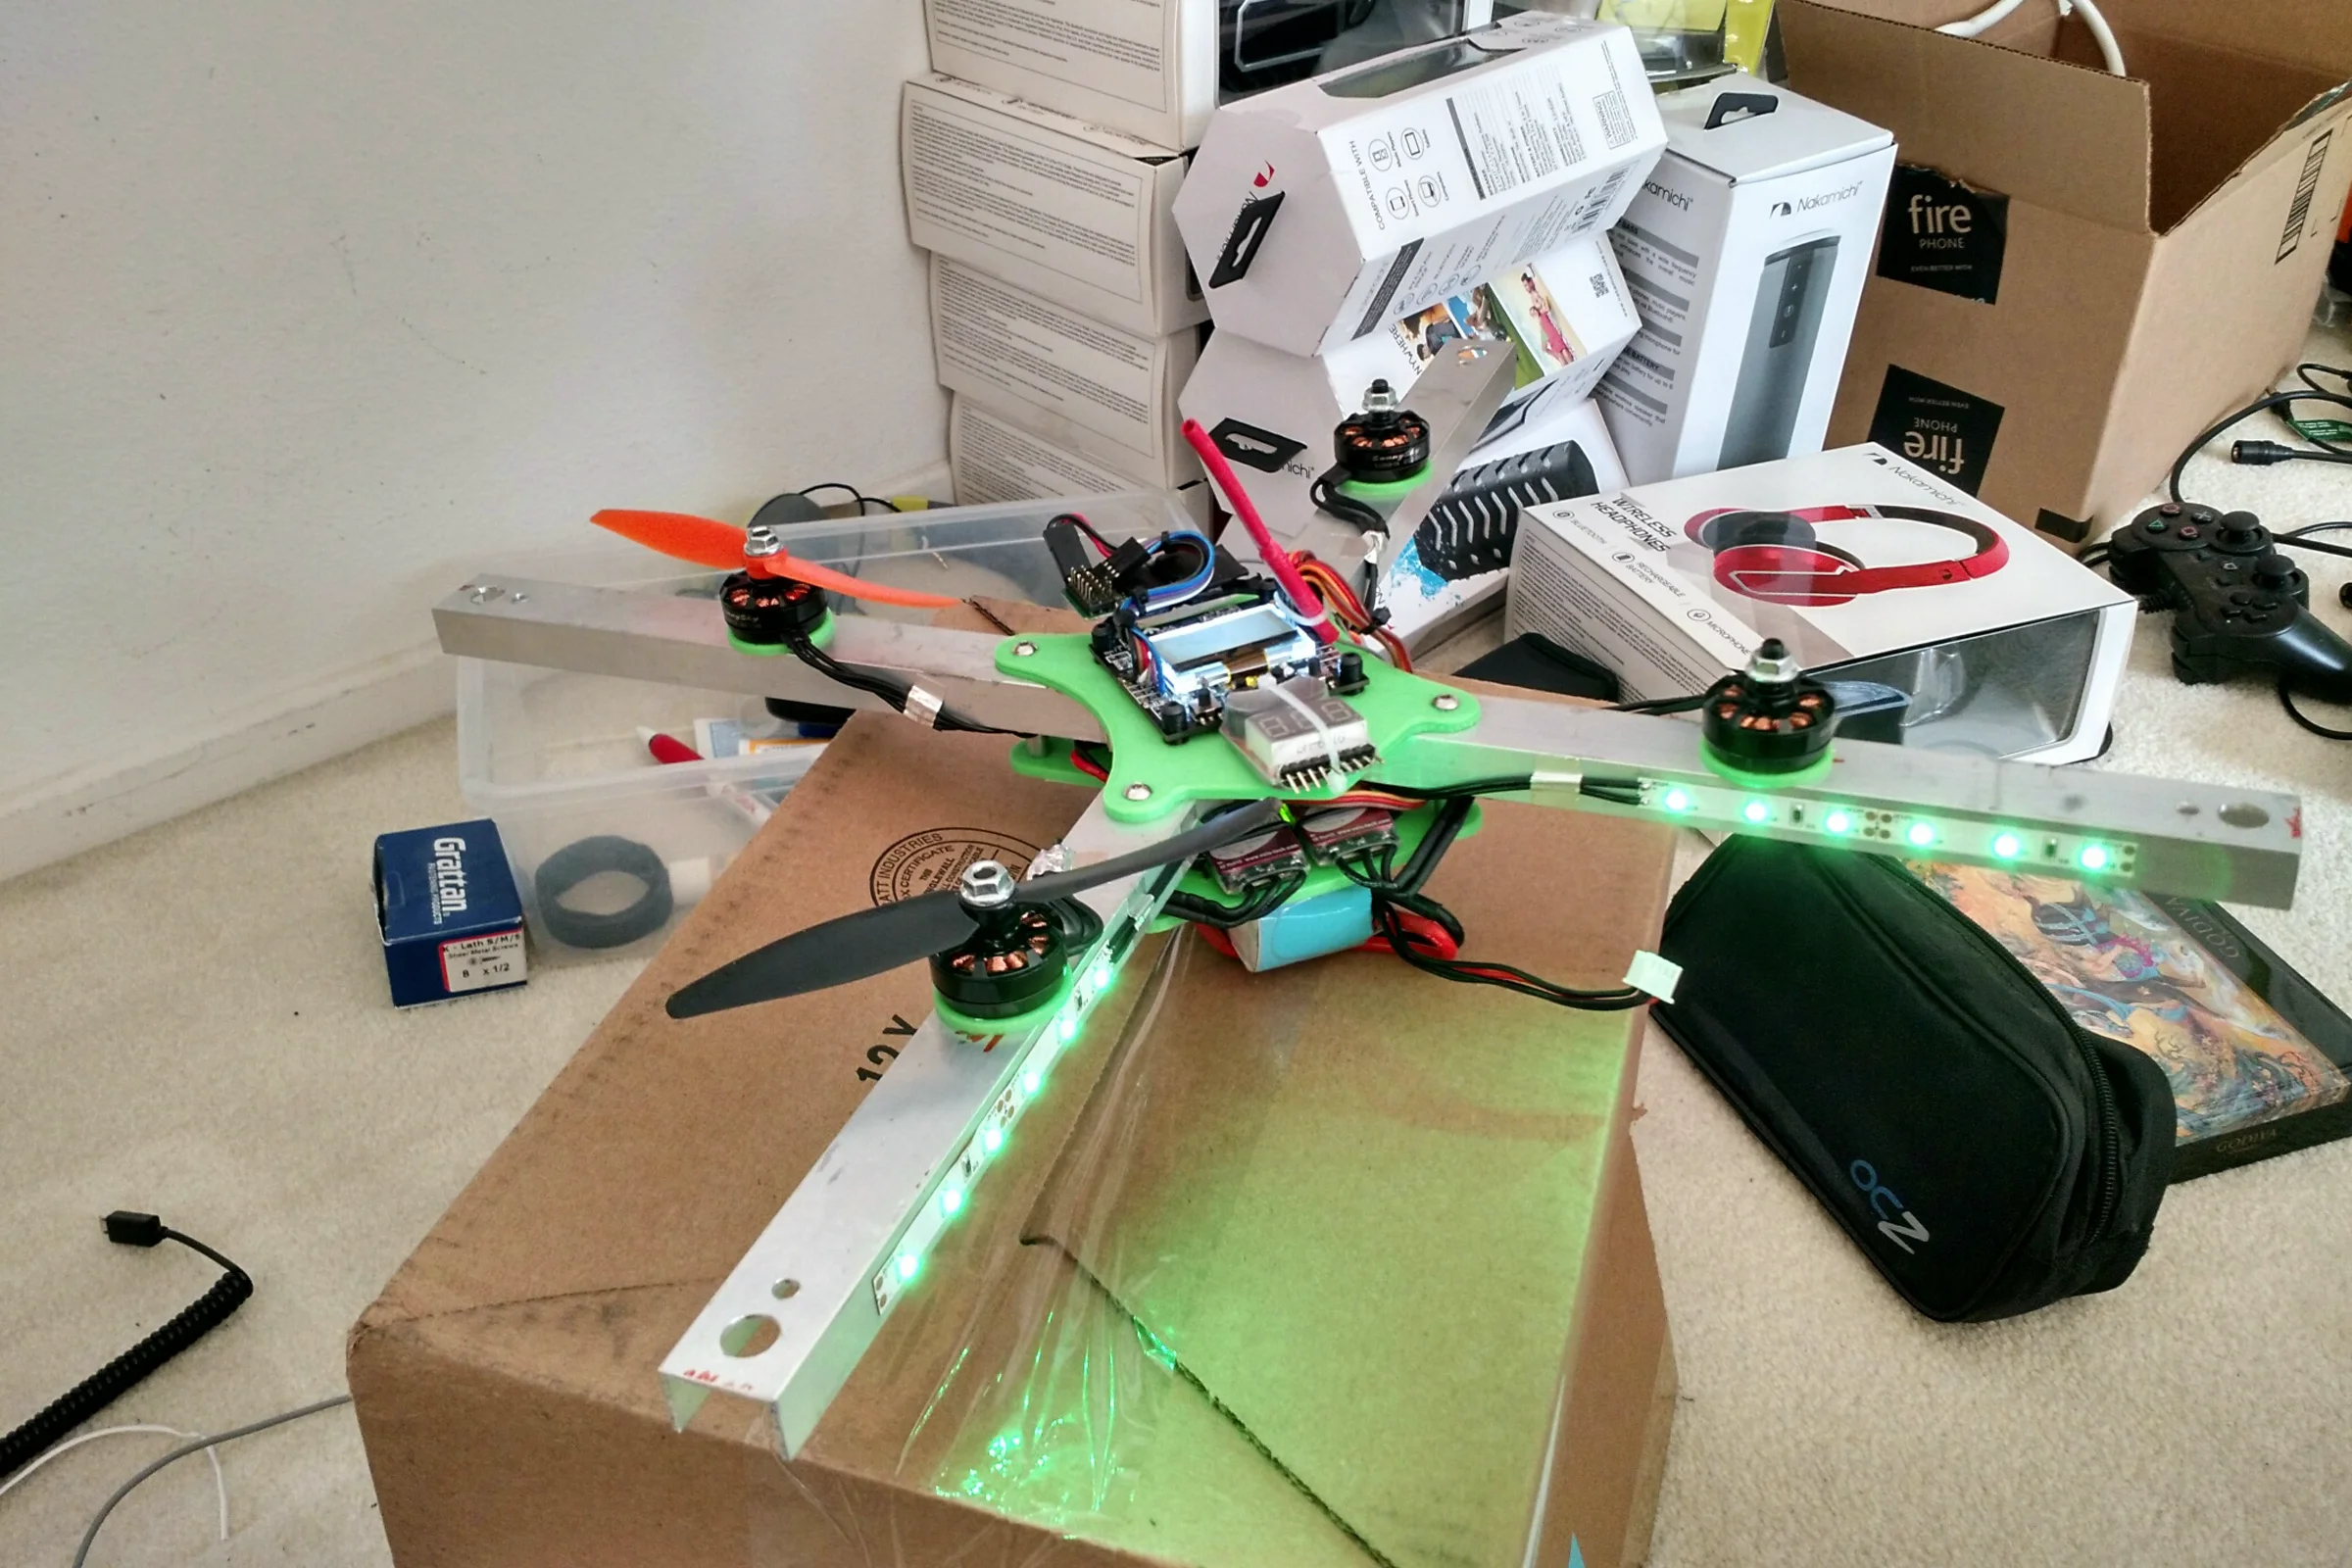
Drone 4 returned to aluminum X-frame but significantly lighter than Drone 2 — full circular holes drilled through each arm throughout to remove as much material as possible while keeping the structural rigidity needed for crash survivability. The arms no longer extend beyond the motor base so props are no longer protected by the frame profile, but flying skill had improved enough that the crash rate was significantly lower. A modular railing system below the center allowed different payload mounting configurations to be tested.
The major new addition was dihedral arms: each arm bent upward approximately 5 degrees, tilting all four motors and their propellers inward. Dihedral creates a passive self-correcting stability effect — when the drone rolls, the lower motor automatically produces more lift than the higher one, counteracting the roll without any input from the flight controller. With FPV flying as the next step and more payload expected, a more inherently stable and forgiving platform made sense. This was the first drone to carry all FPV hardware simultaneously: board cam, video transmitter, and video system battery alongside the flight battery.

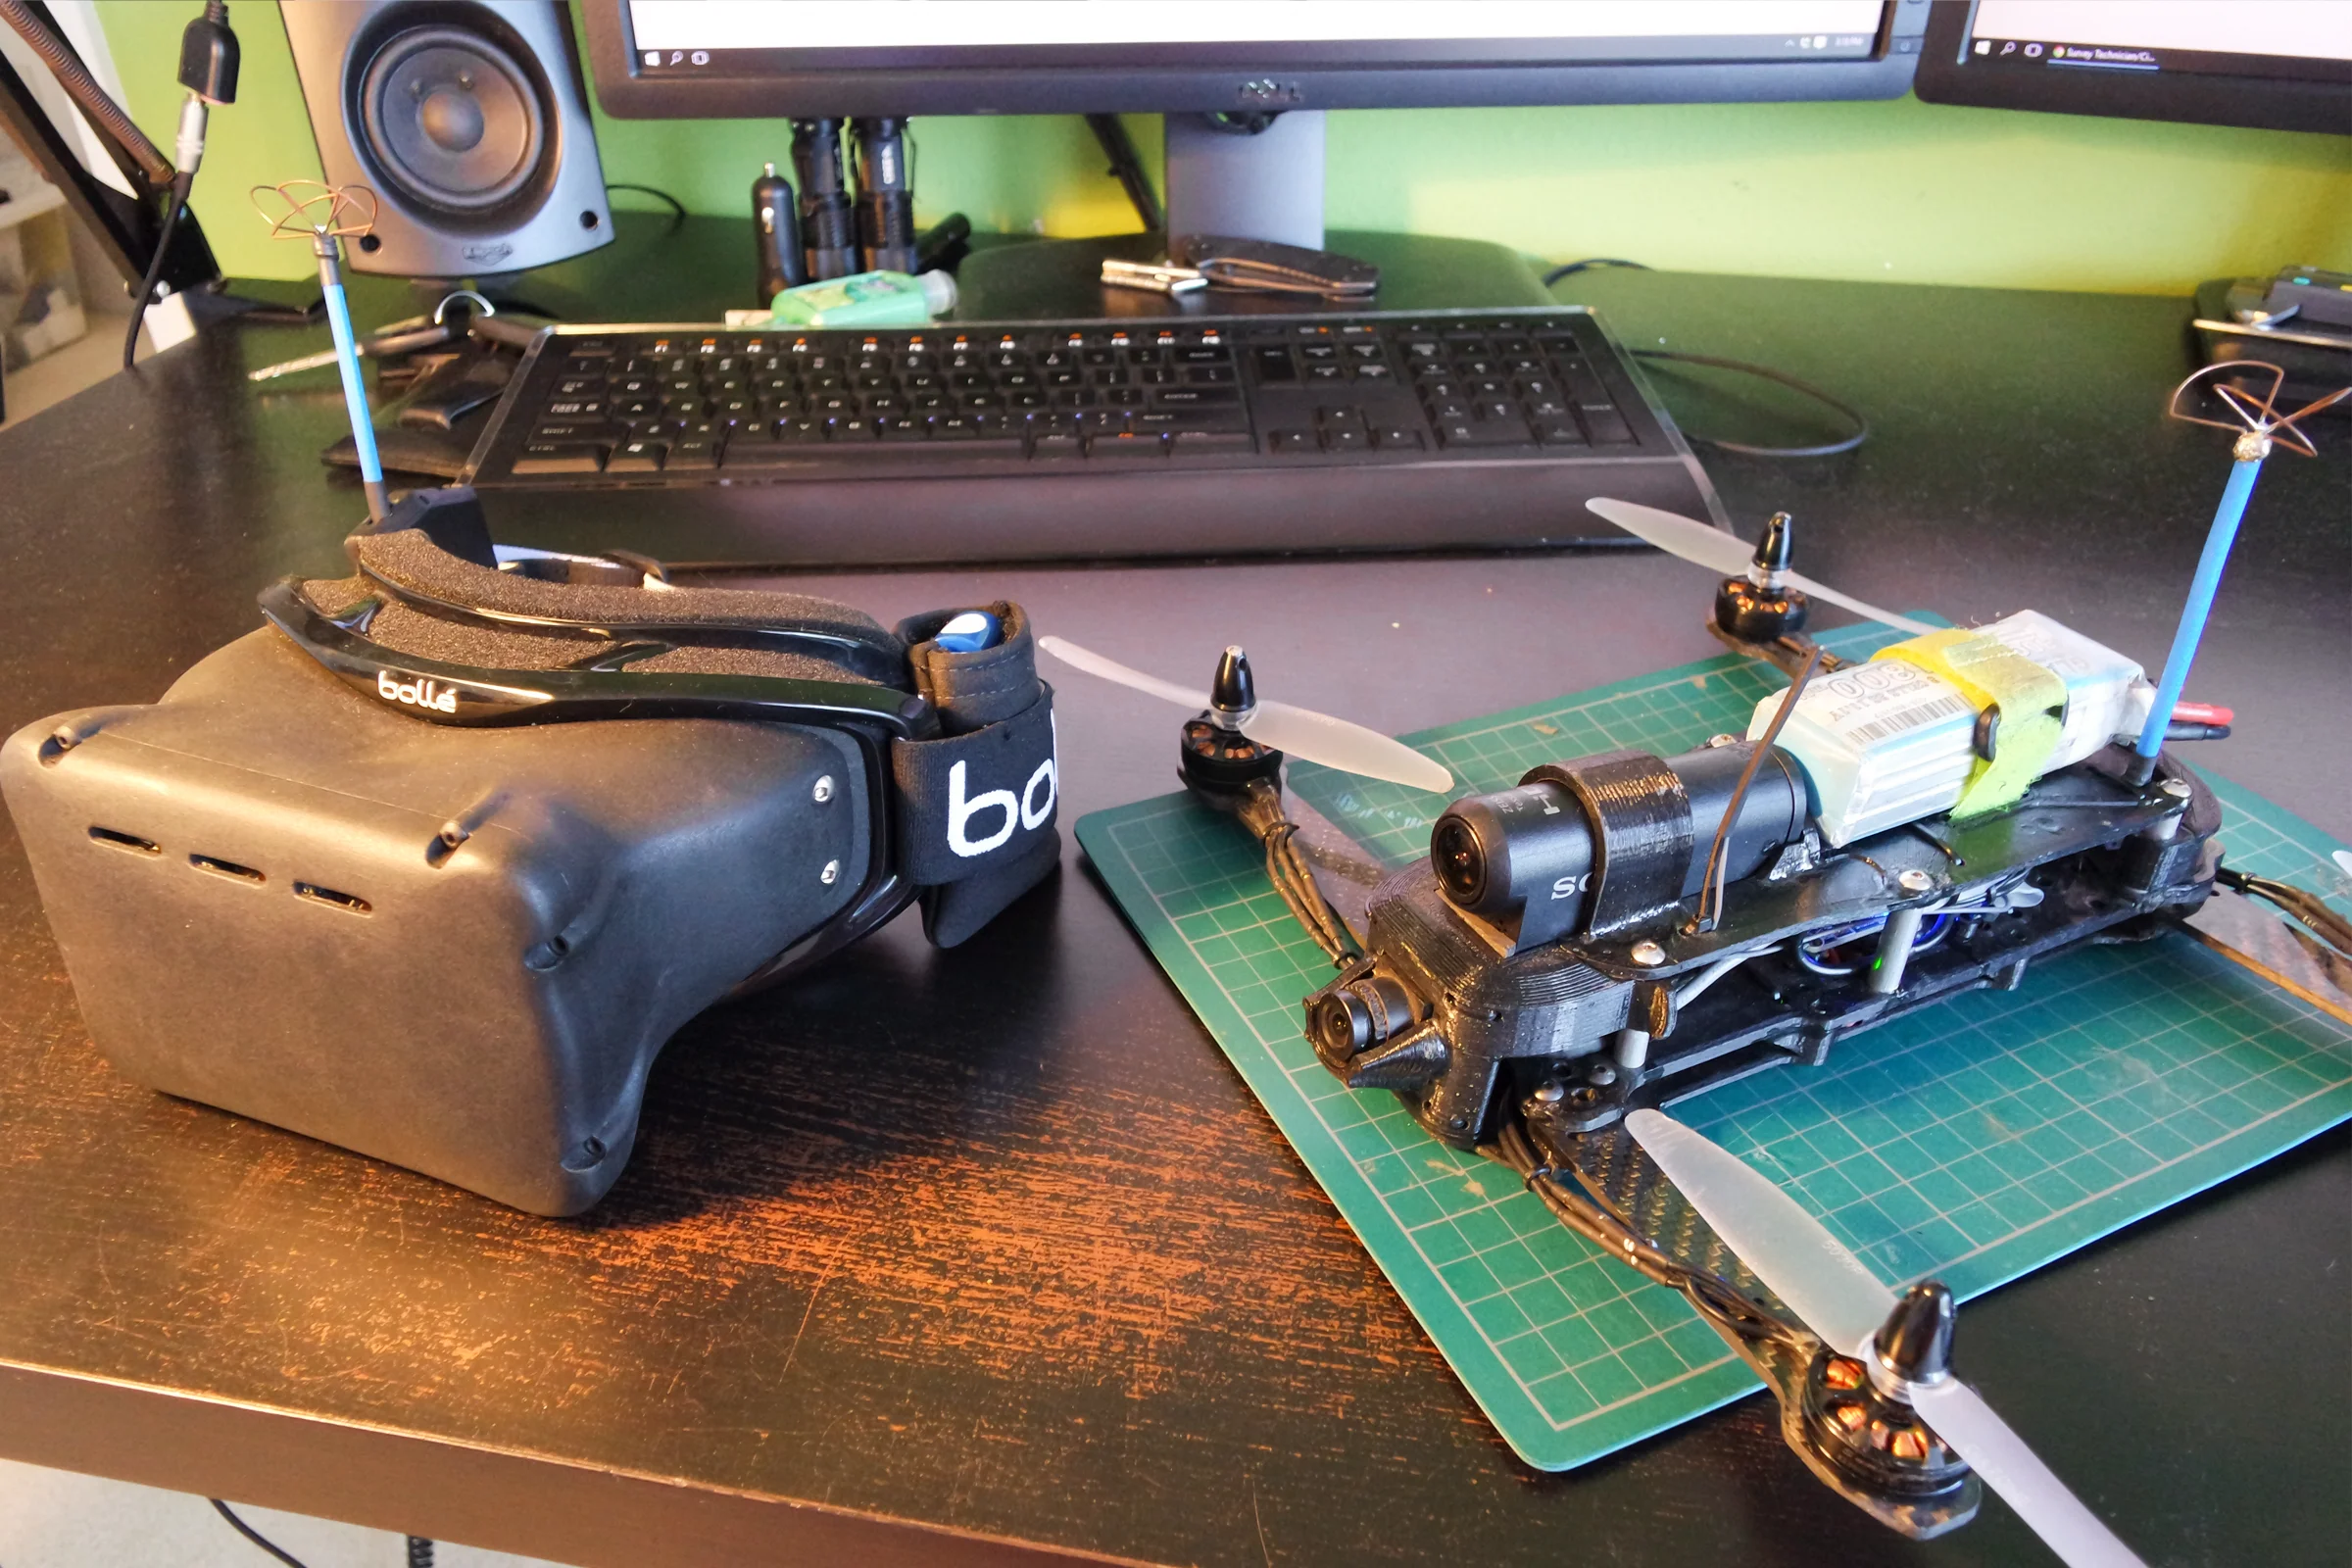
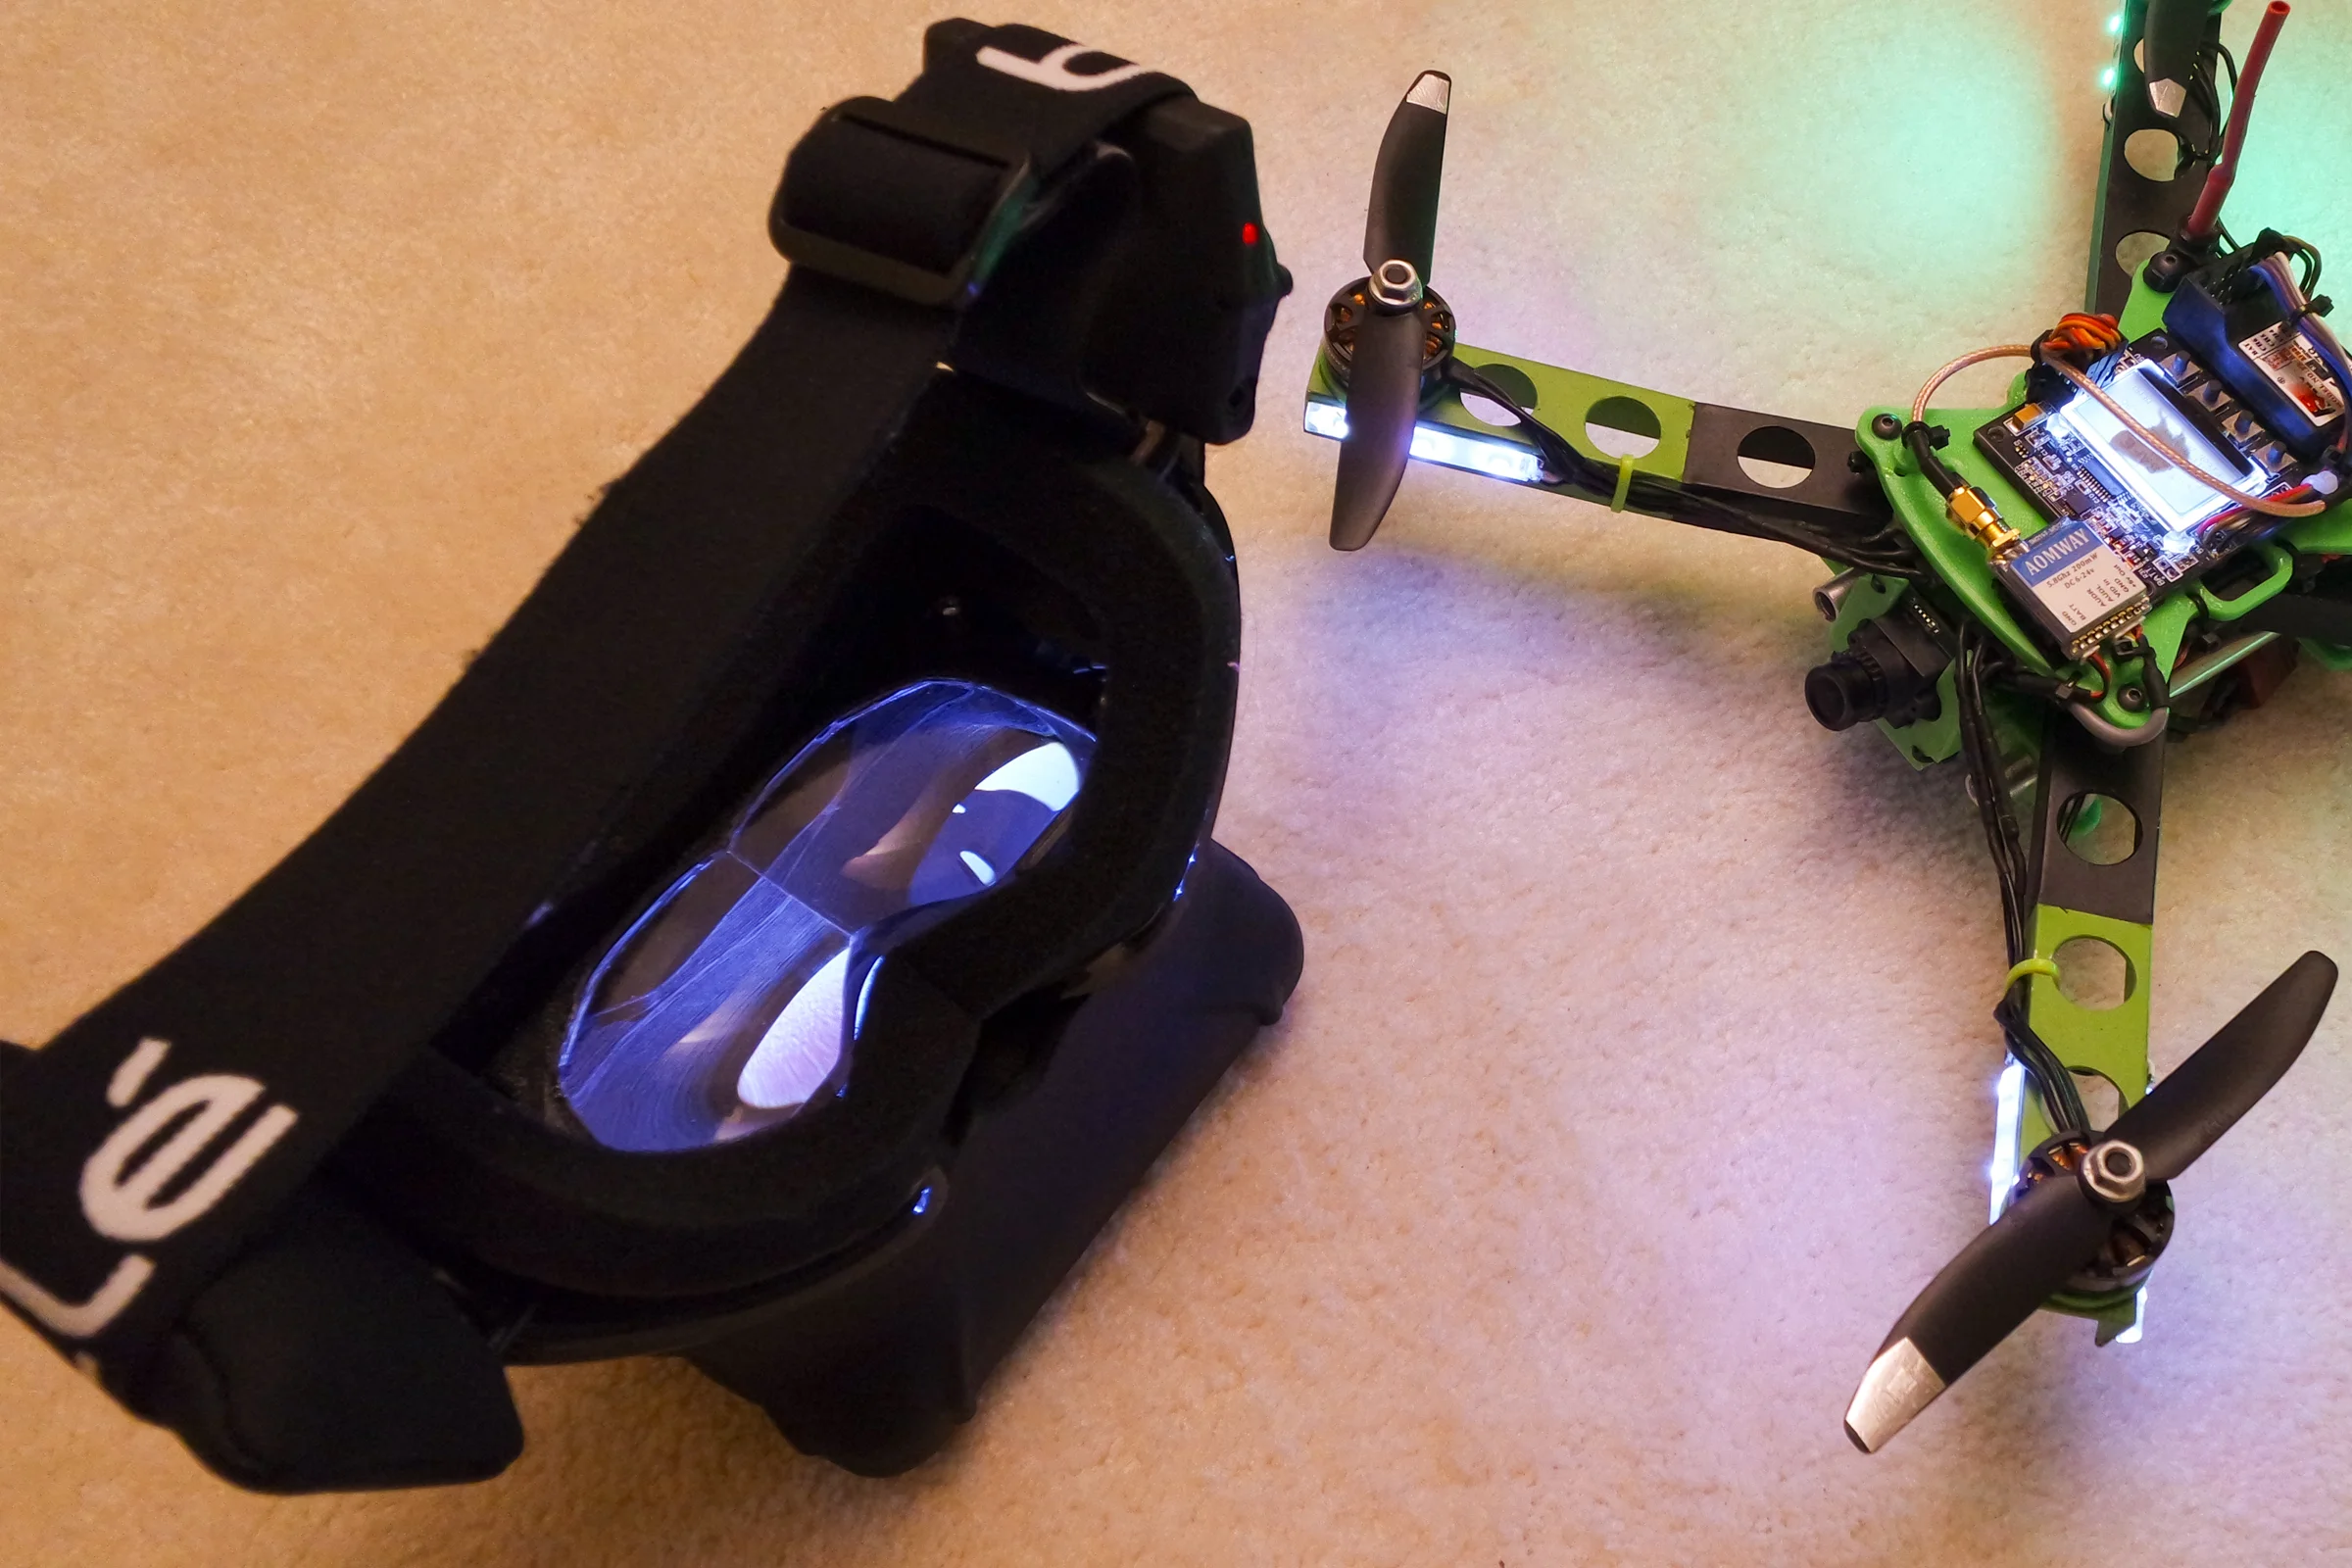
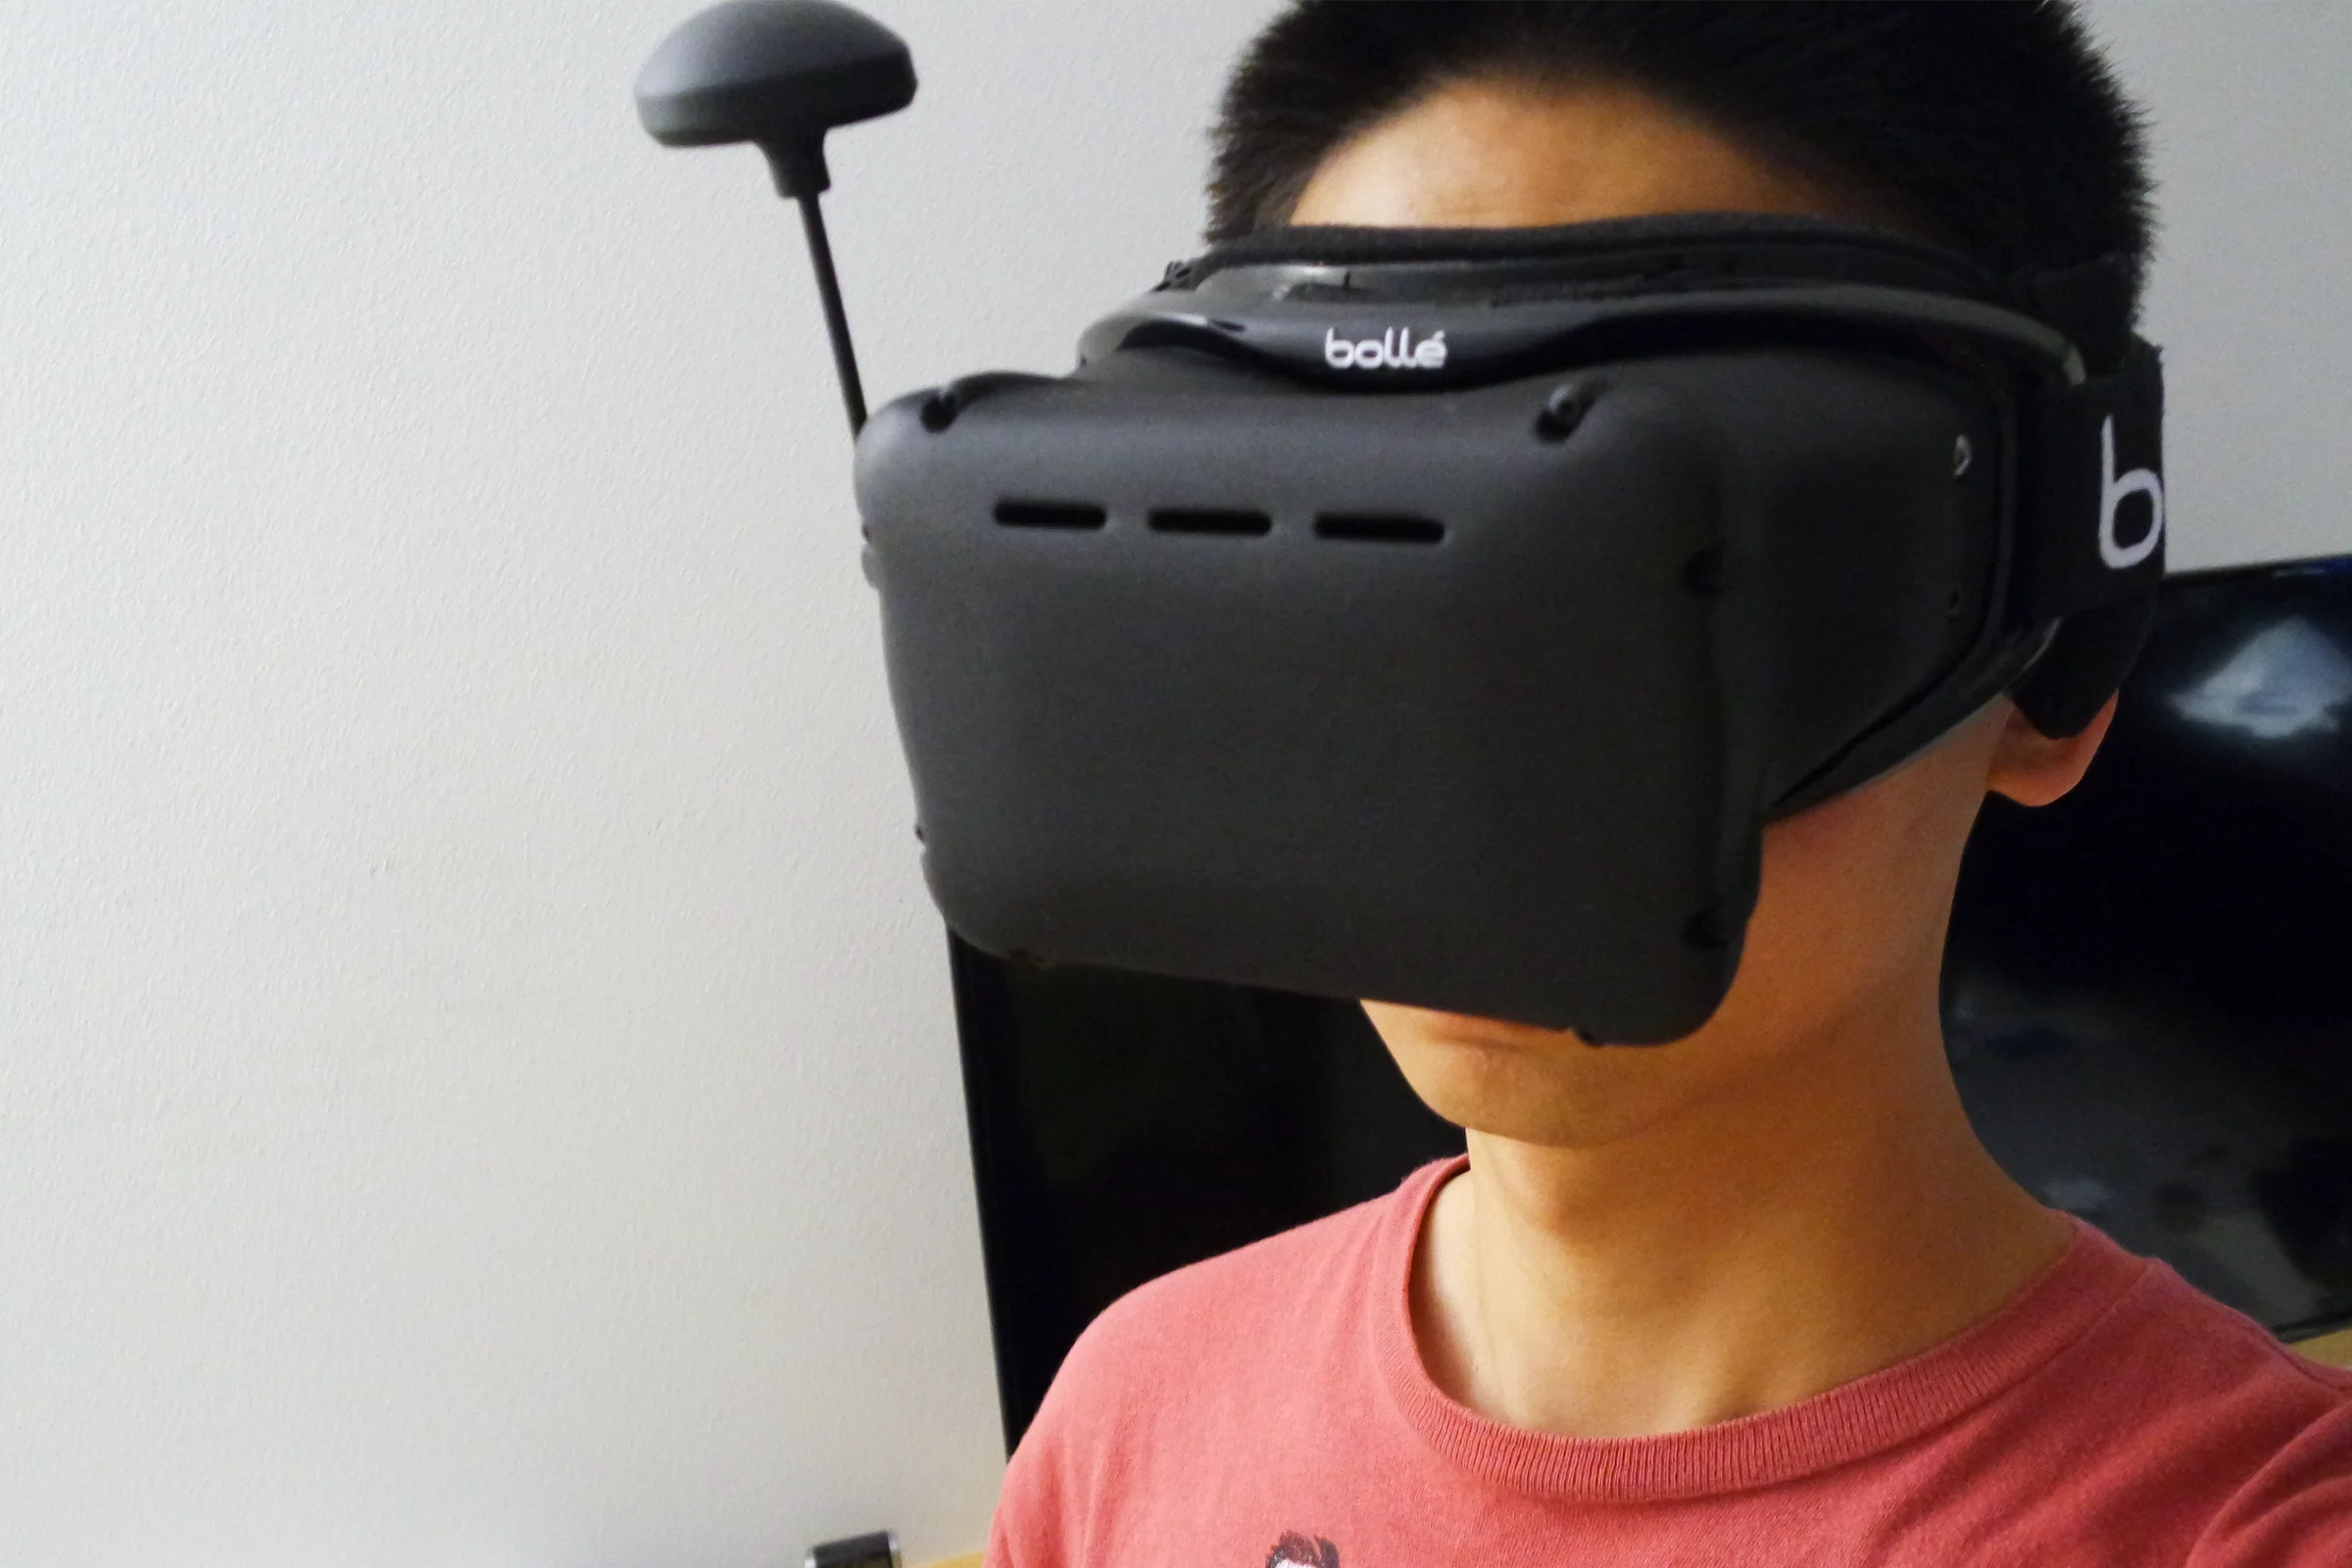
The FPV Goggle System: Built from Scratch
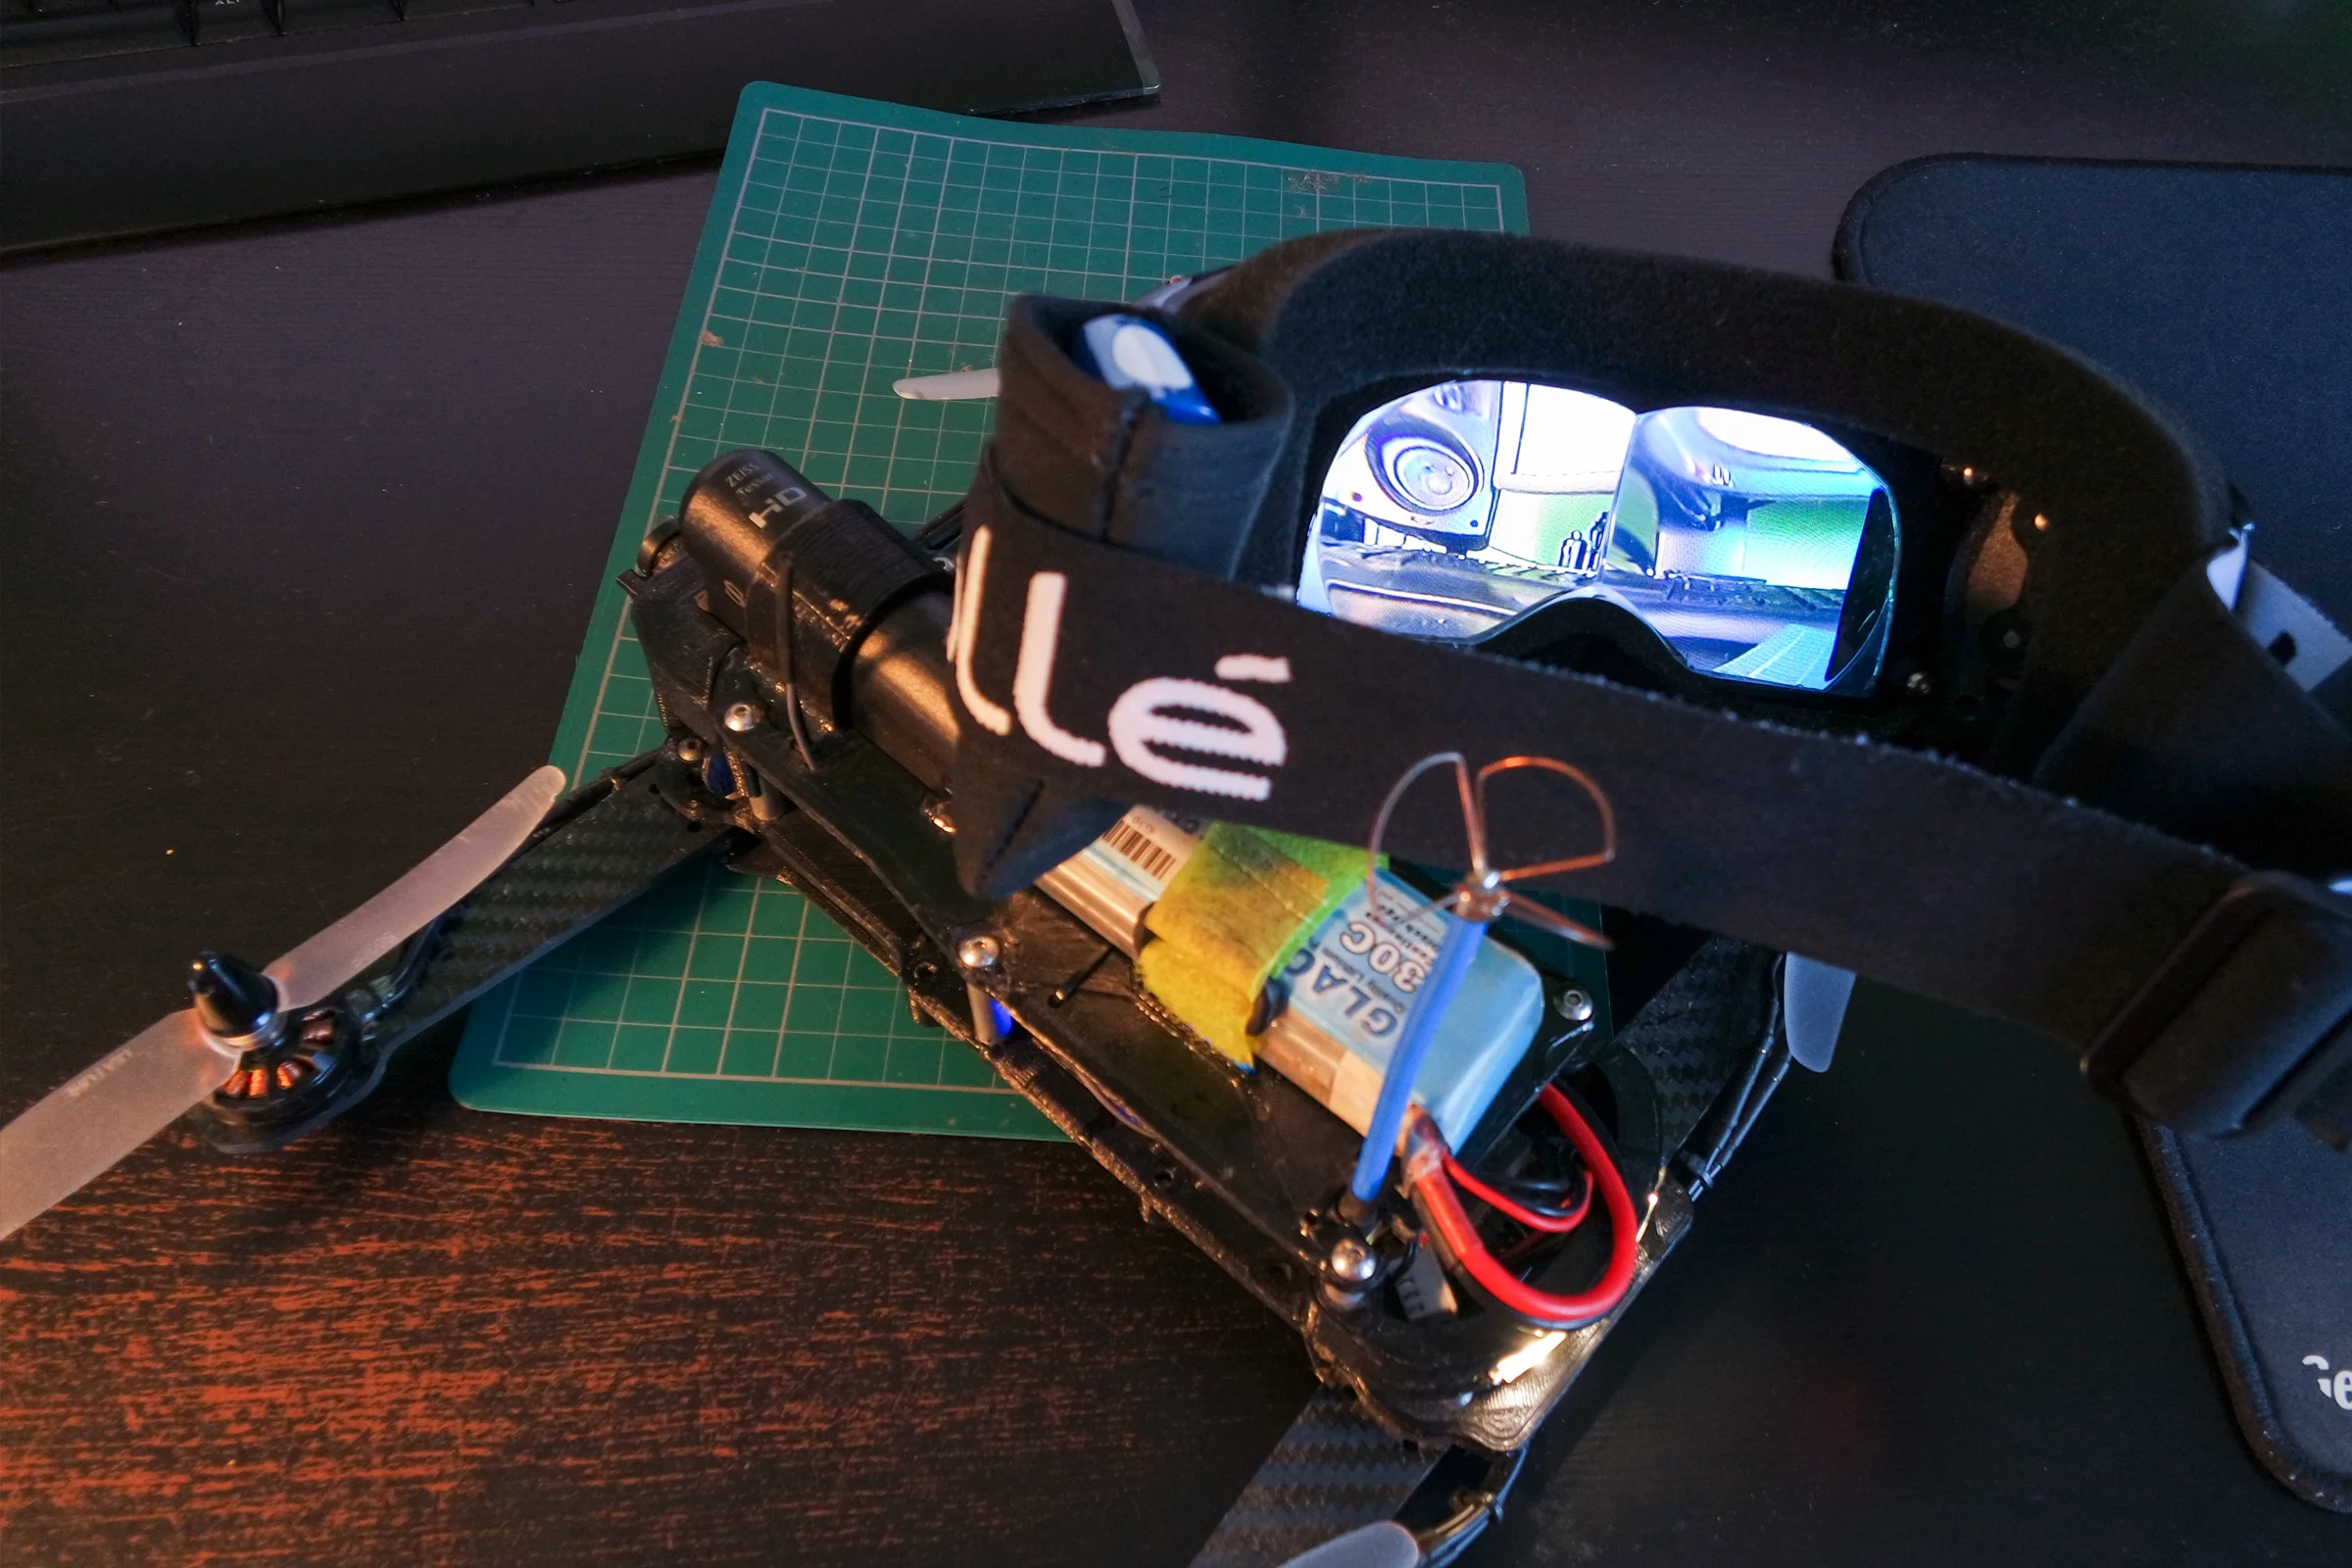
Commercial FPV goggles at the time were expensive, uncomfortable, and had a field of view commonly described as "flying while looking through a mailbox." The Oculus Rift had just launched for PC gaming but FPV uses analog broadcast signals — you cannot use an Oculus for racing FPV. The goal was to build something closer to the Oculus experience: genuinely wide field of view, self-contained electronics, and actually comfortable to wear.
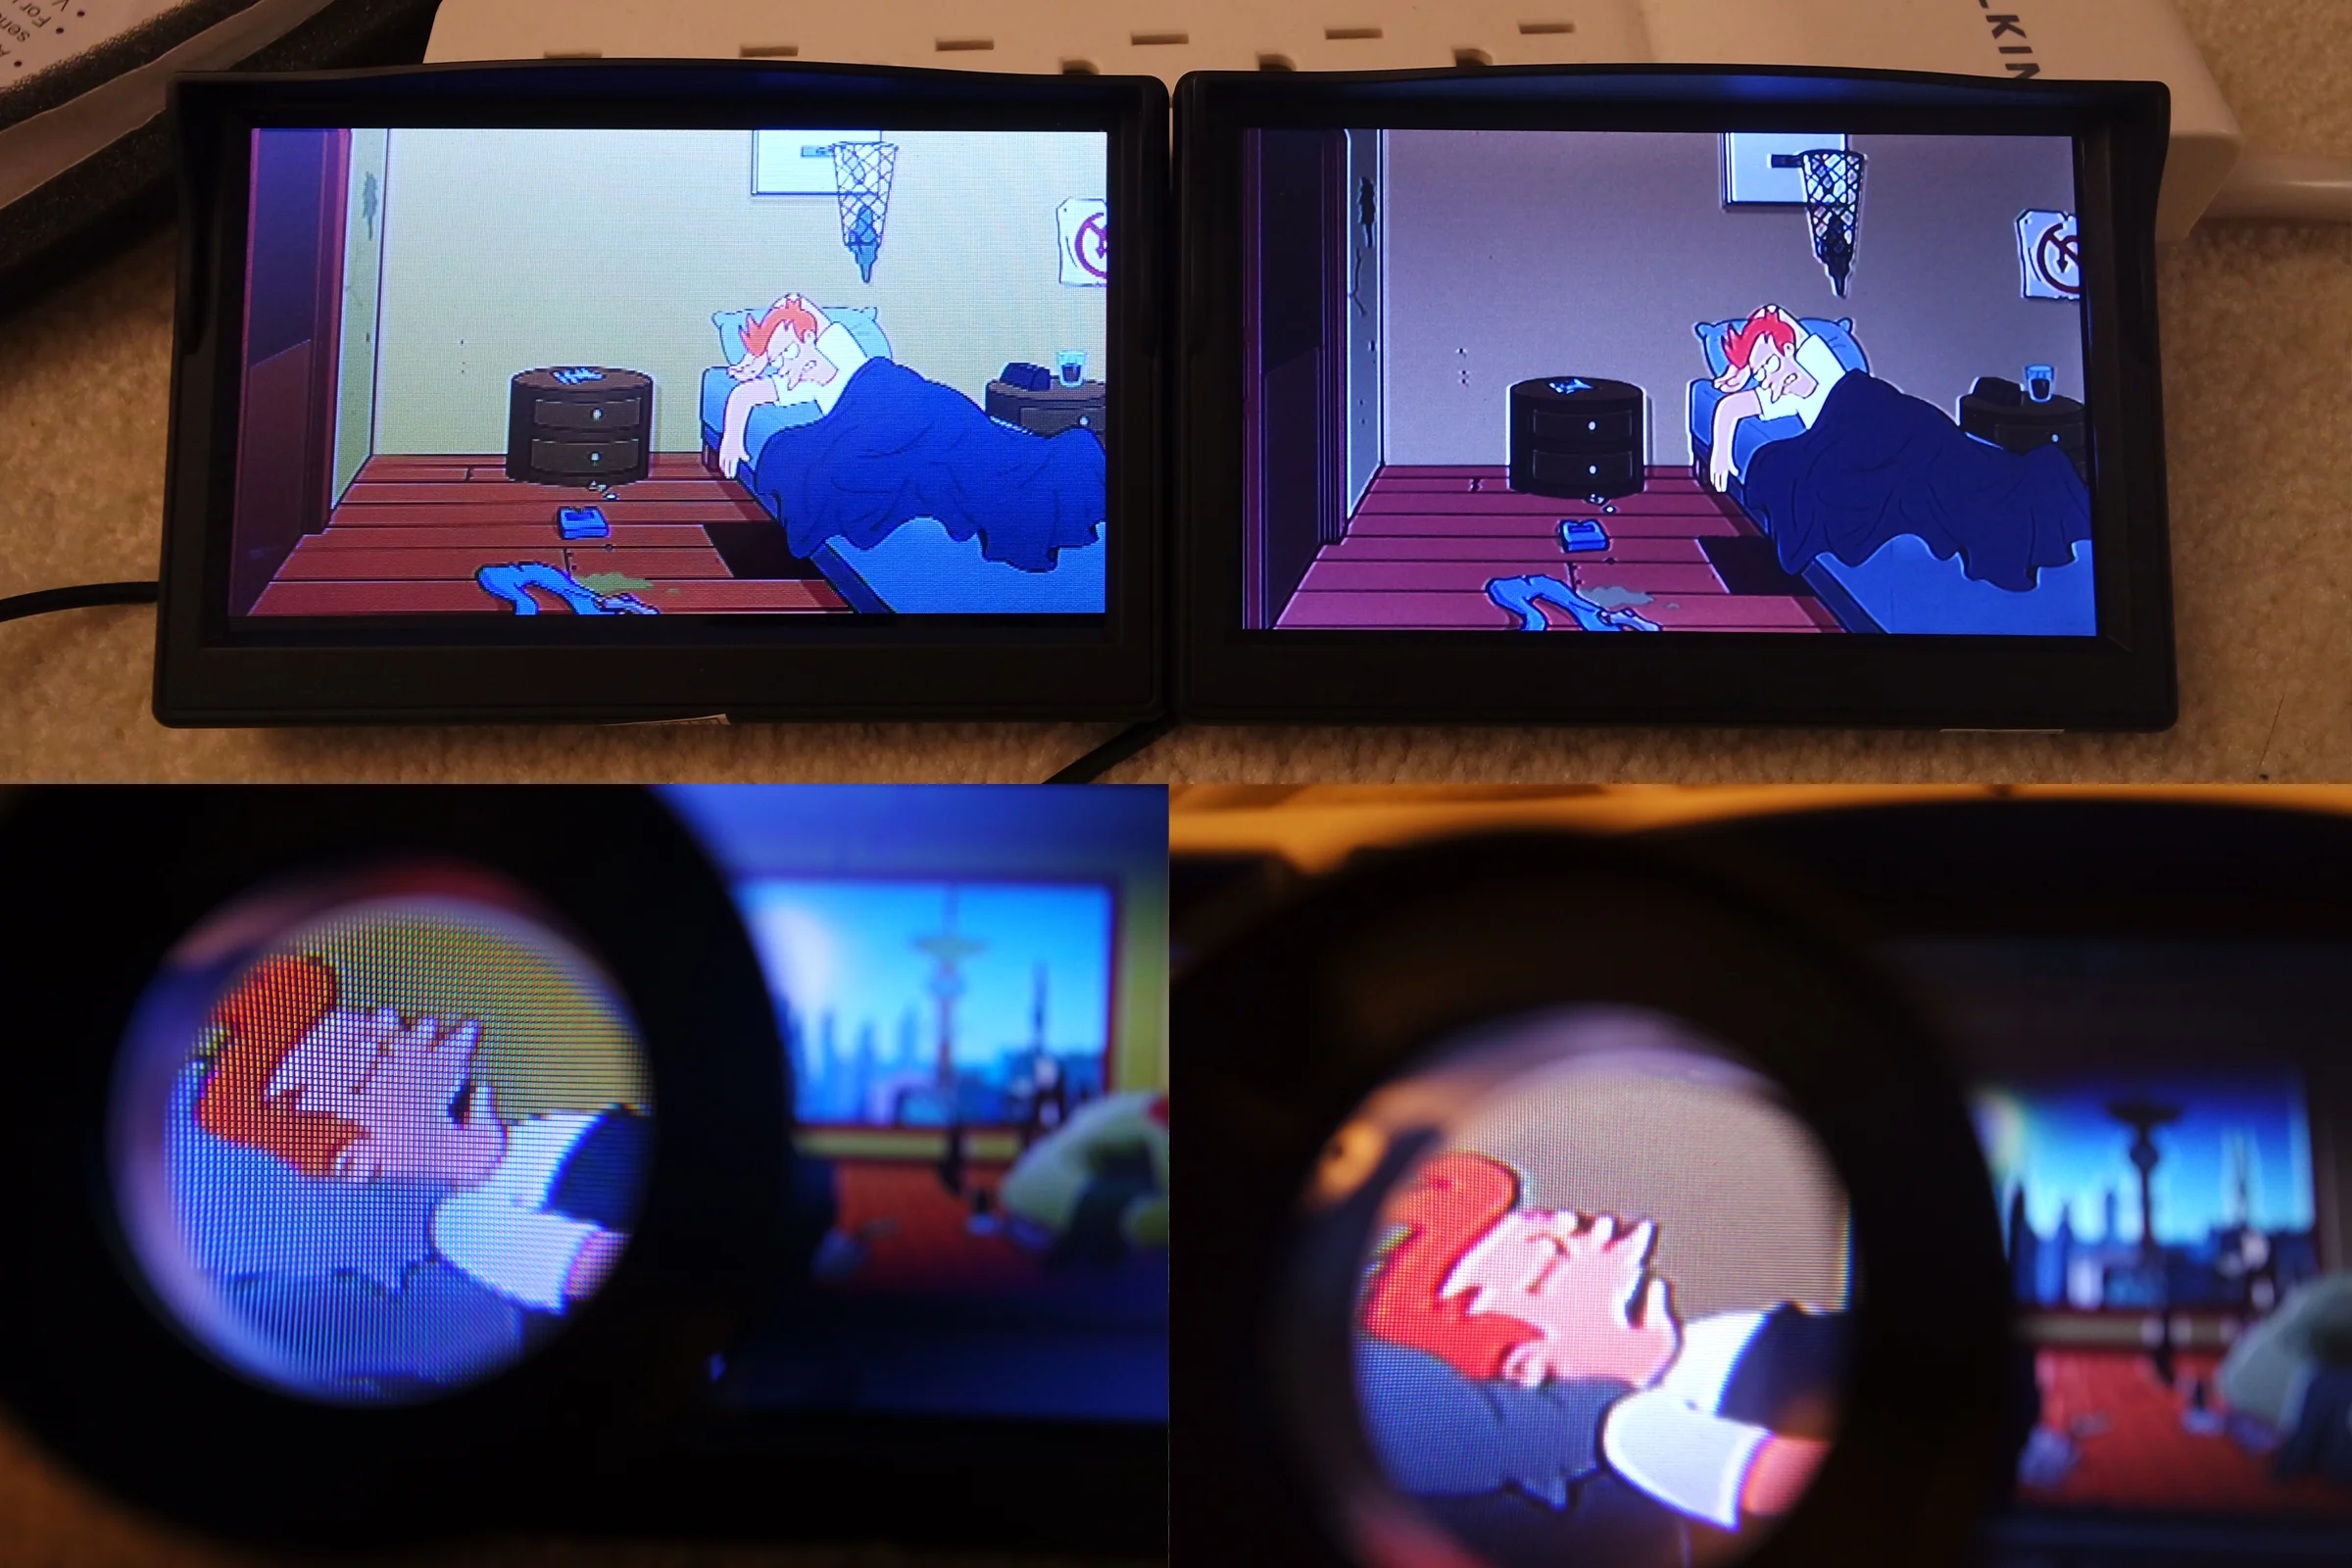

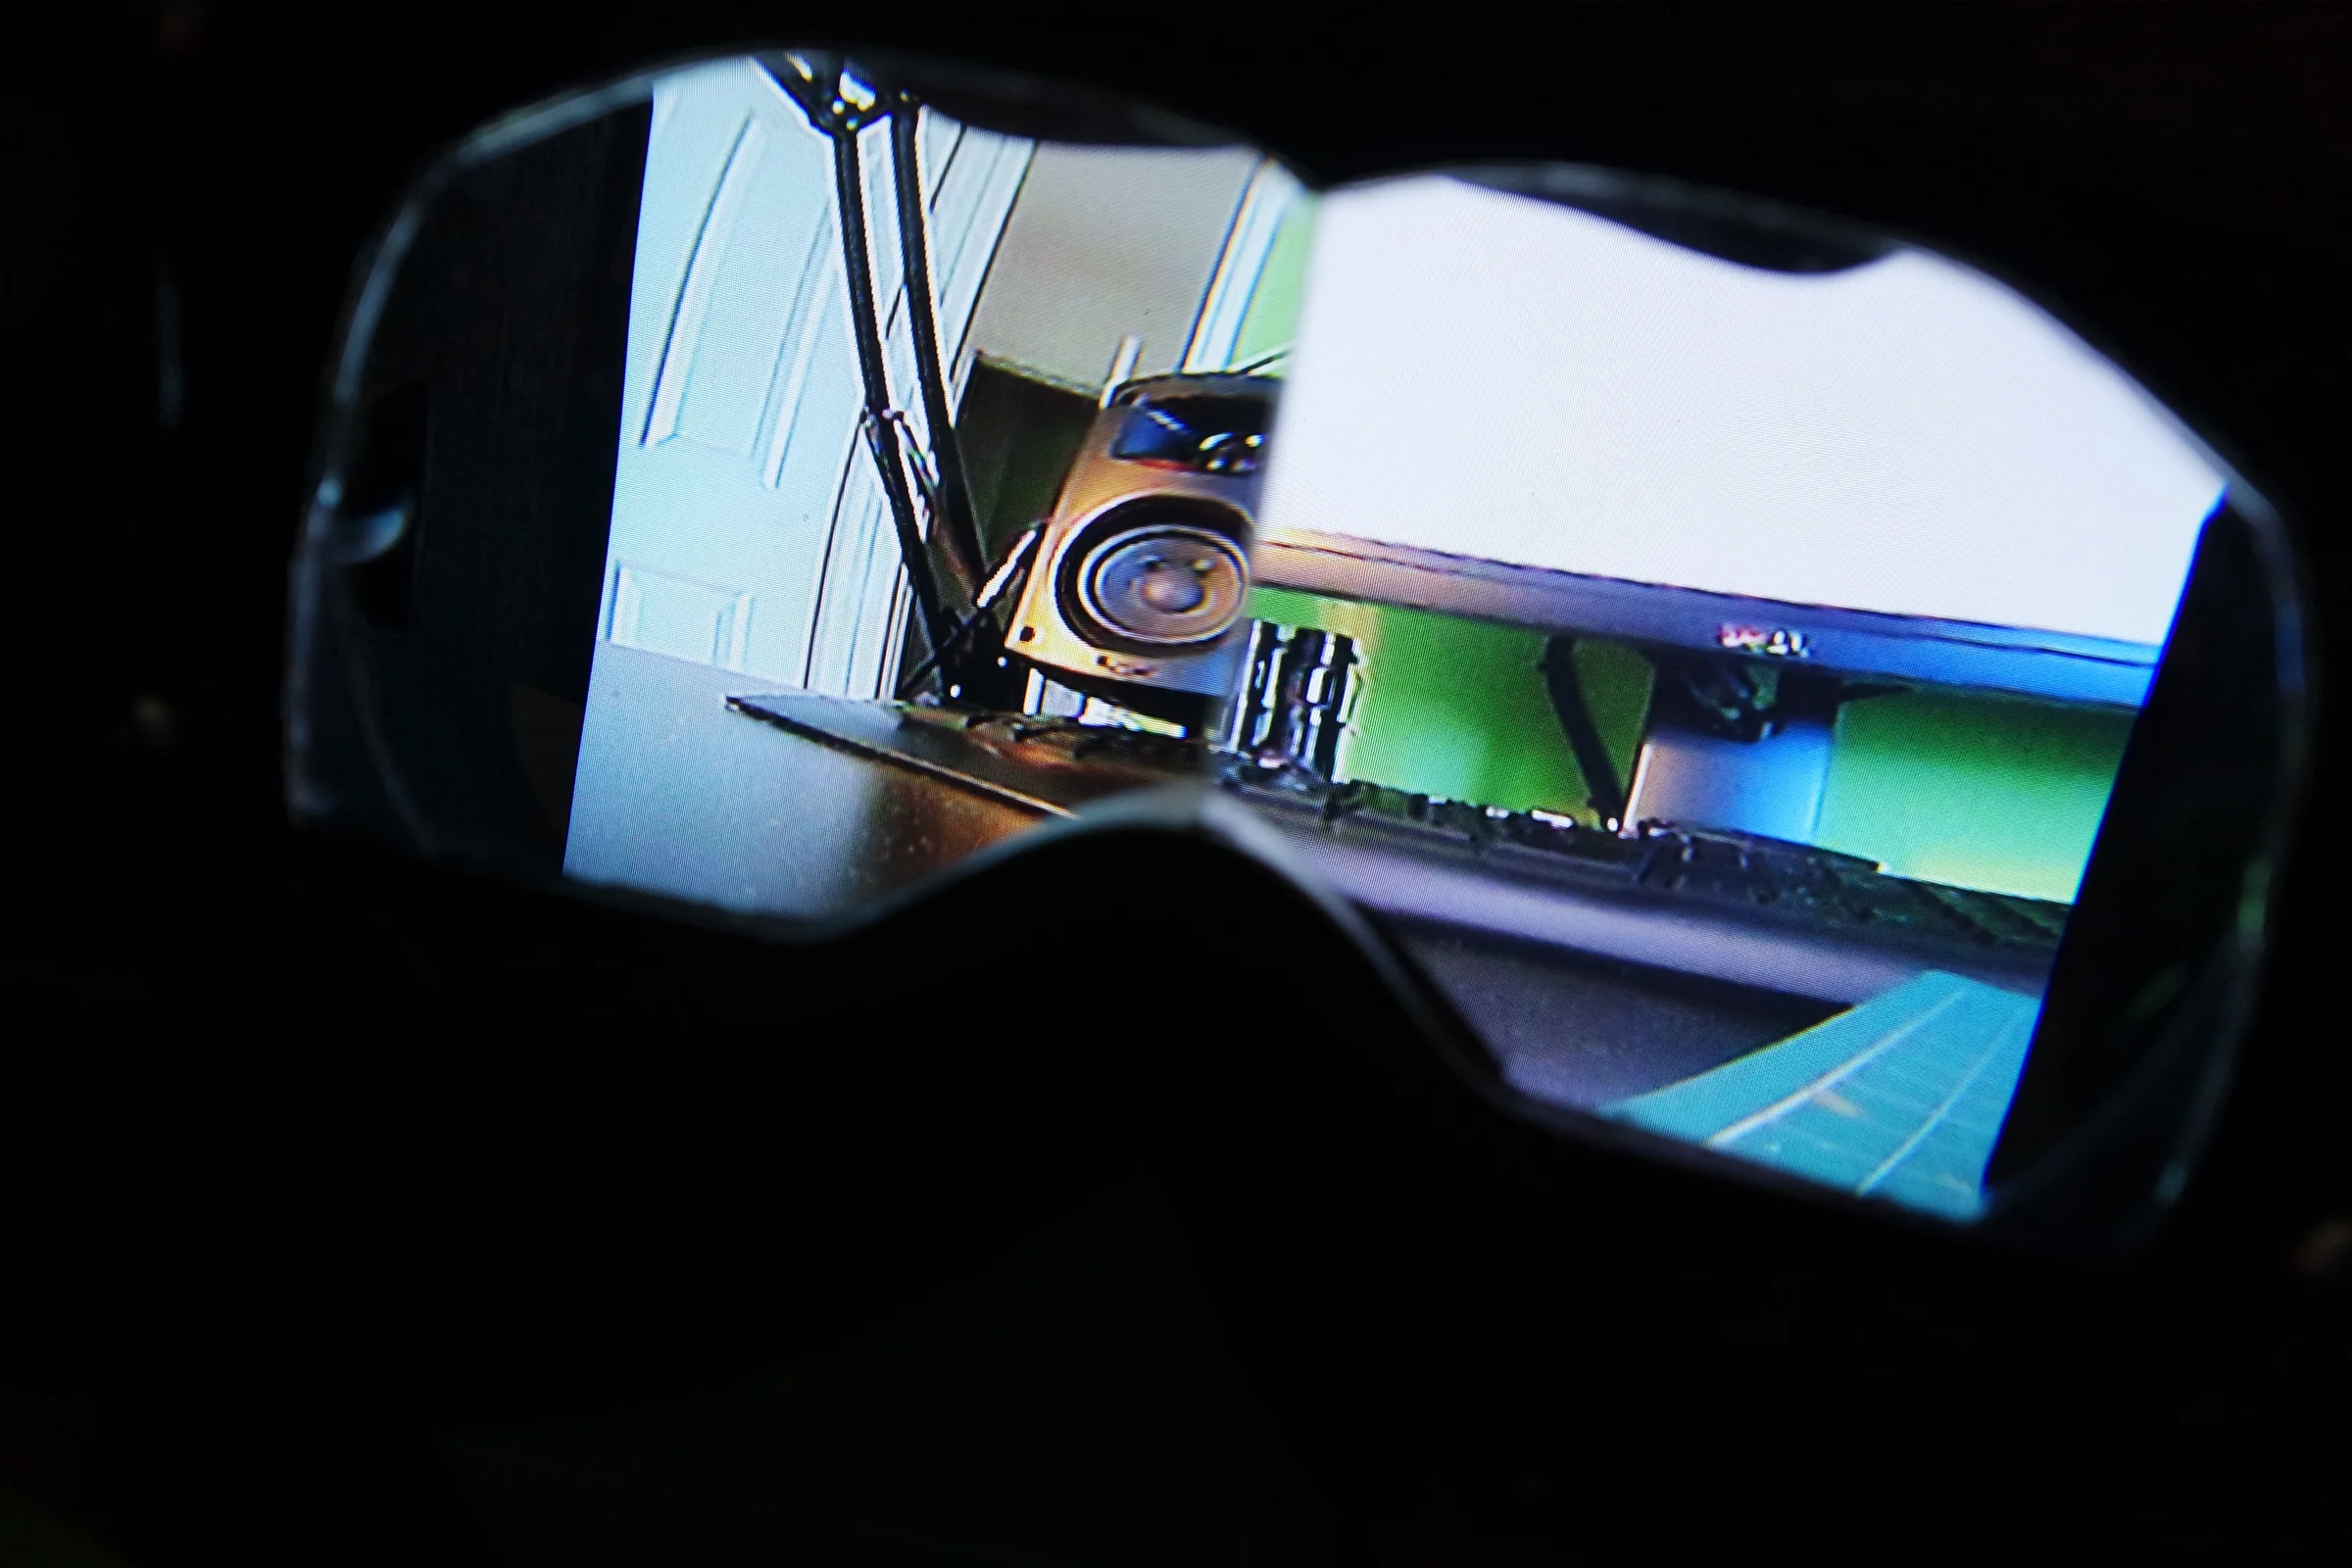
Started by getting the full FPV signal chain working: board cam, transmitter on the drone, receiver, analog monitor to verify signal quality. Then bought and tested approximately eight different generic 3 to 7-inch analog LCD screens from Amazon — cheap car backup camera monitors that happened to accept the same analog signal and were far cheaper than purpose-built FPV screens. Experimented with two panels side by side for a stereoscopic wide-FOV approach, tried curved mirrors to allow side mounting, tested many optic and spacing combinations. None of the dual-panel configurations worked — sufficiently small, high-quality panels at the right resolution were not available and spacing was always an unresolvable problem. Chose the best single 5-inch panel and moved on.
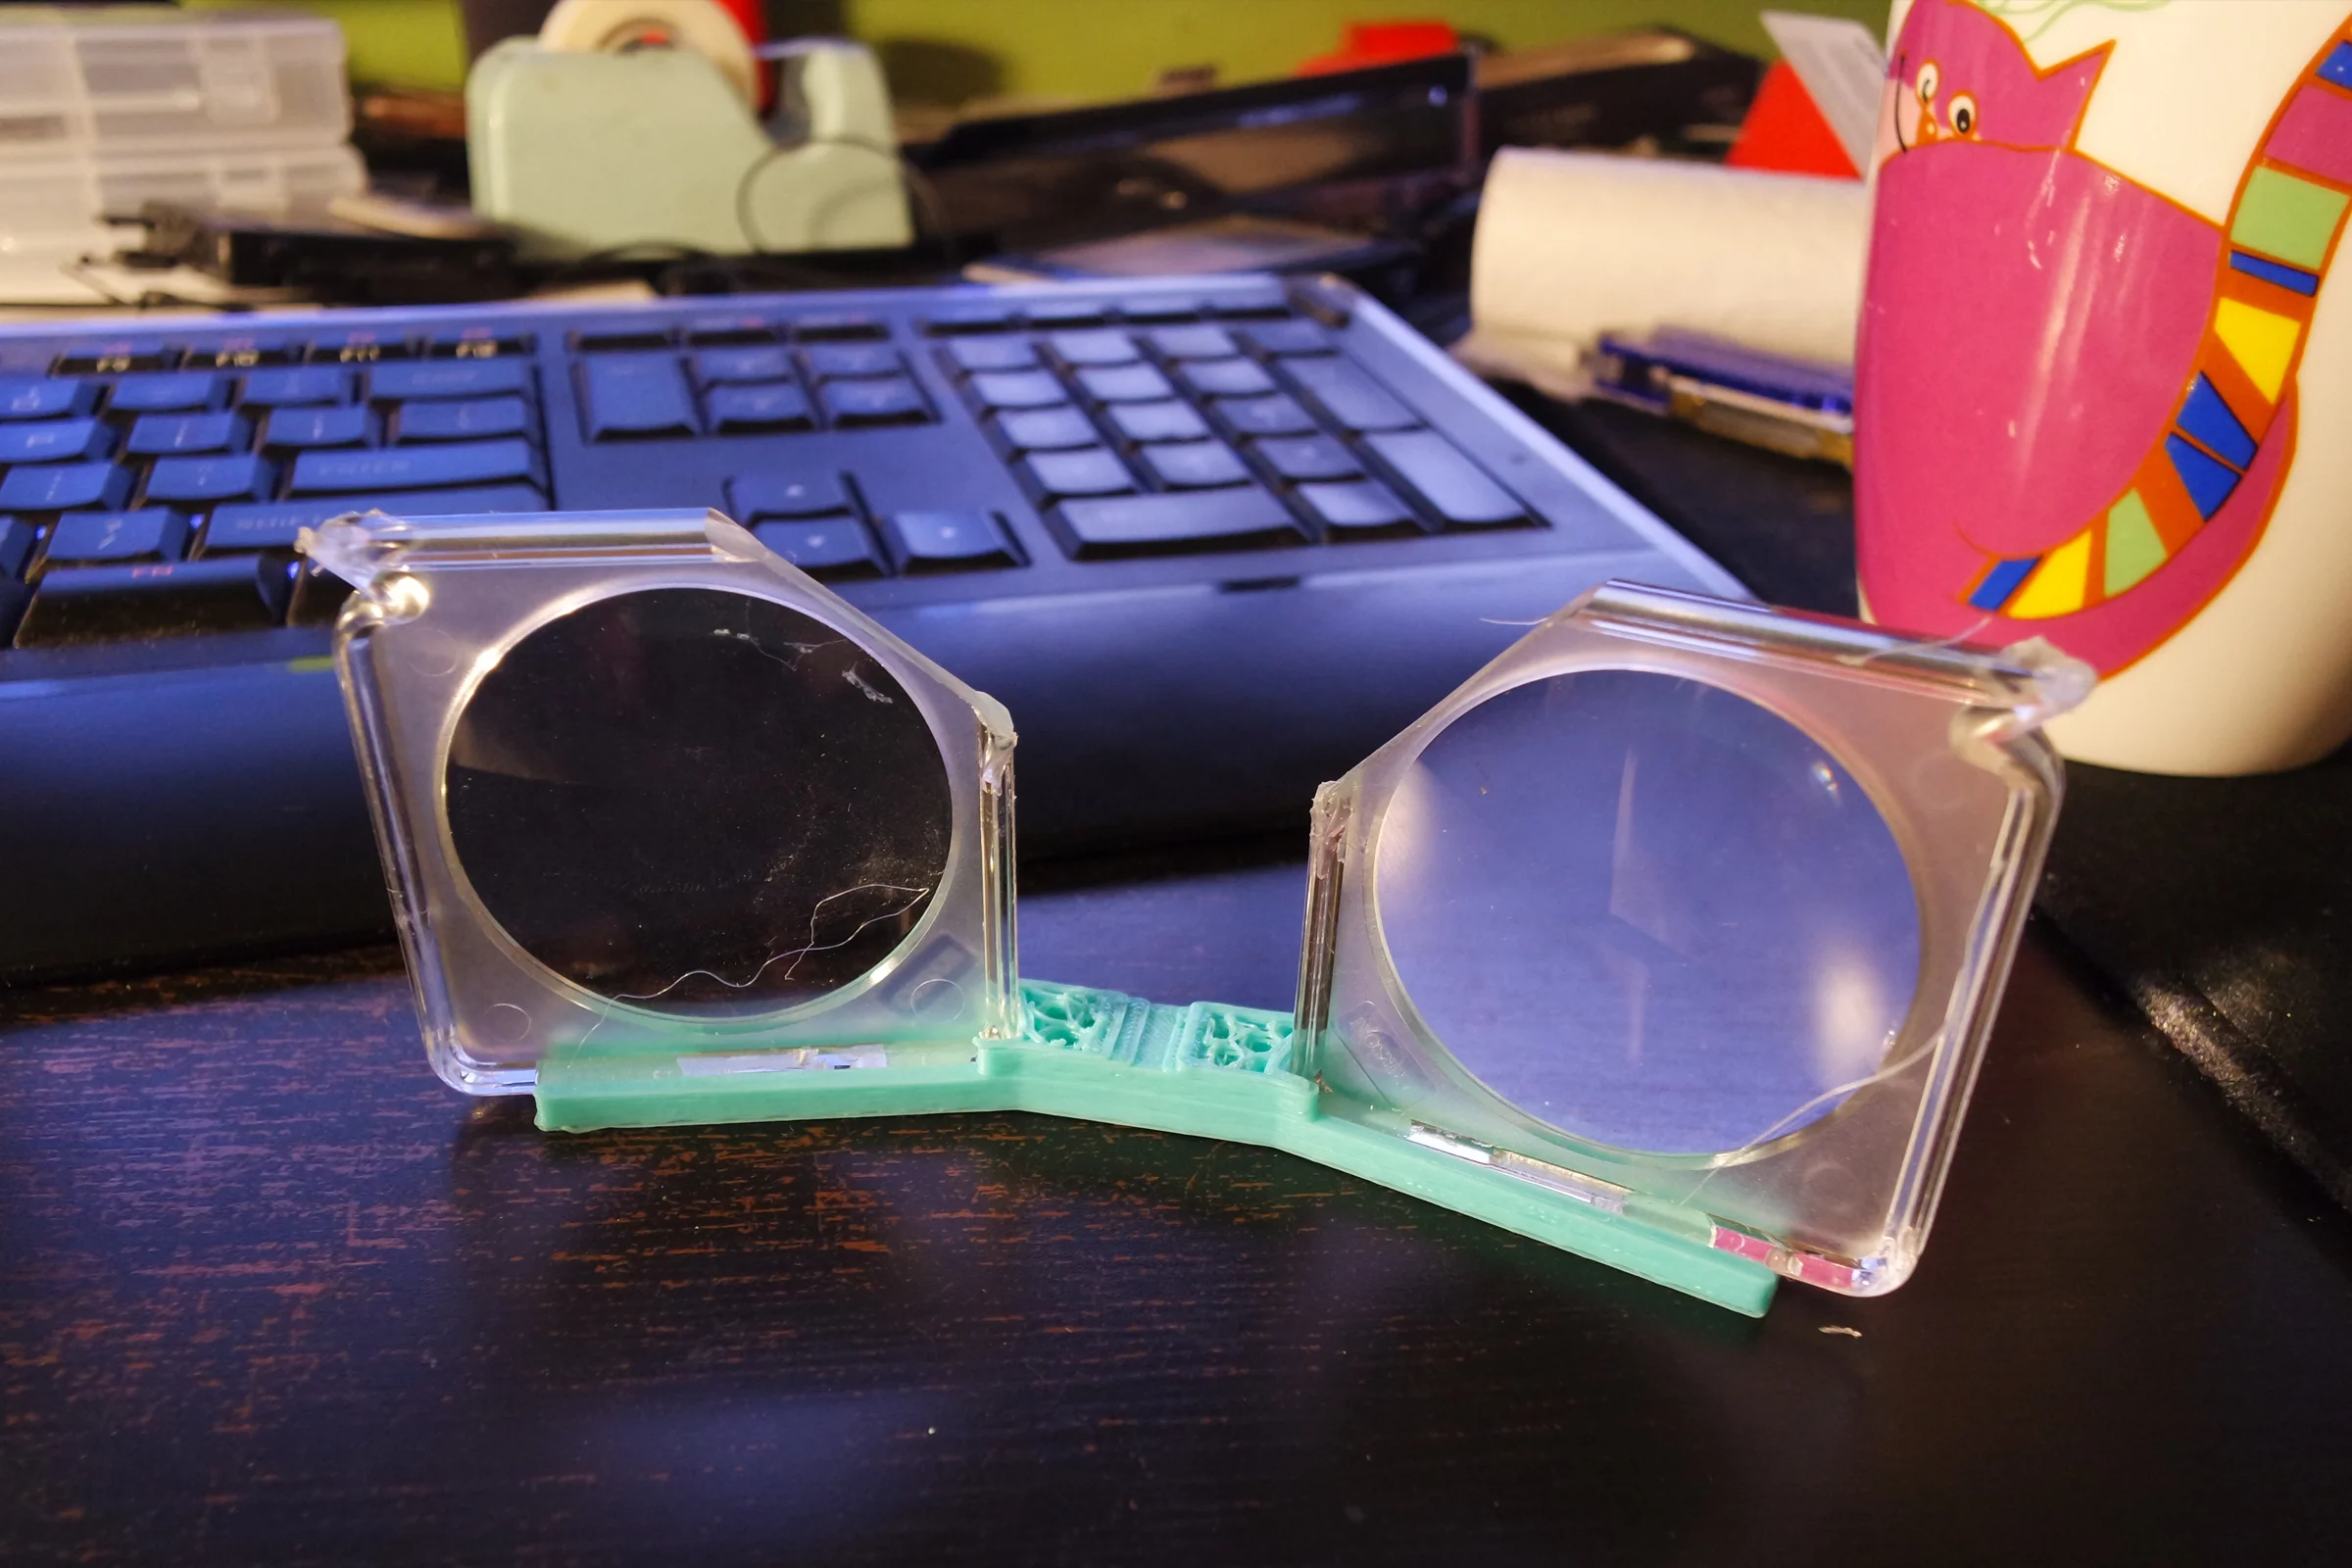
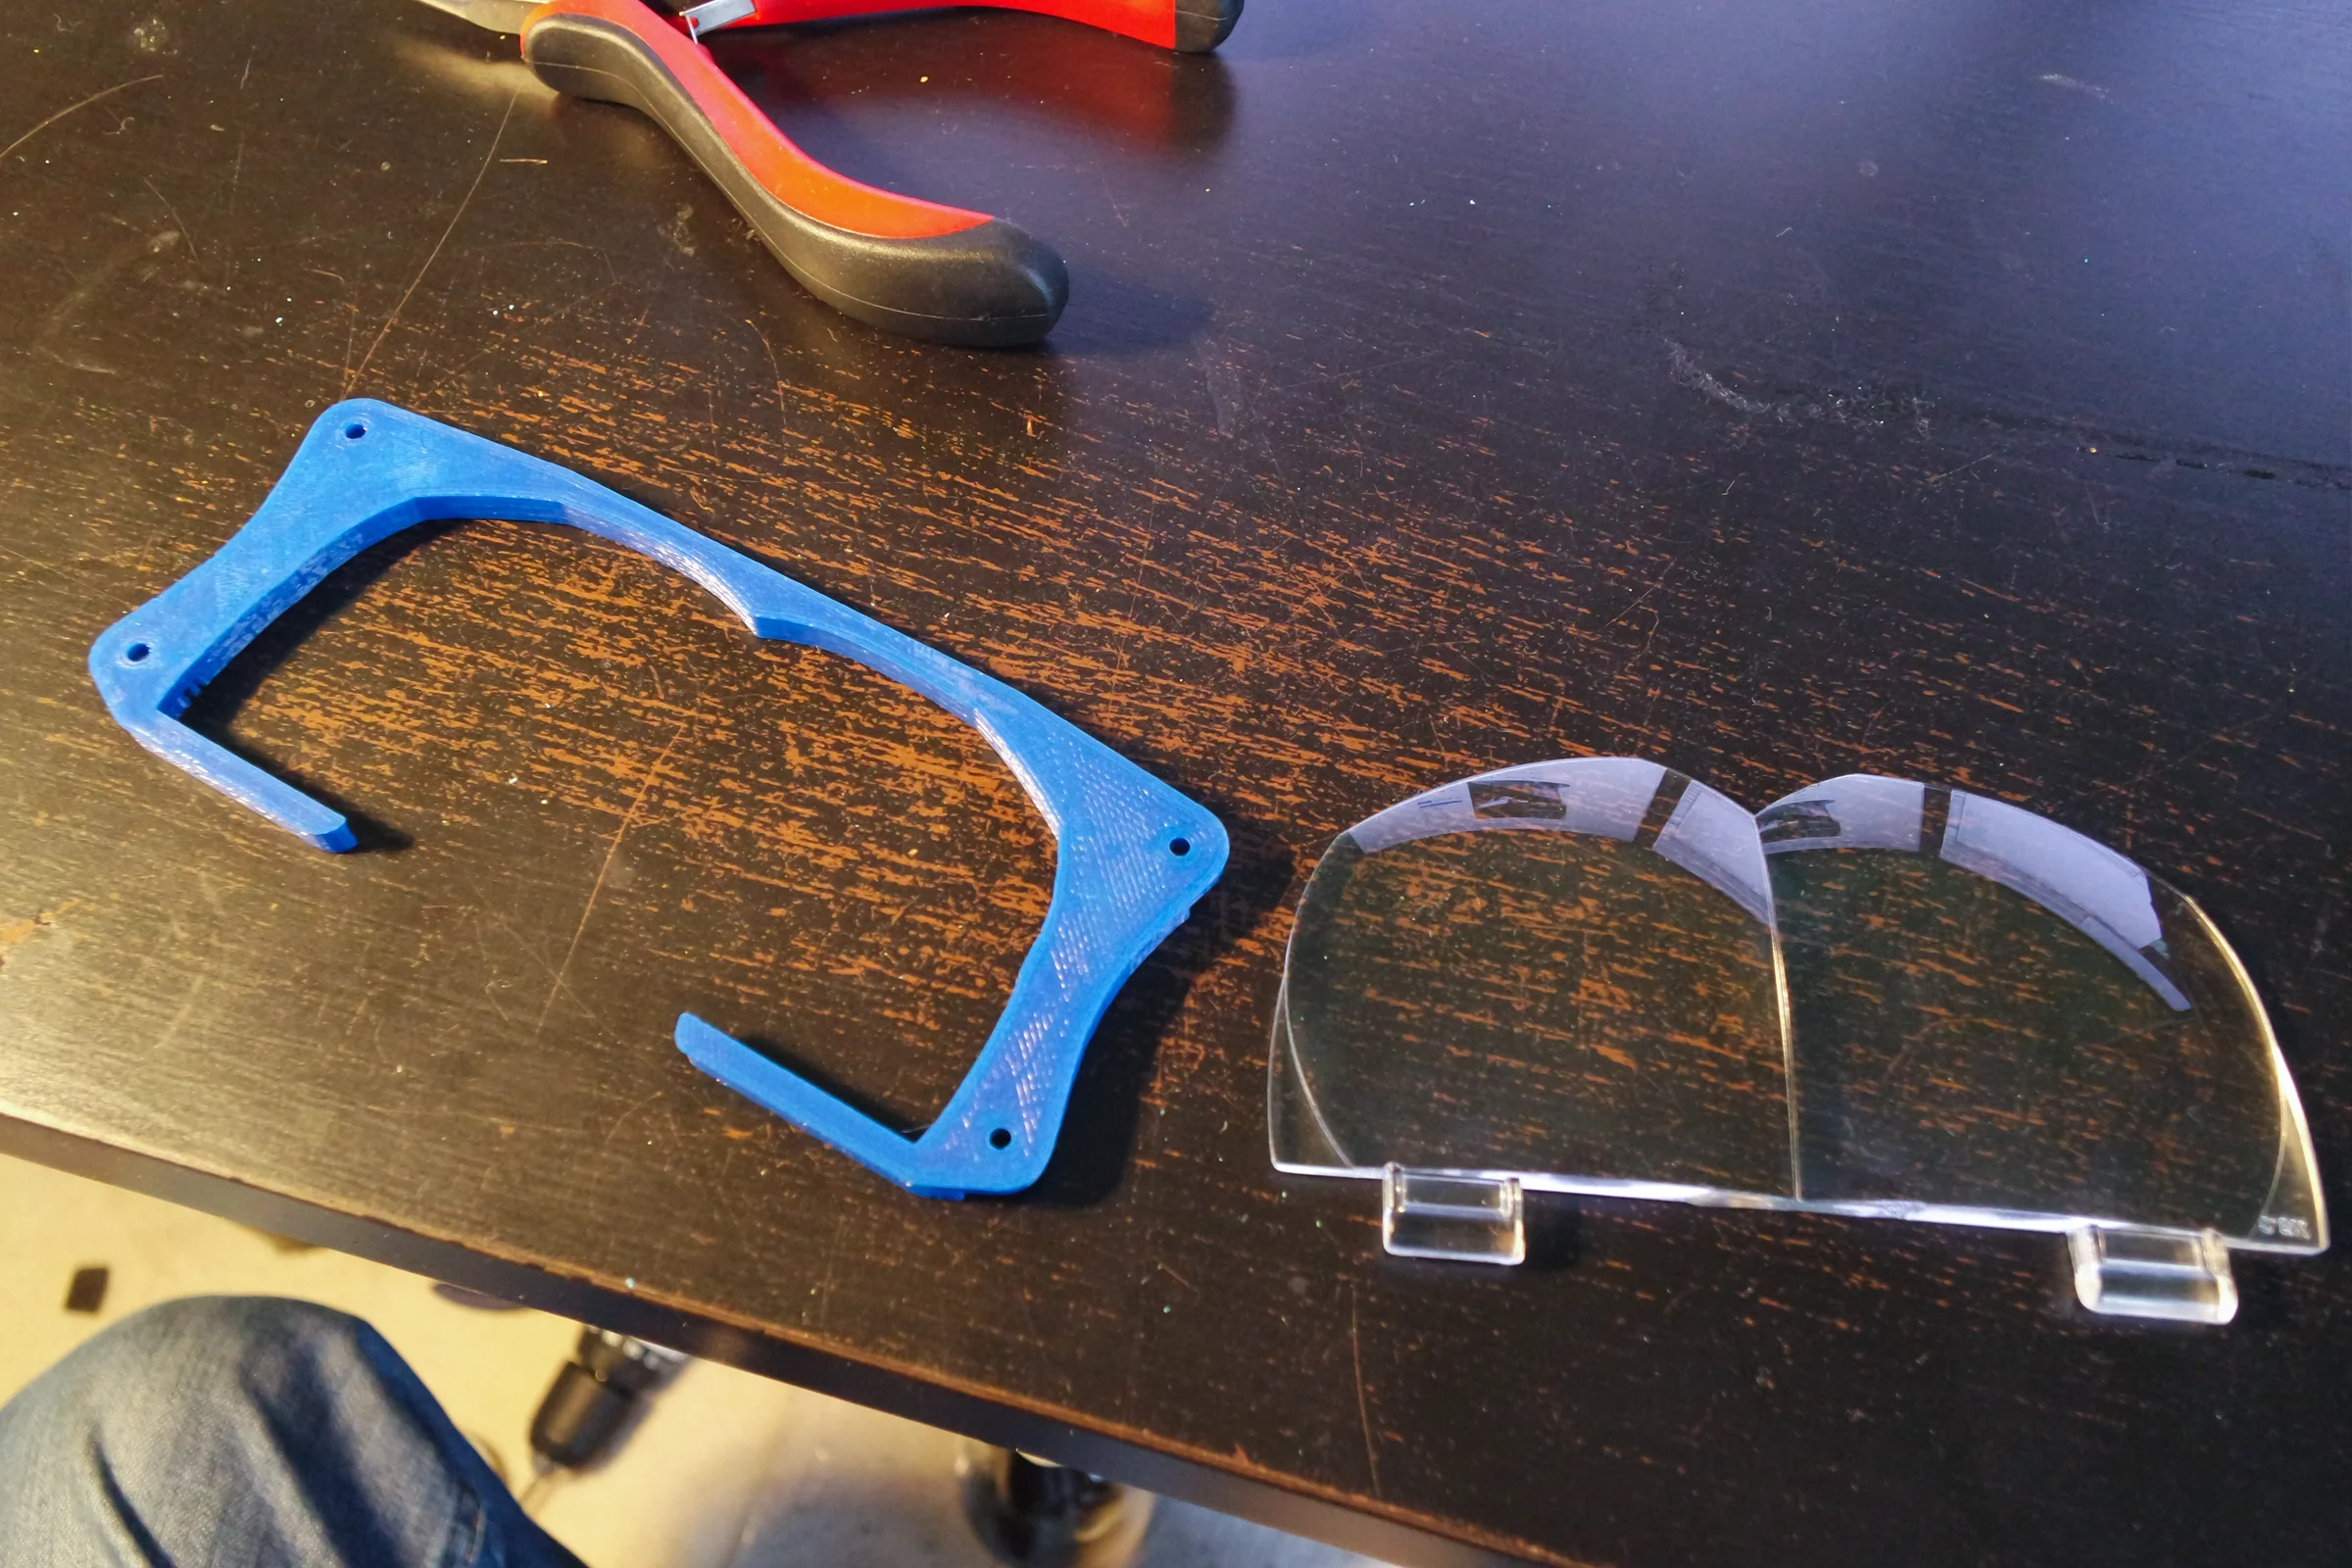
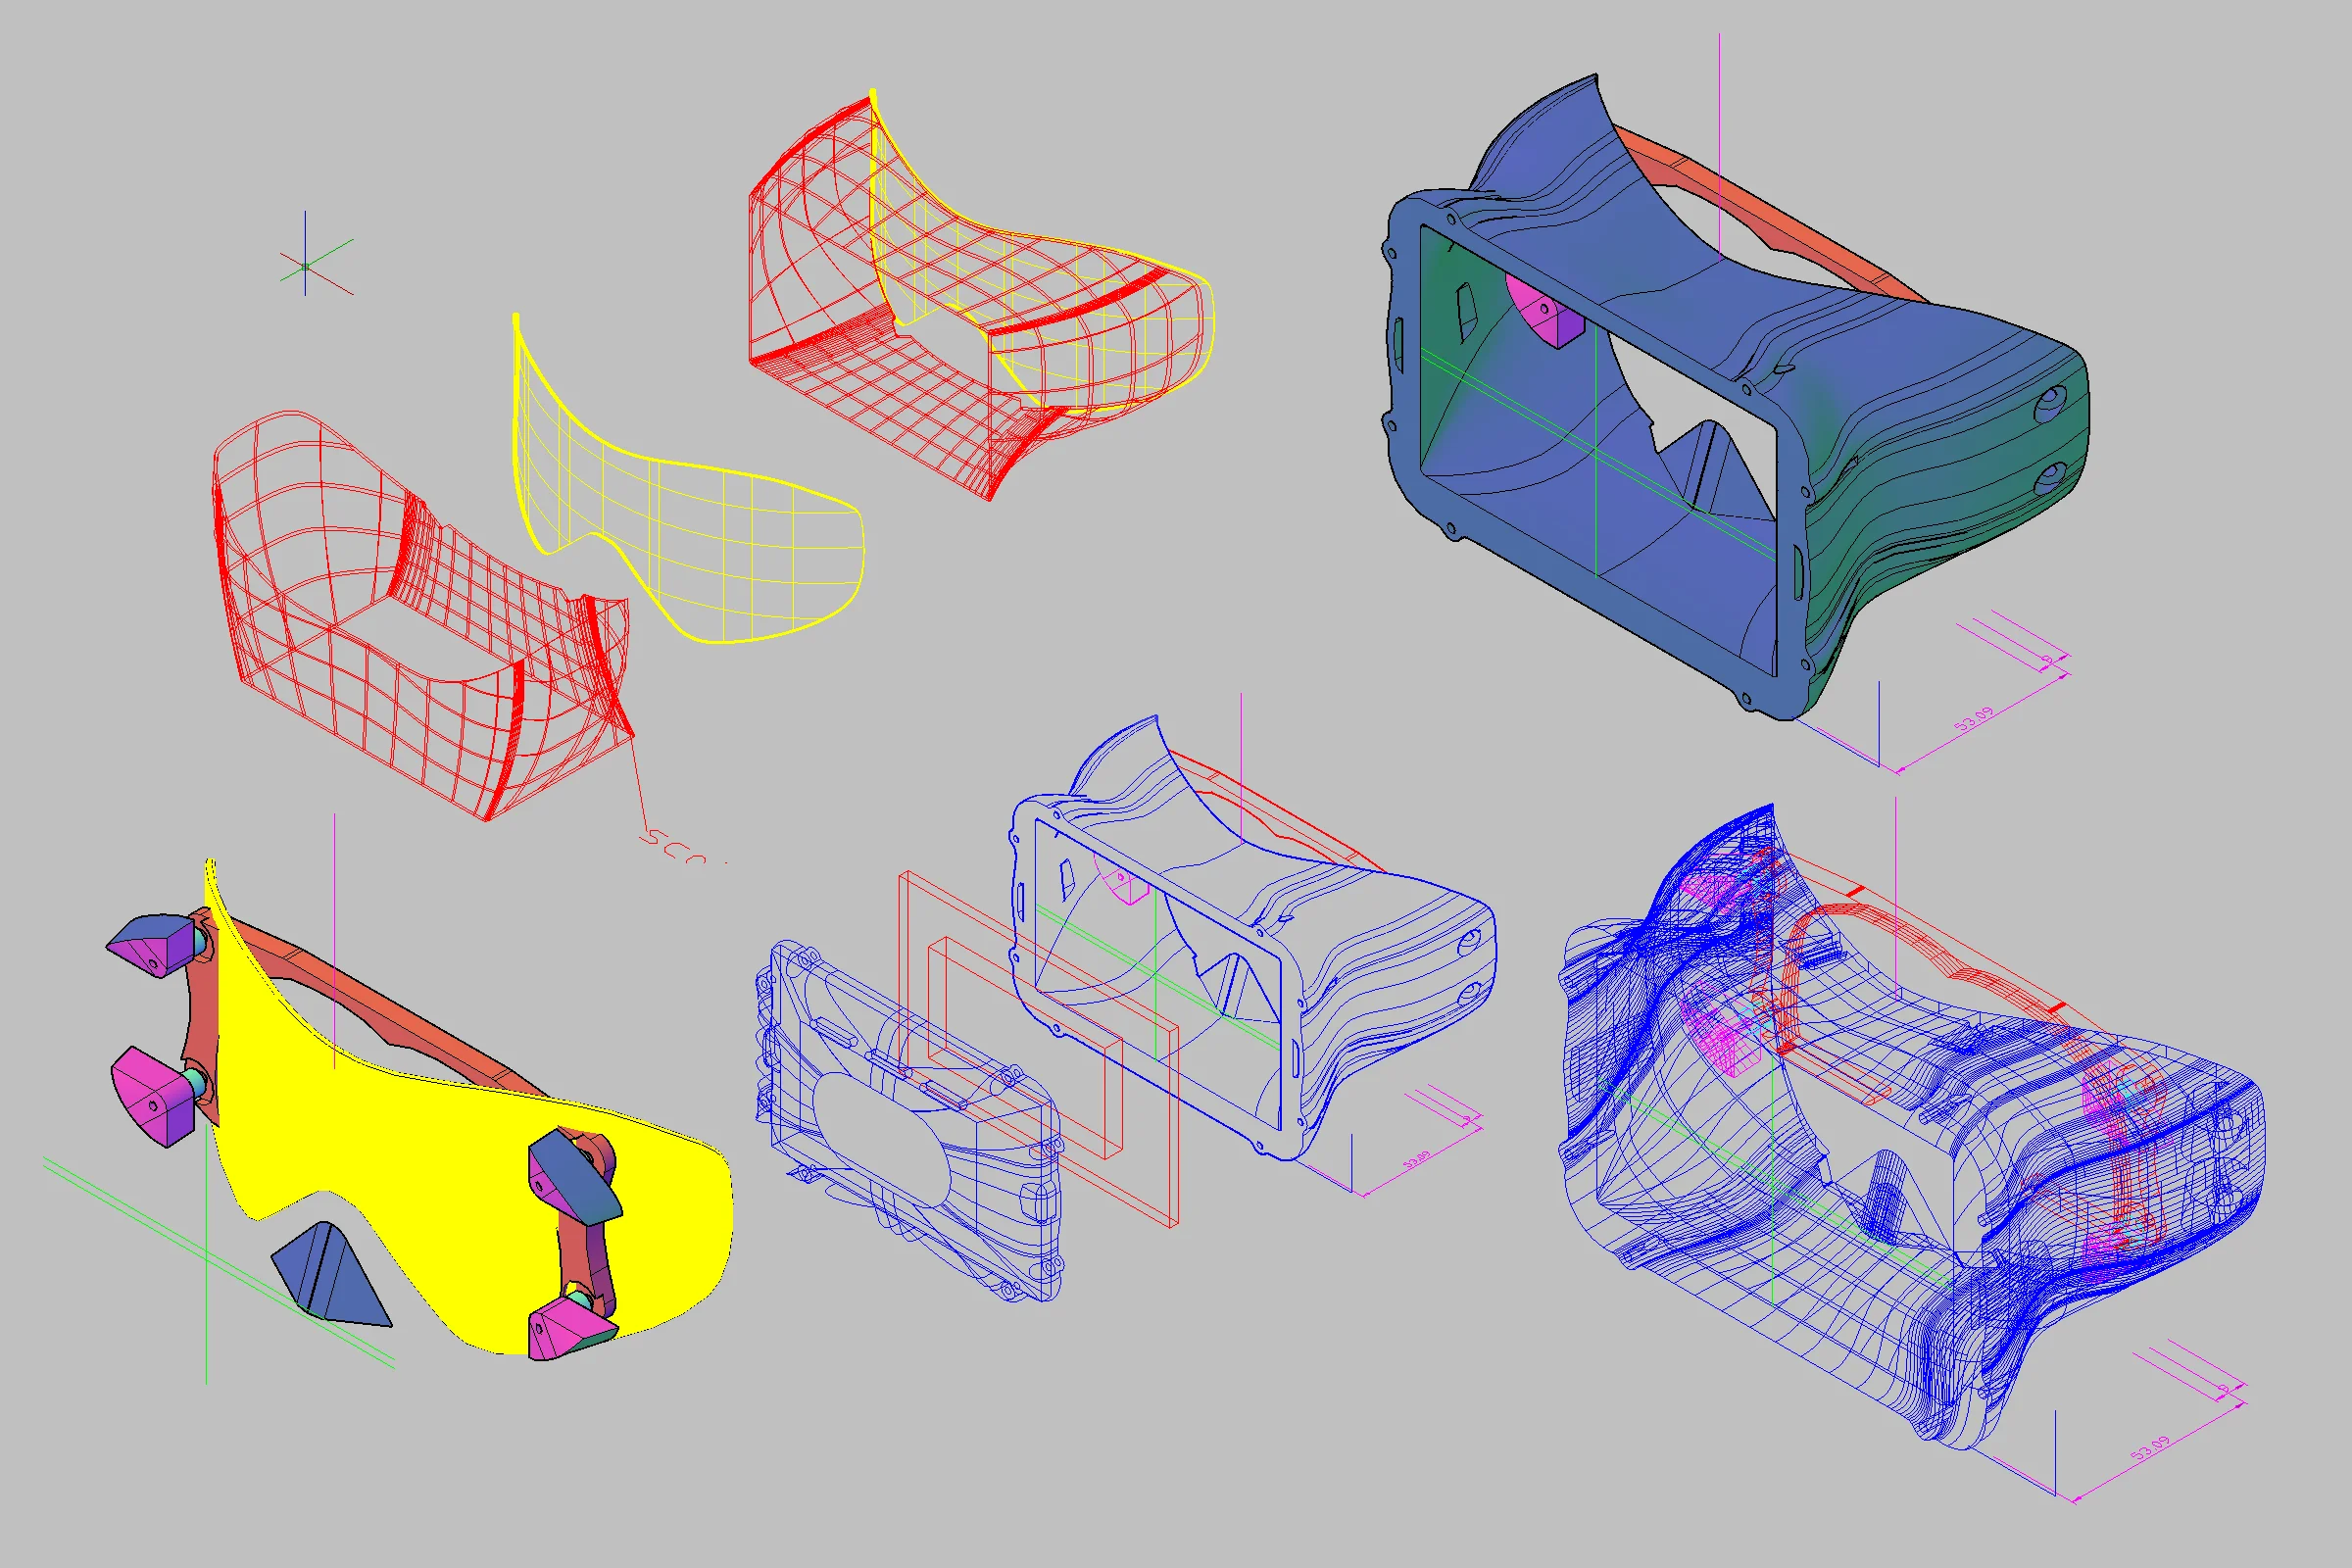
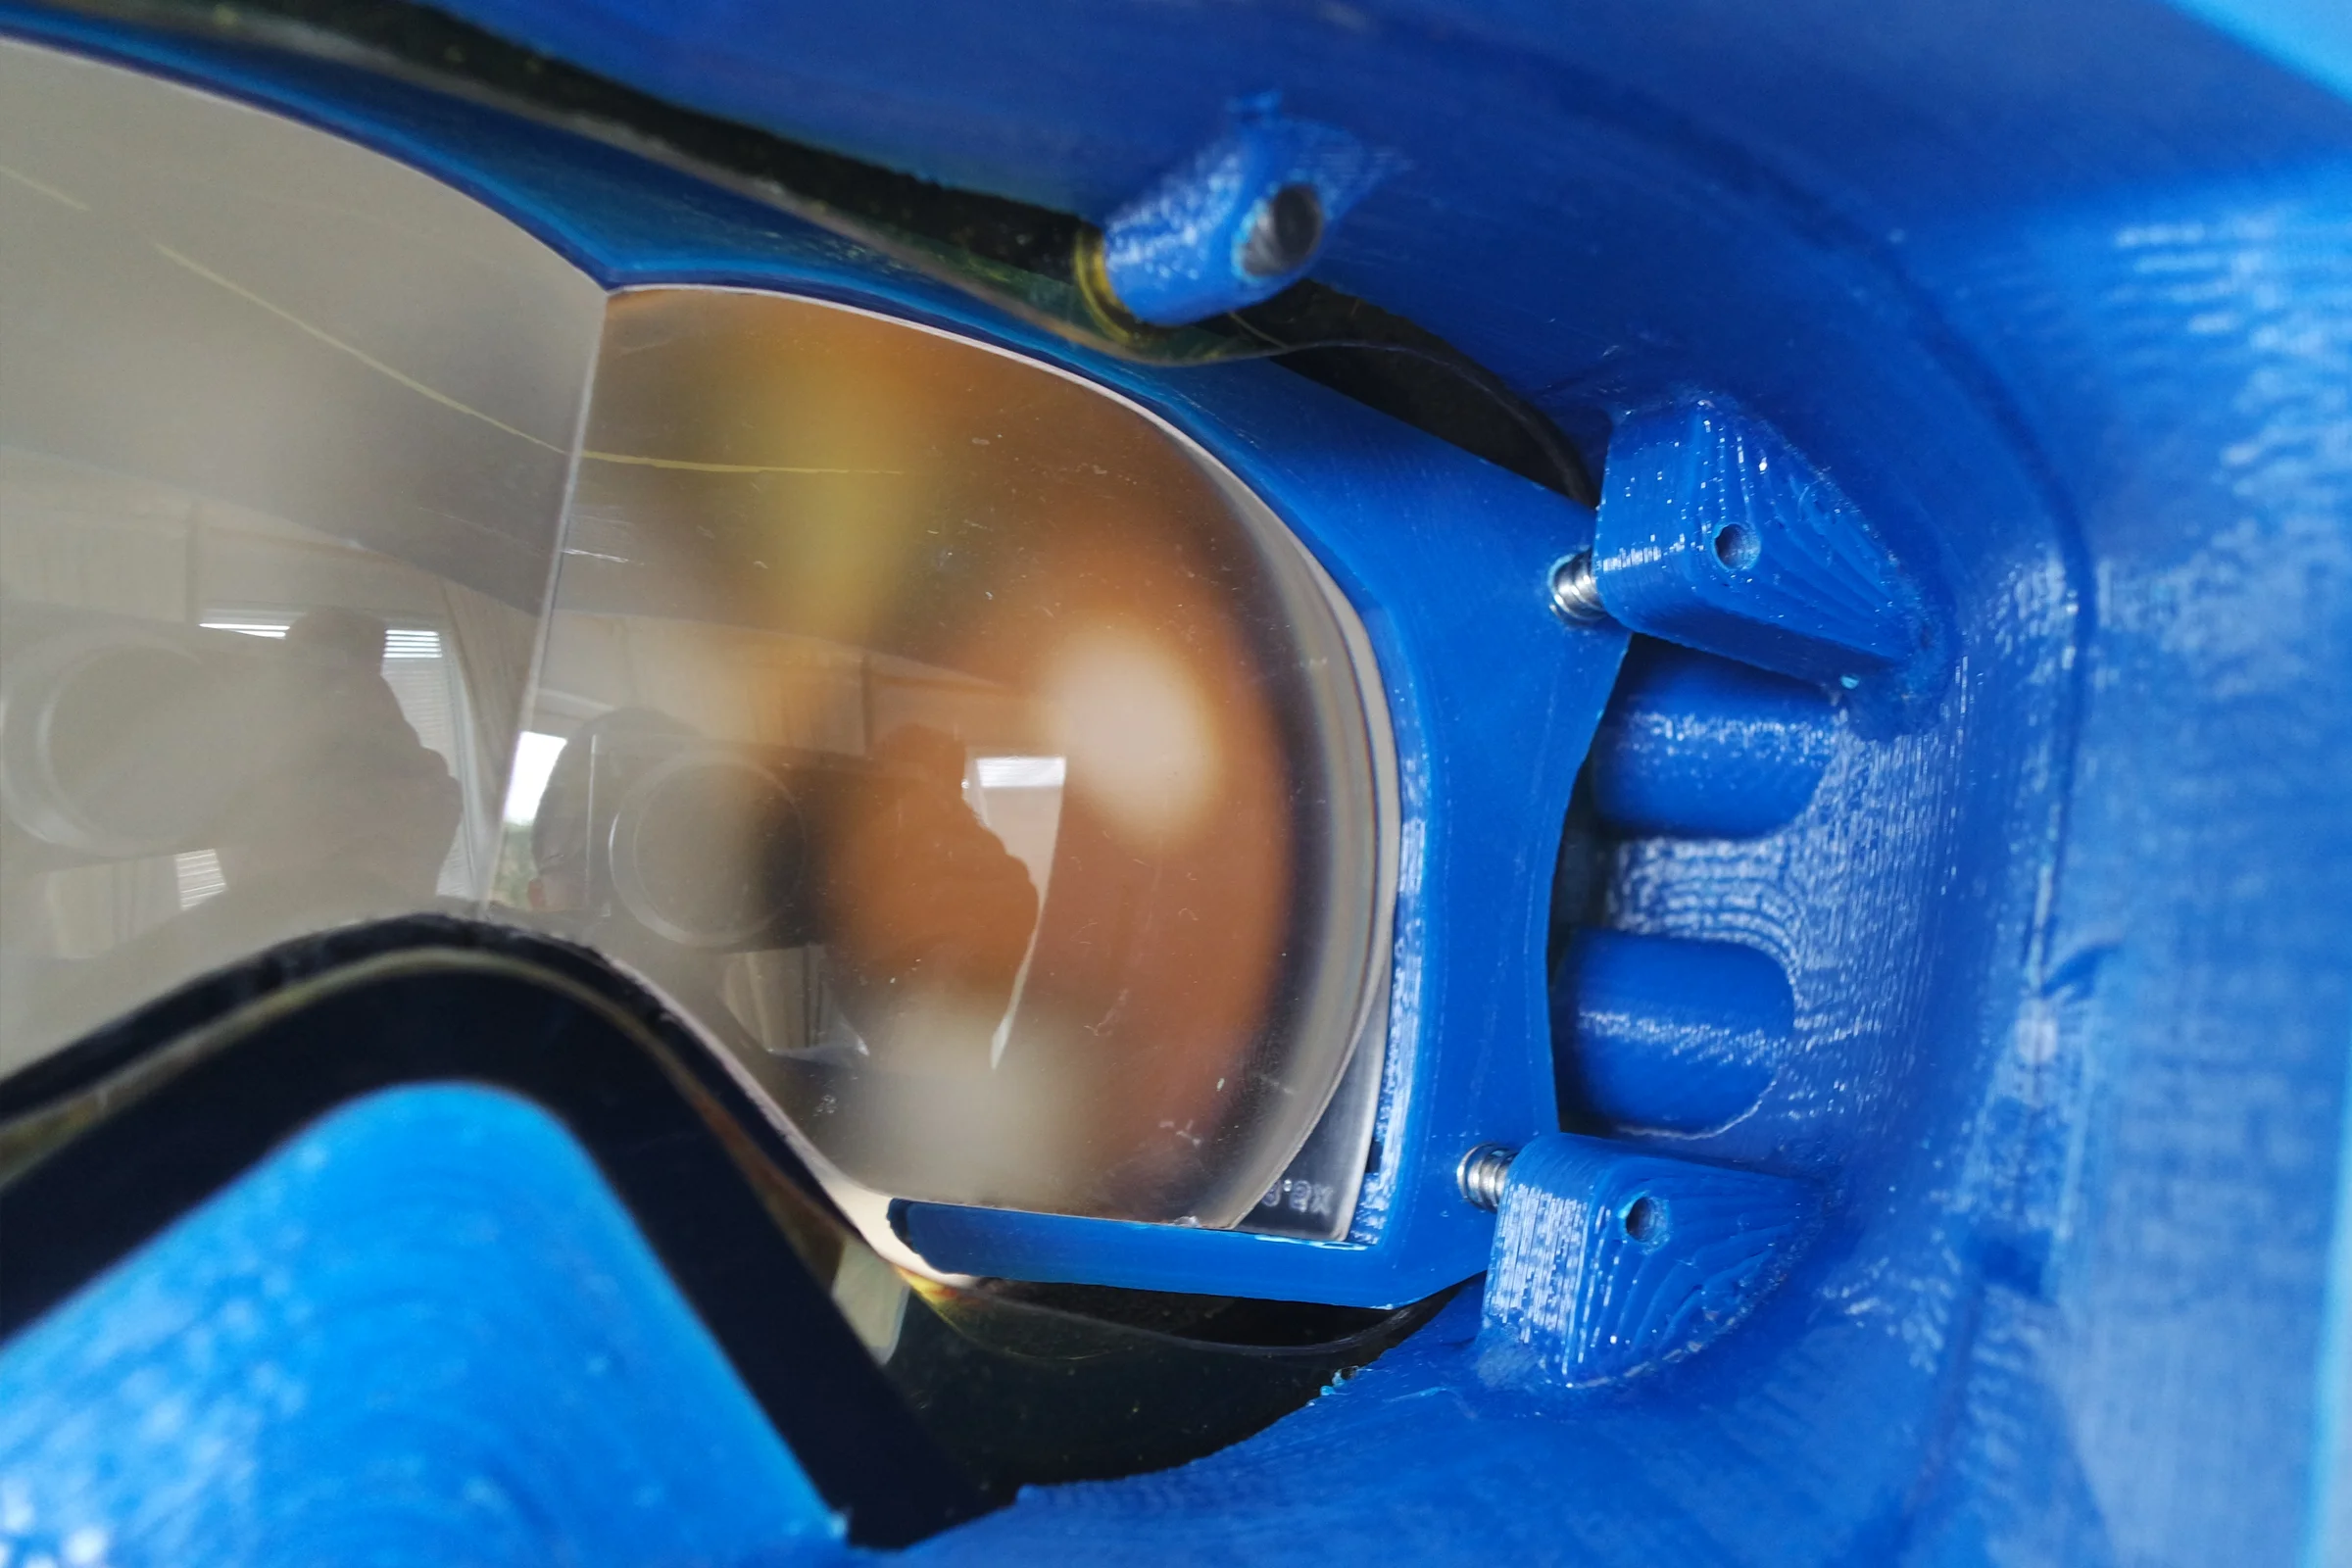
Optics were next. Short focal distance lenses were needed to keep the headset compact enough to actually wear. I tried cutting and bonding magnifying glass lenses together but the bond line never looked clean. Then I found head-mounted magnifiers — the kind used for fine assembly work — which came pre-built with exactly the double-fused lens I had been making, in multiple magnification levels, cheaper, and better quality. That solved the optics problem.
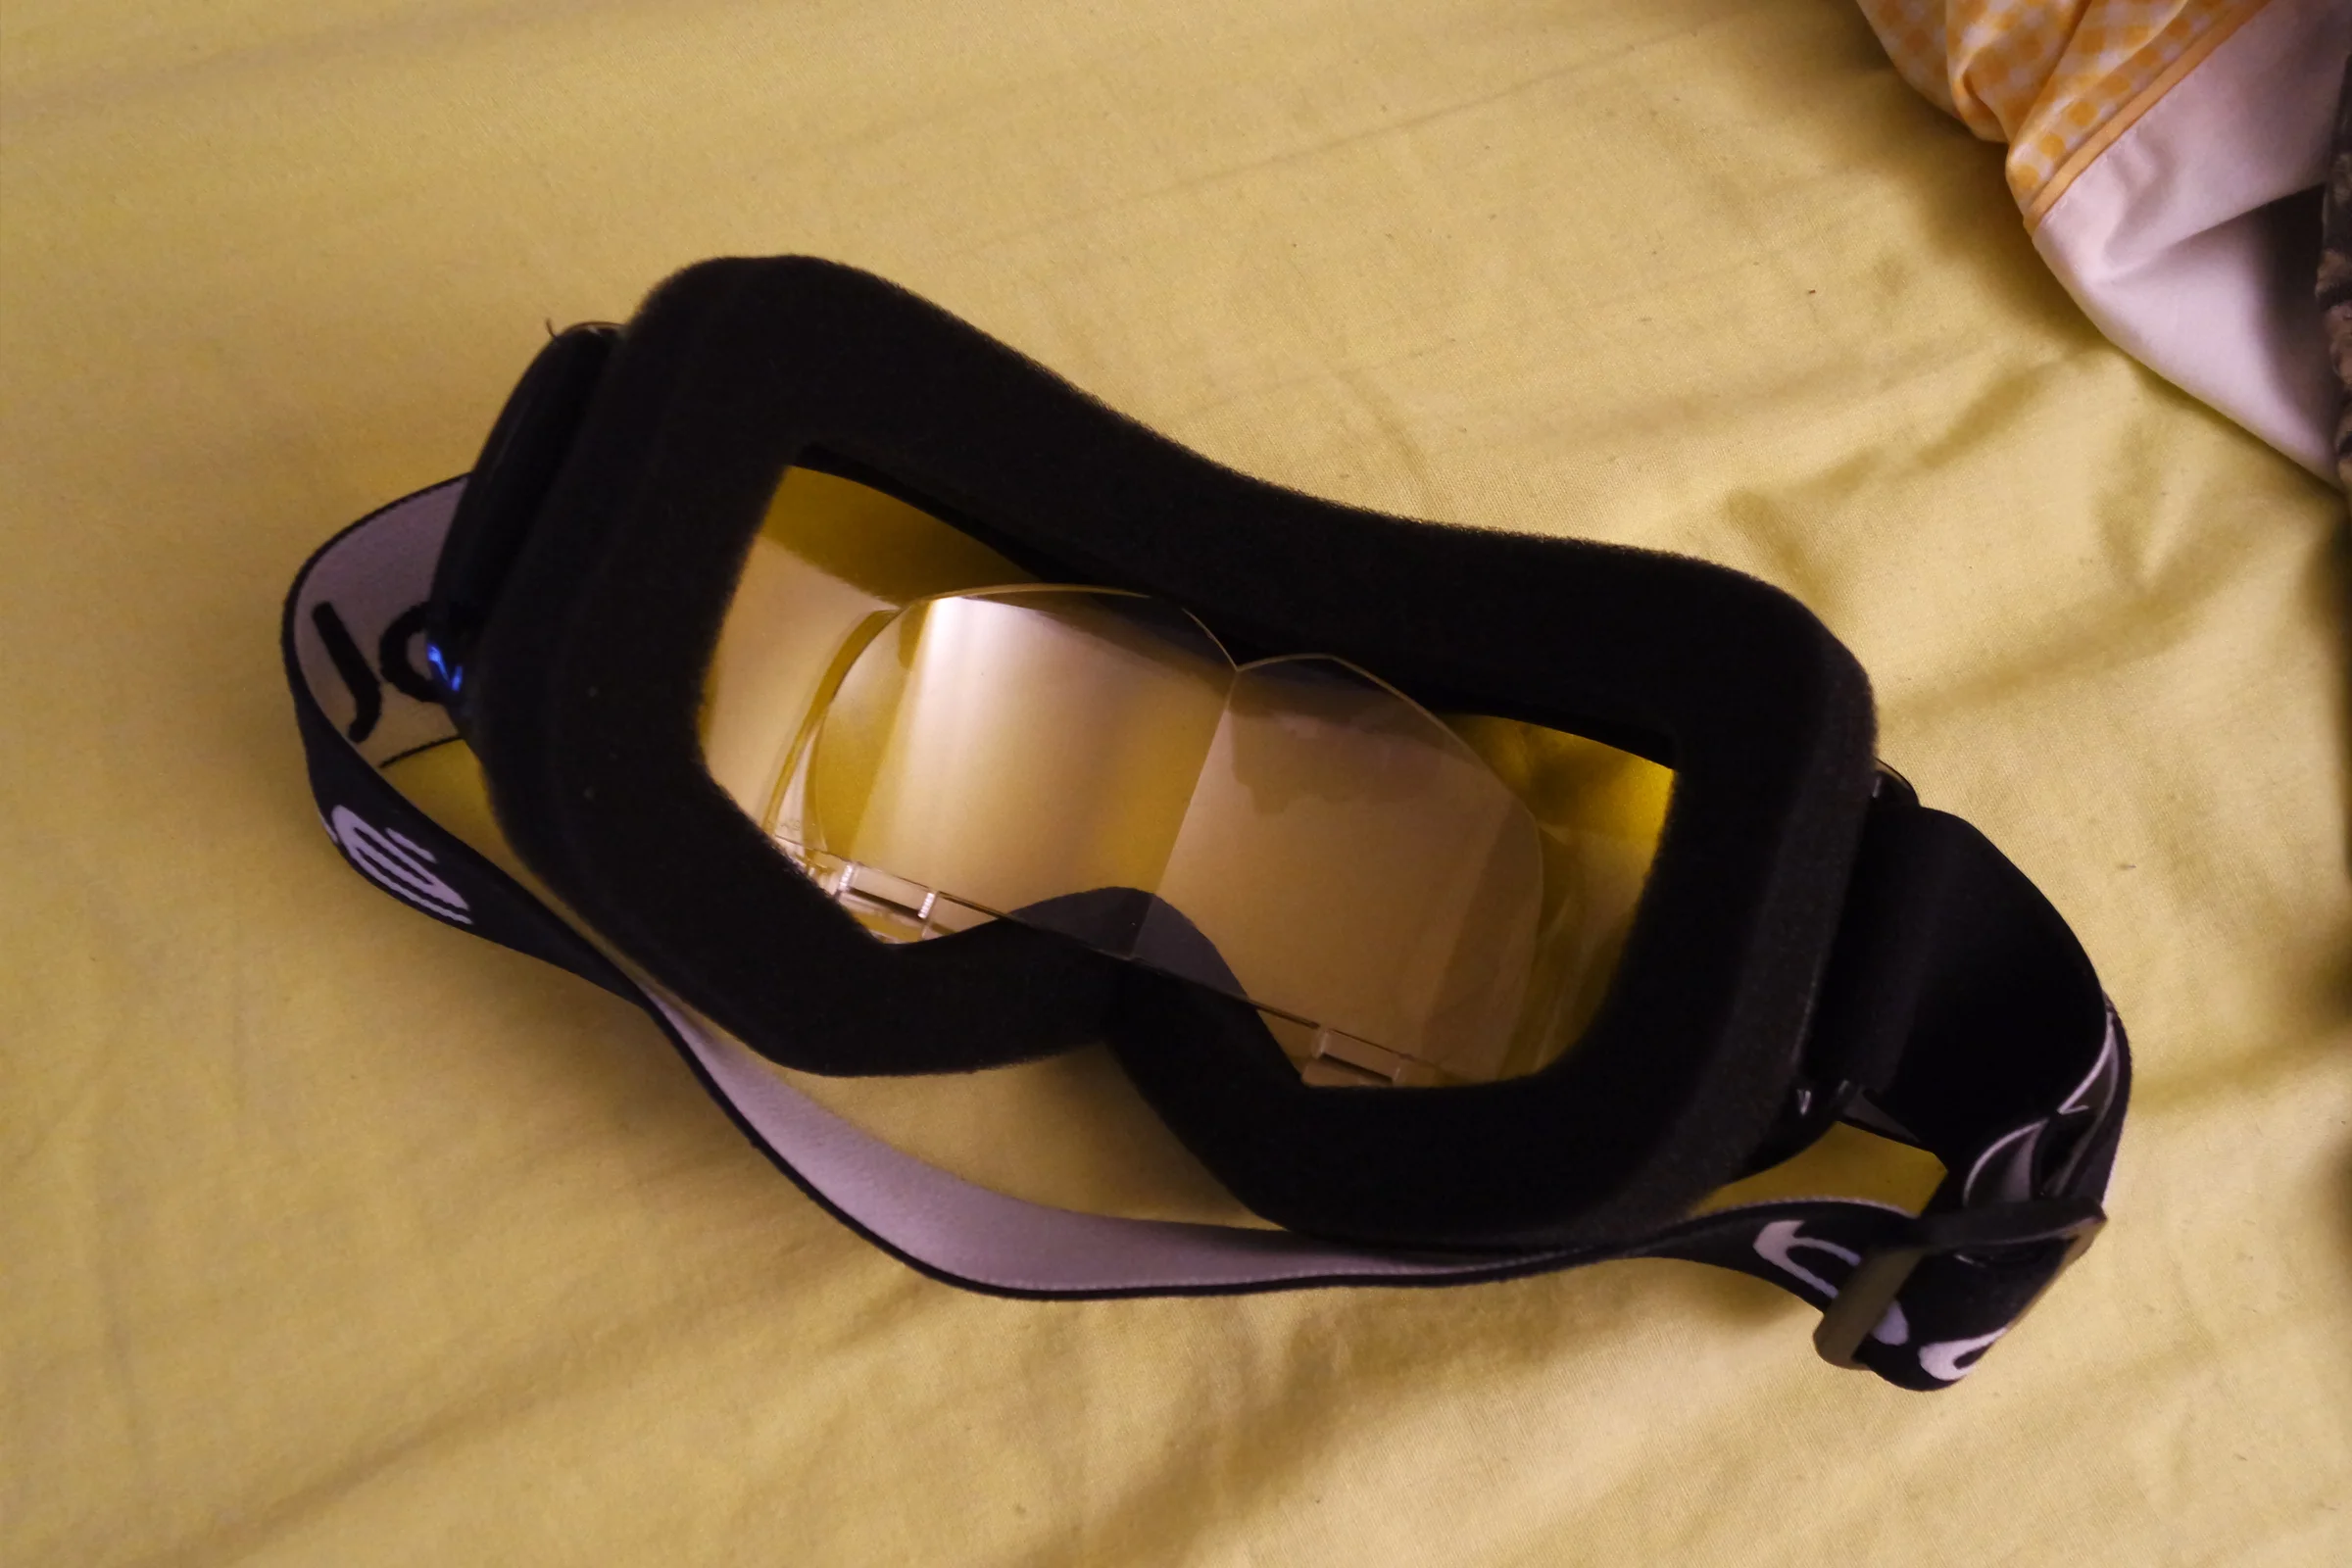
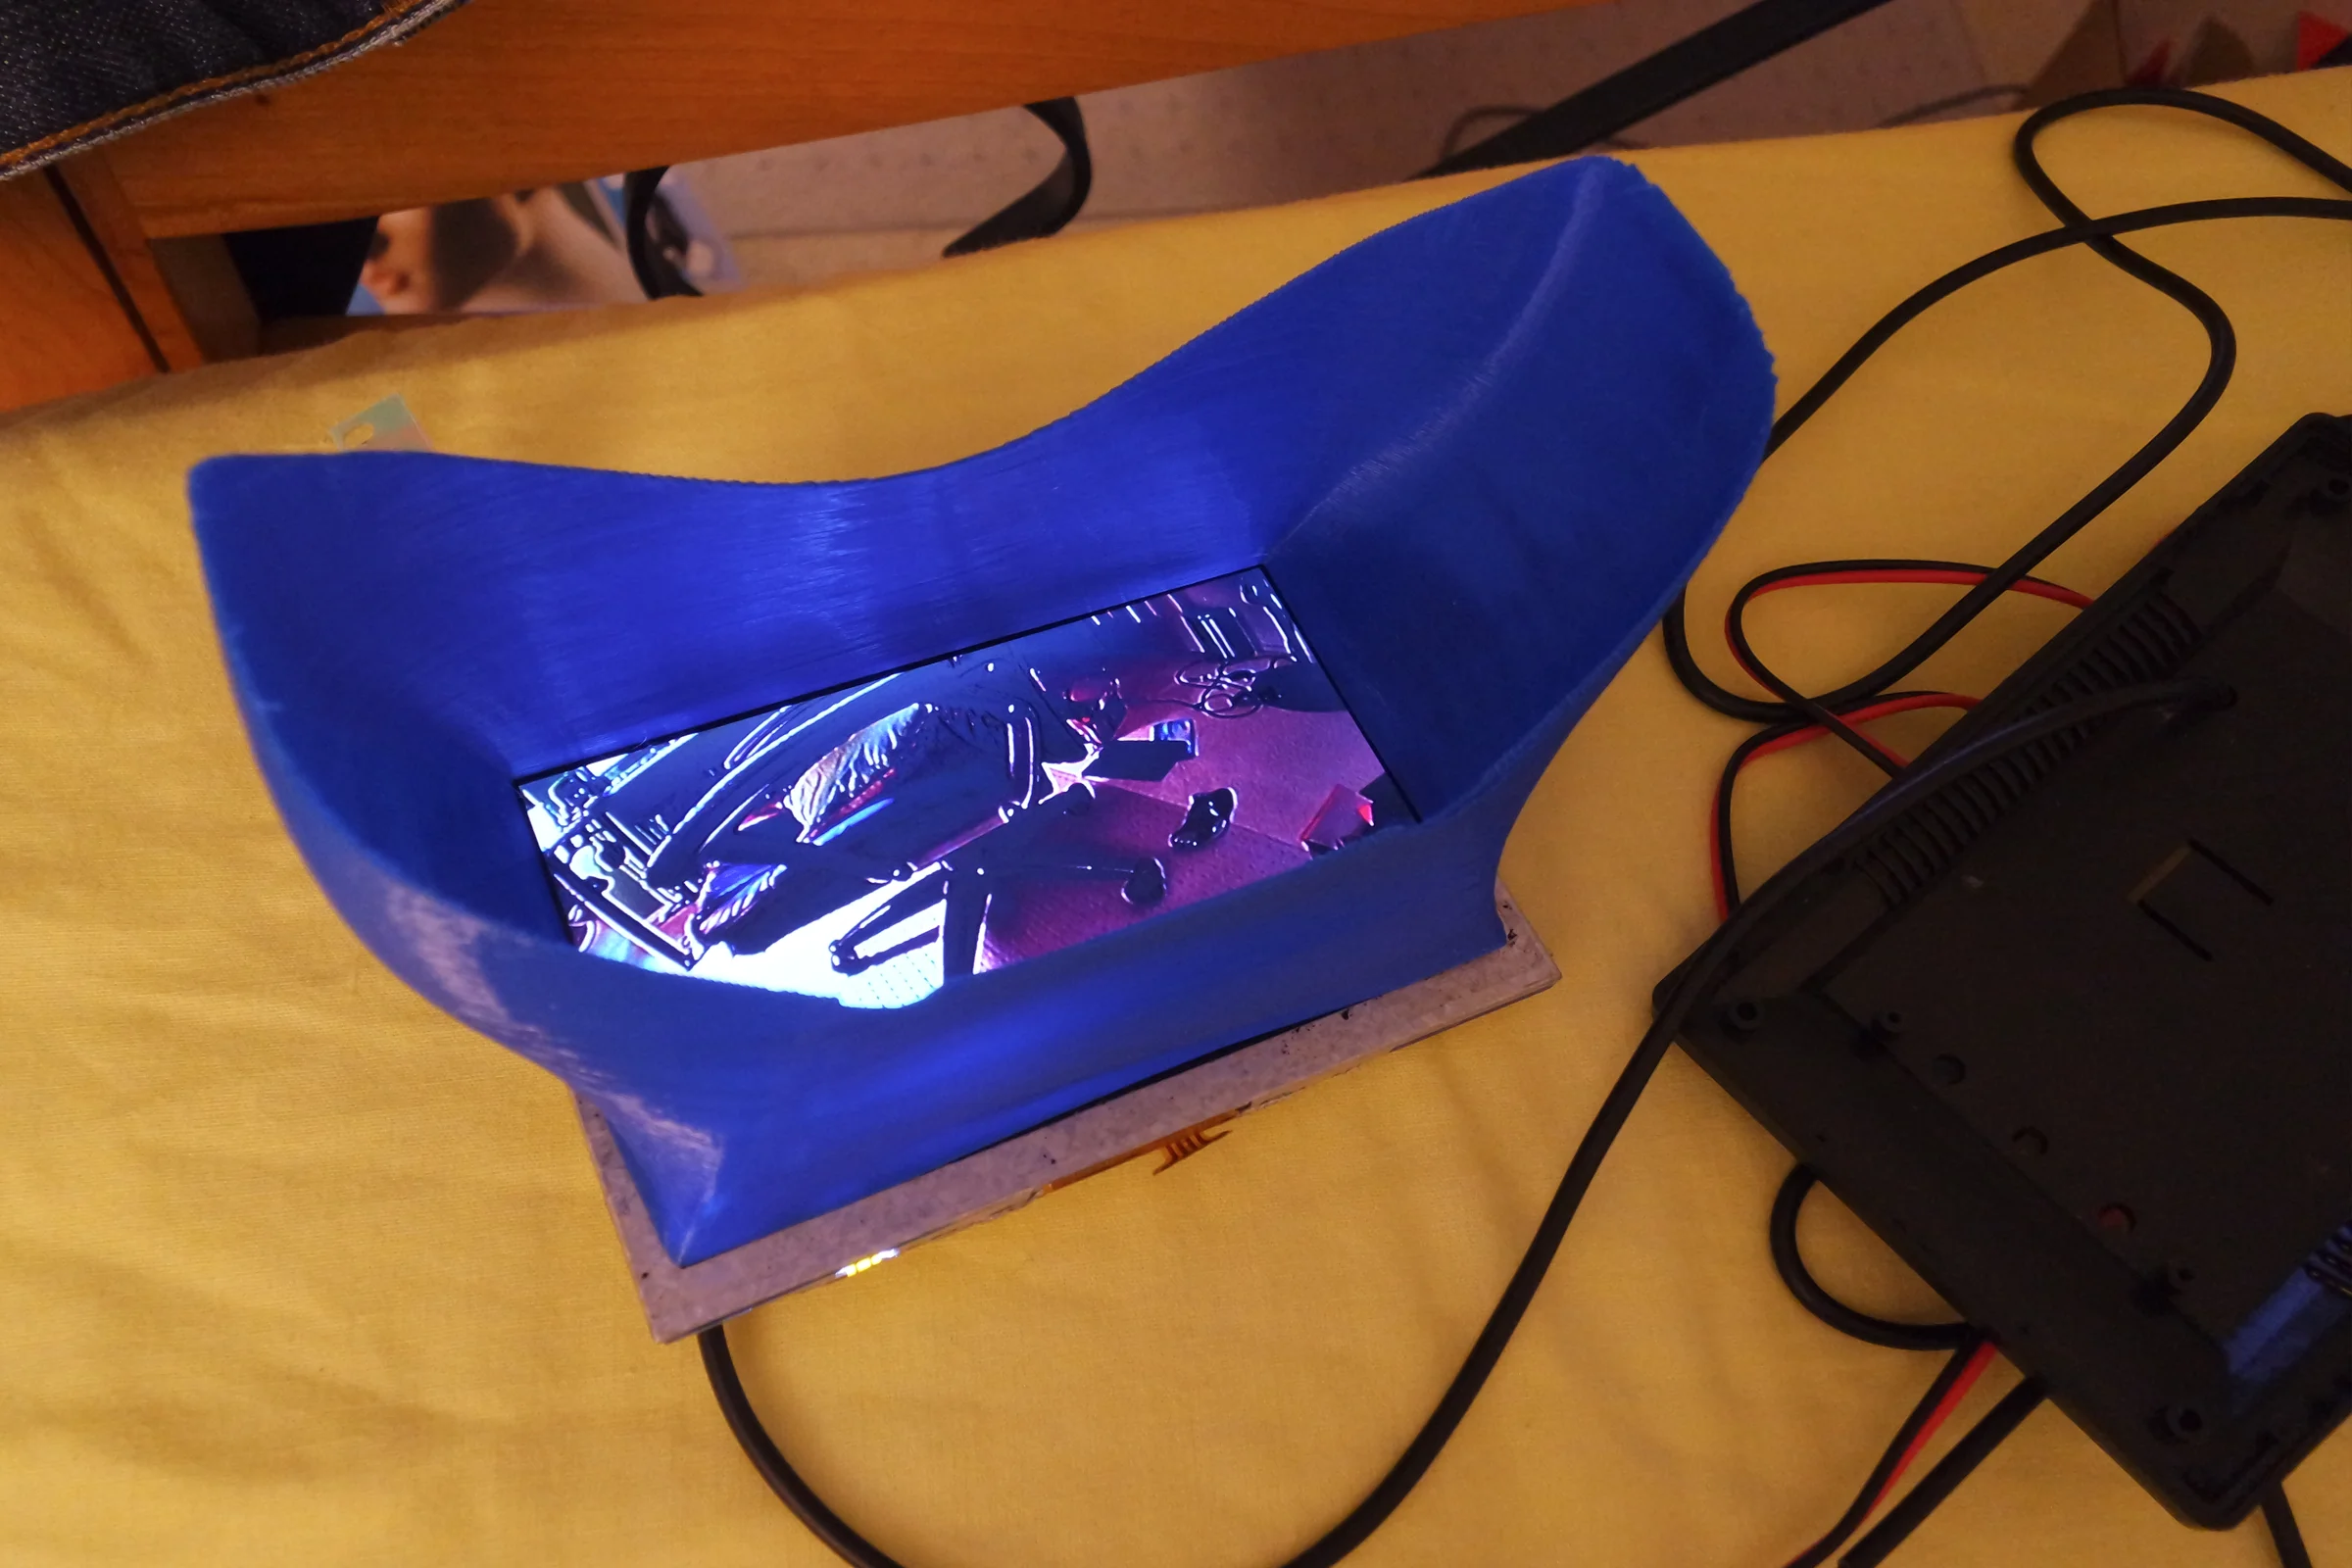

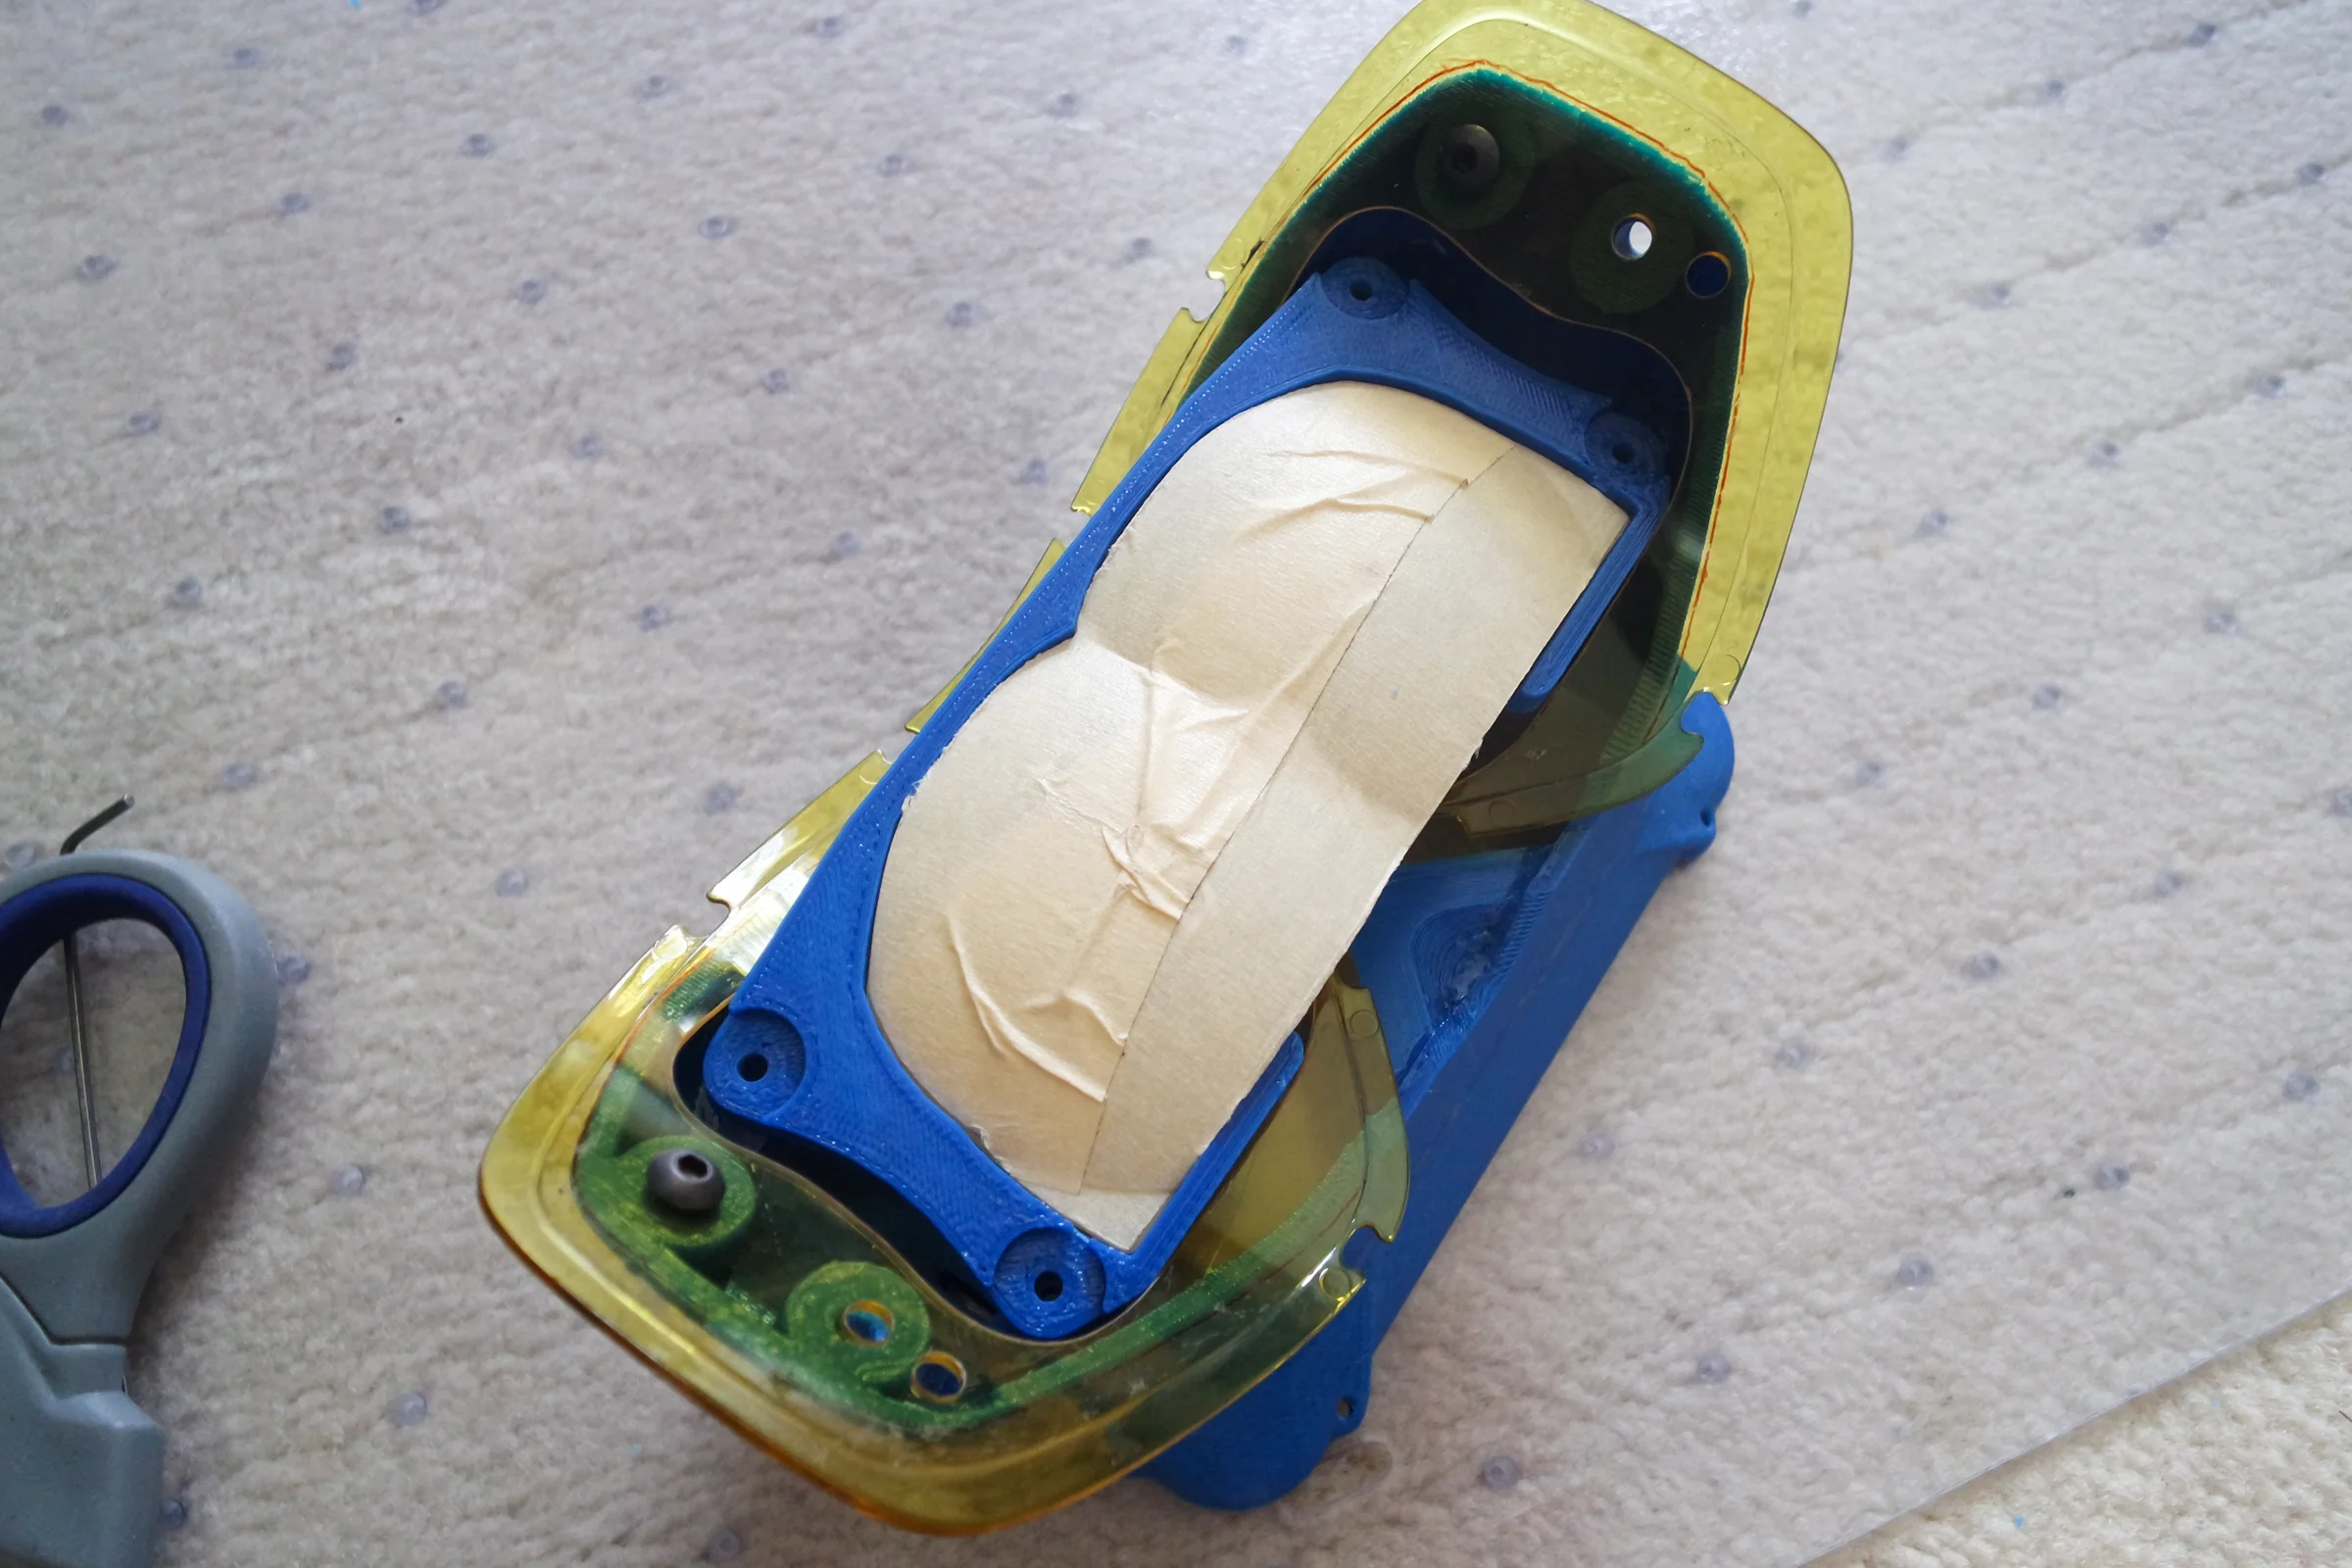
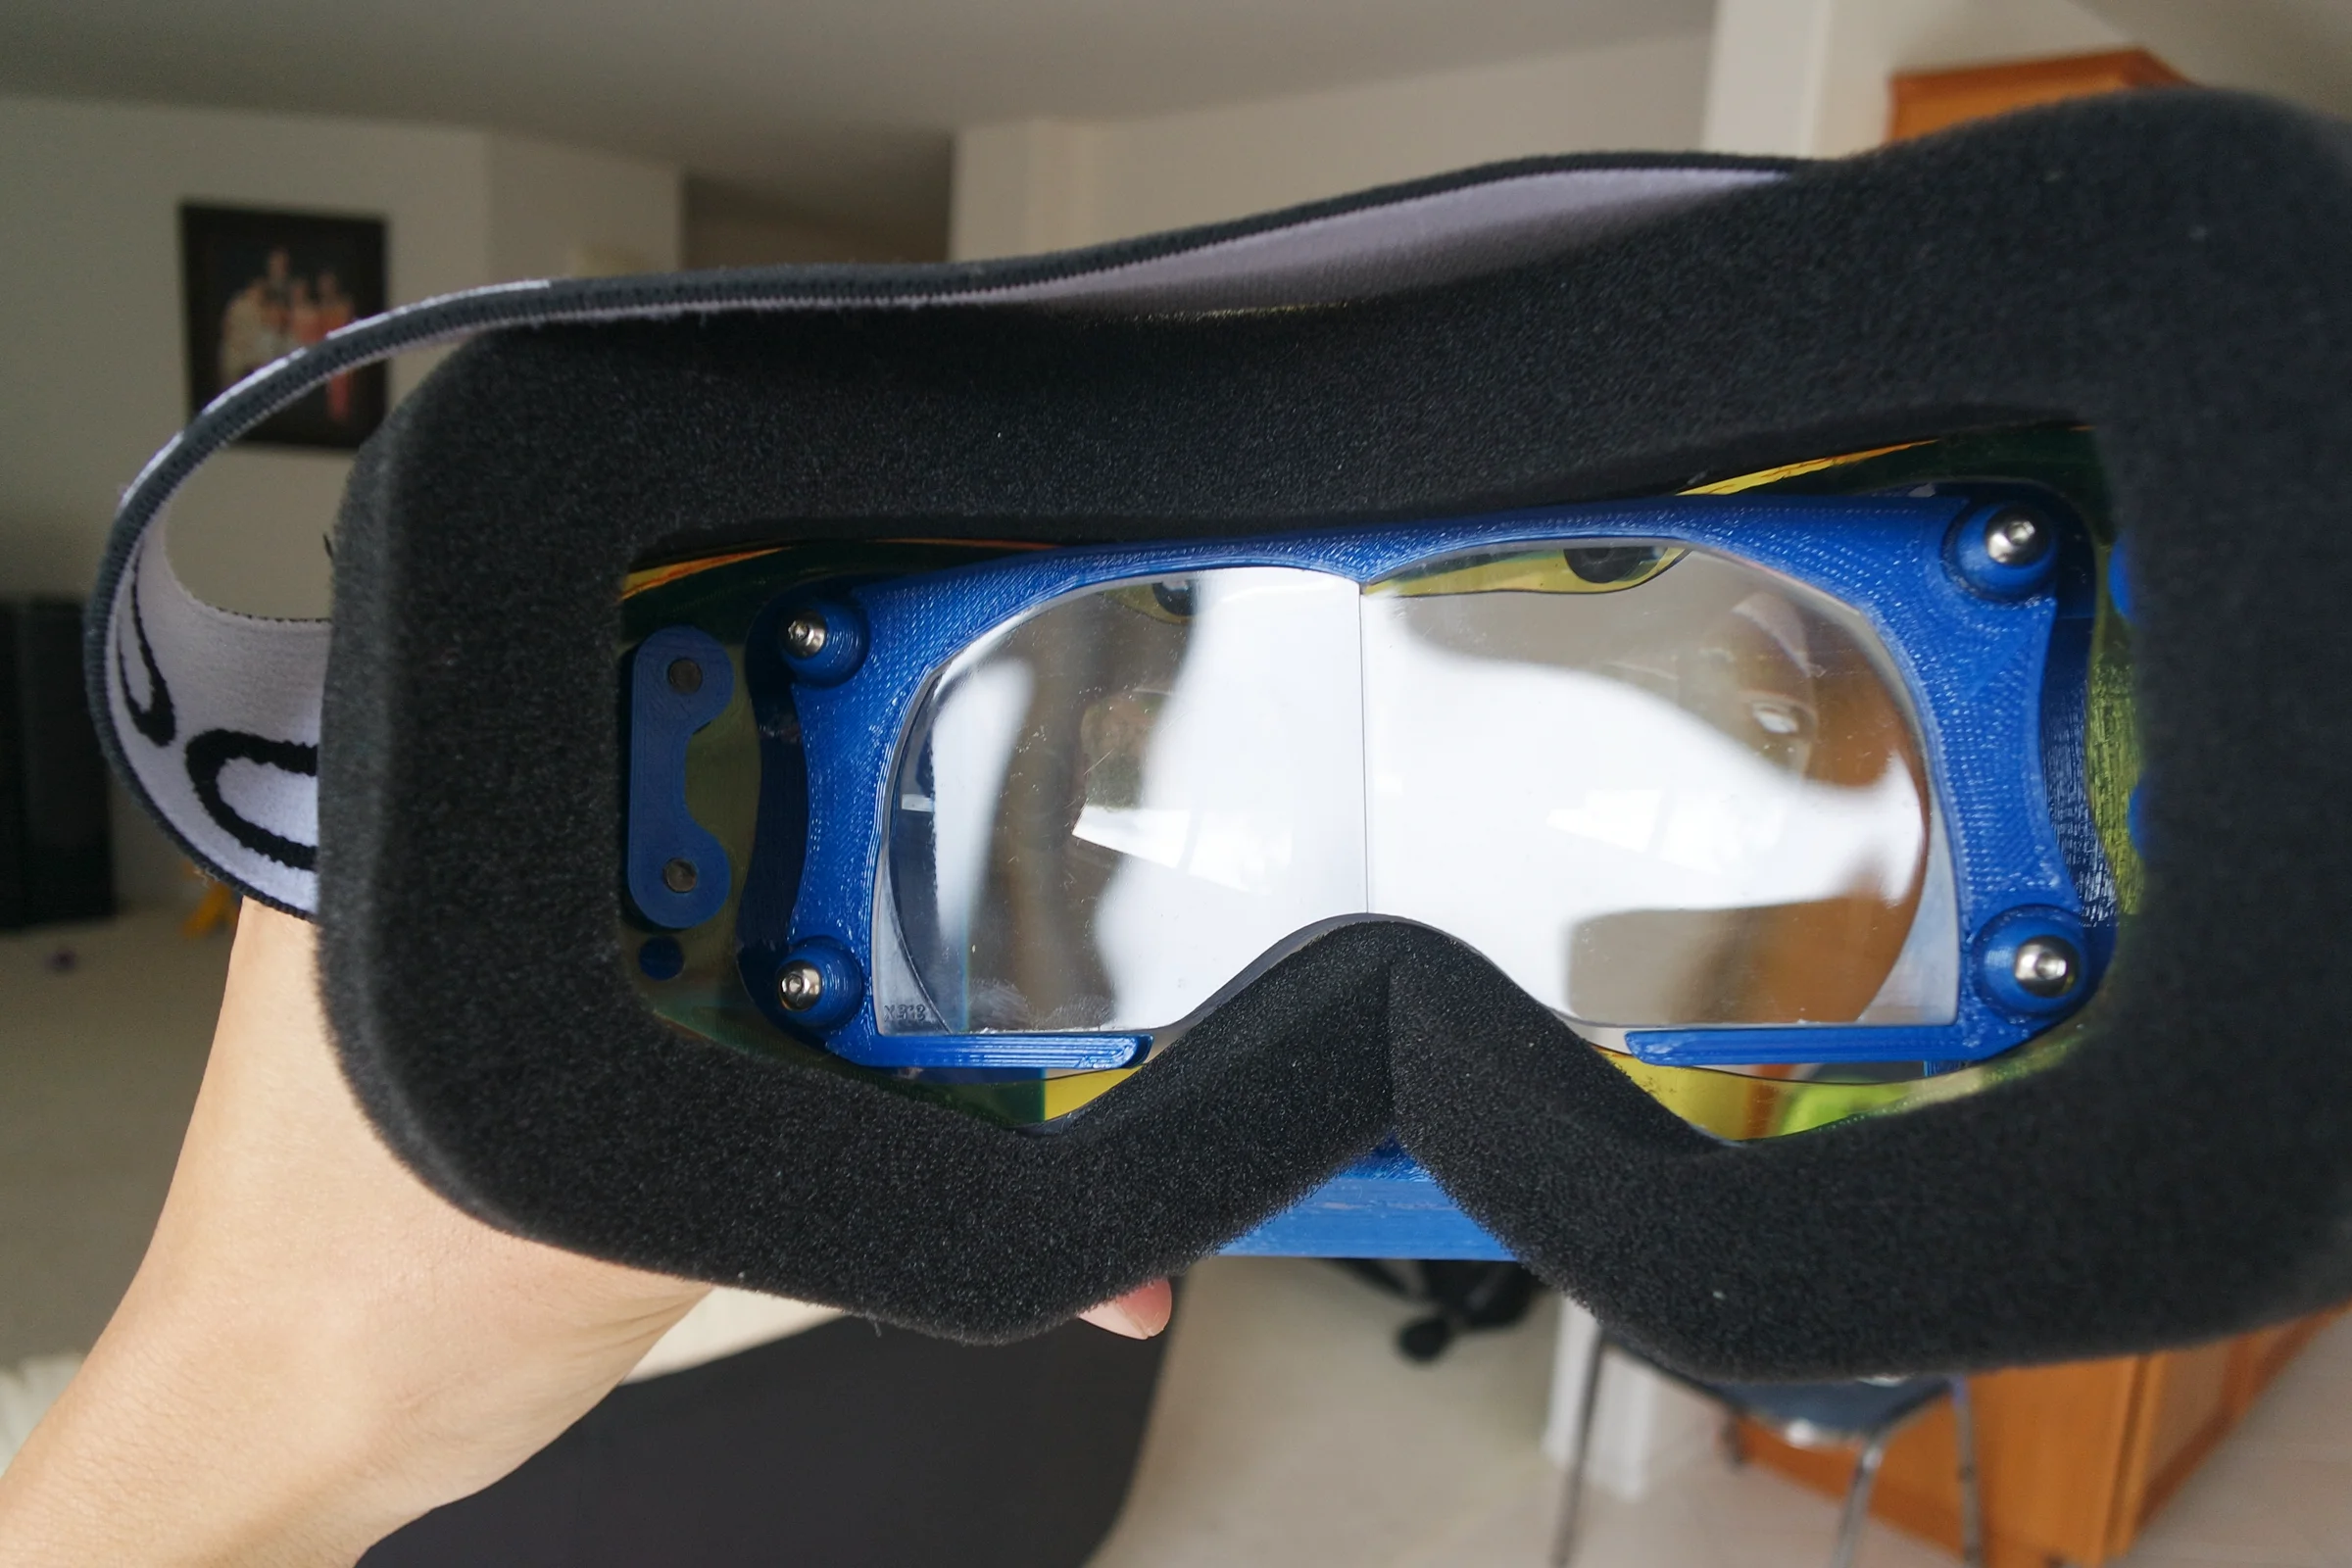
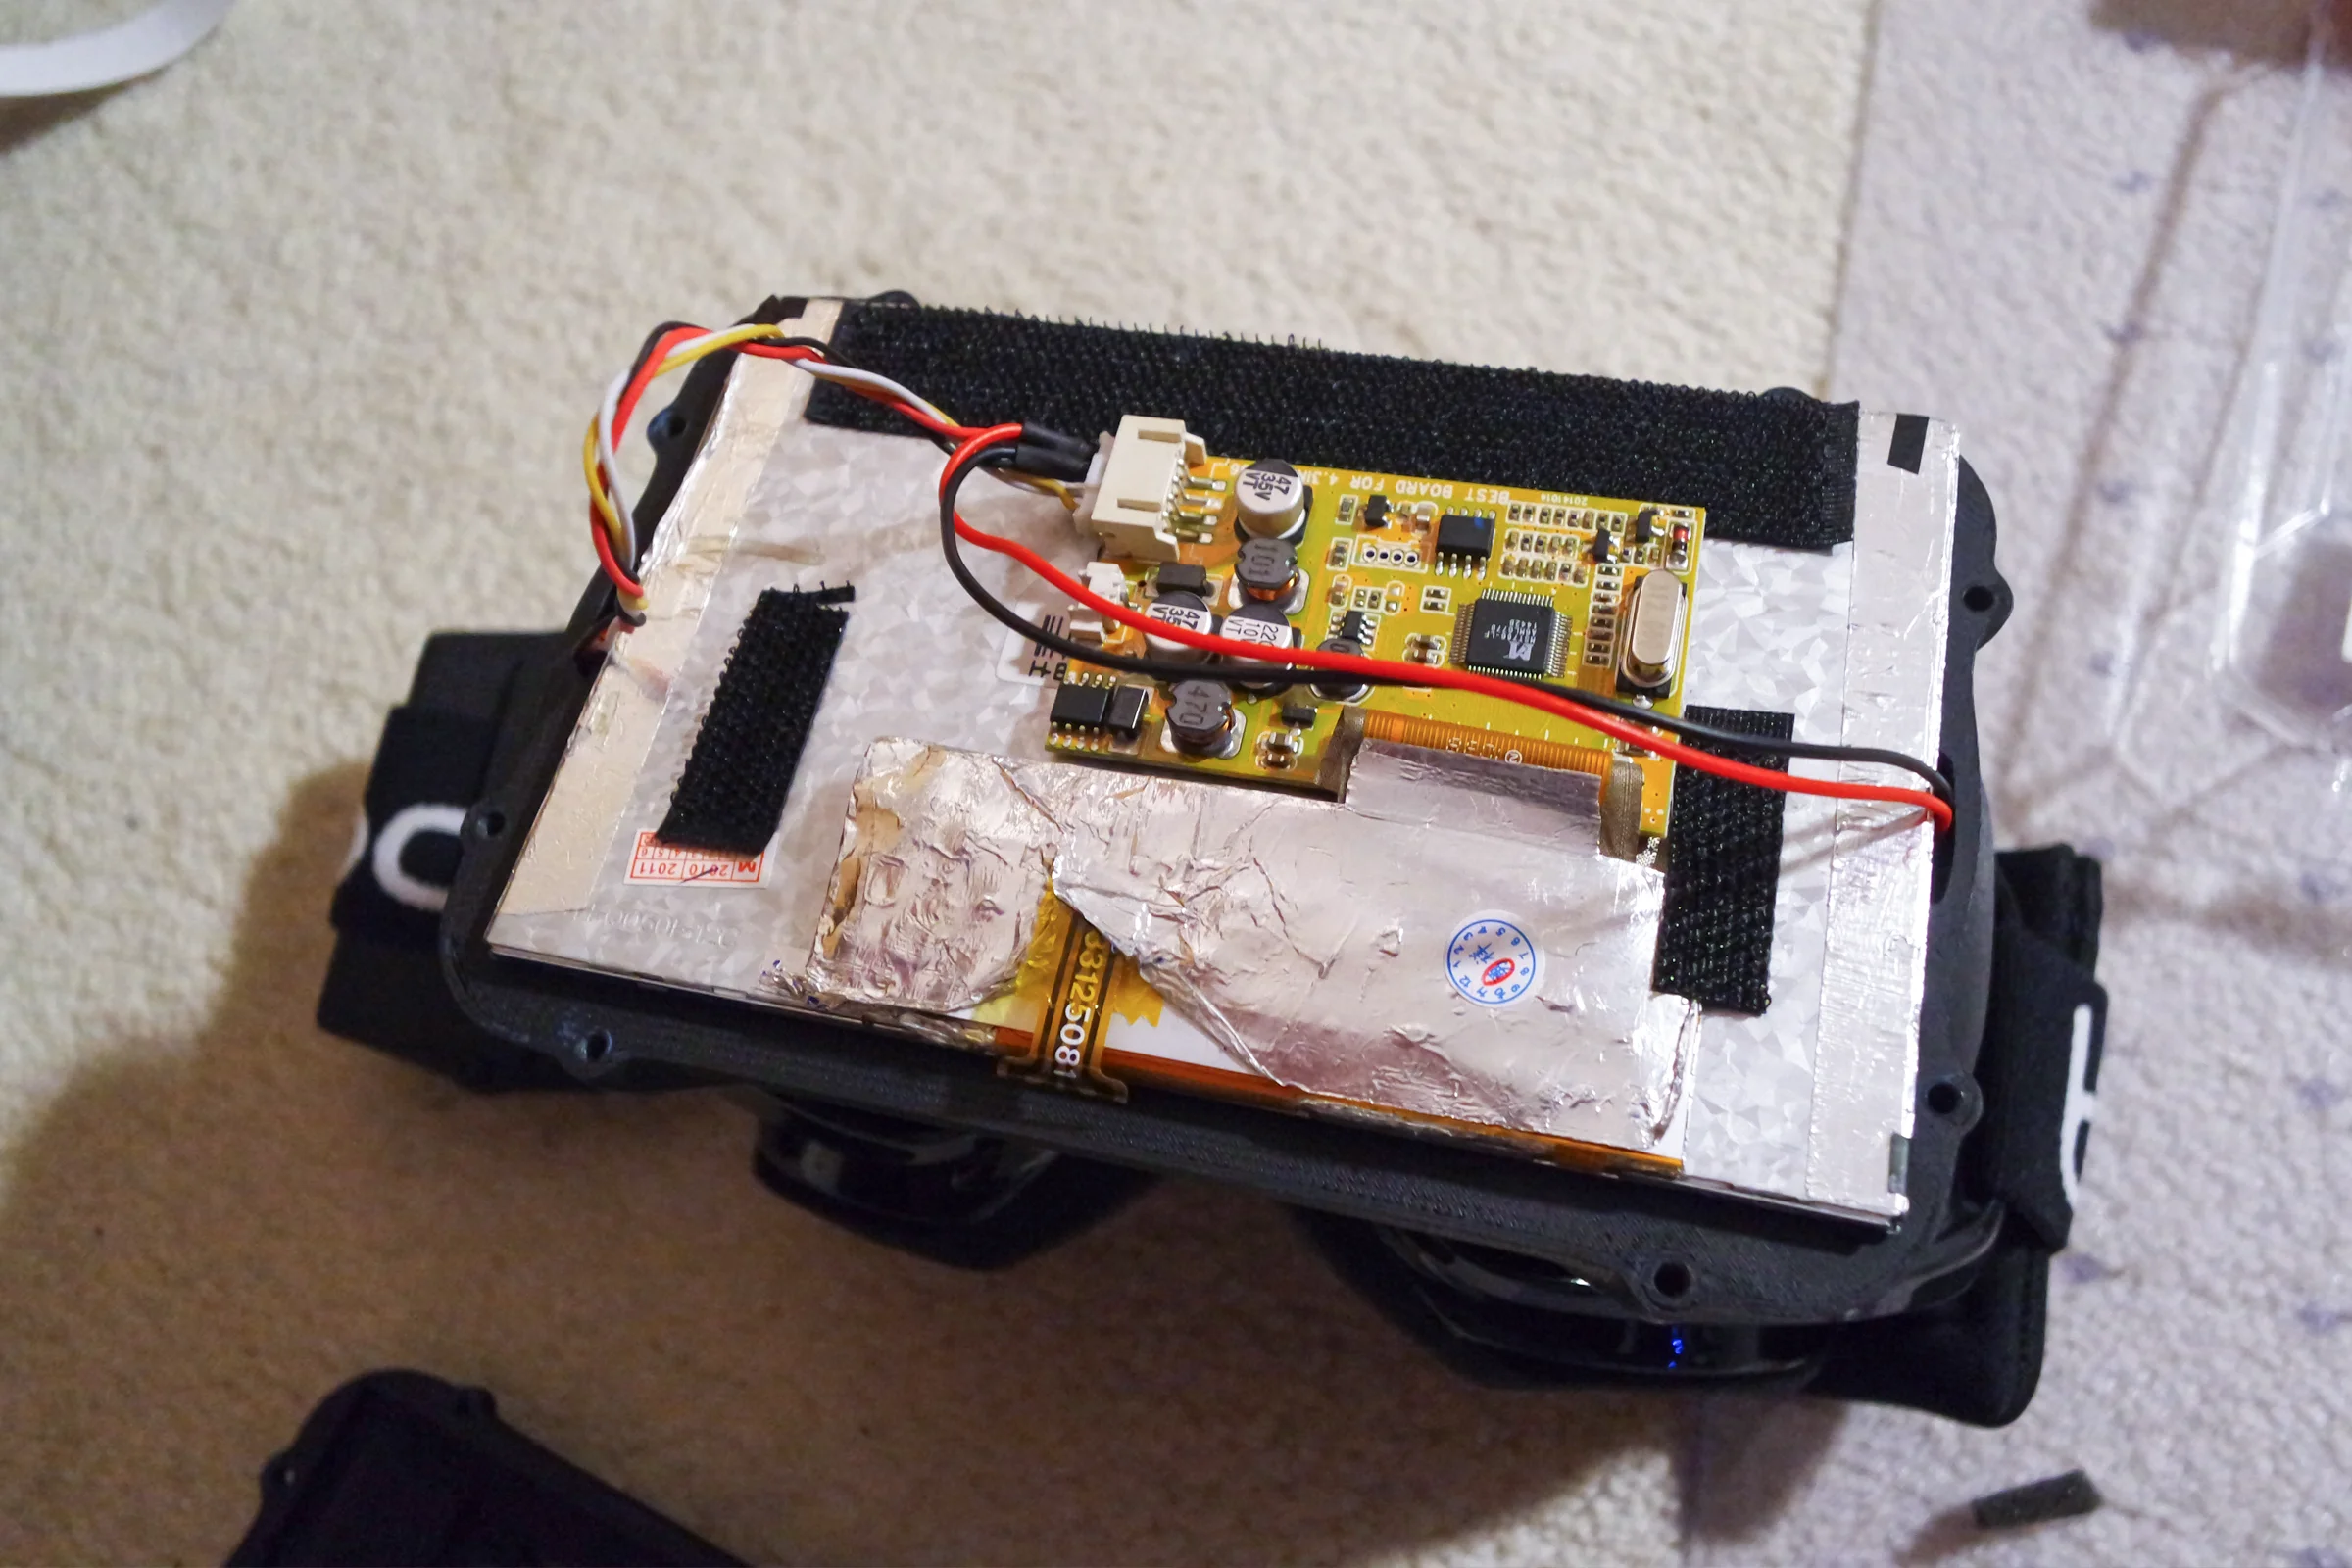
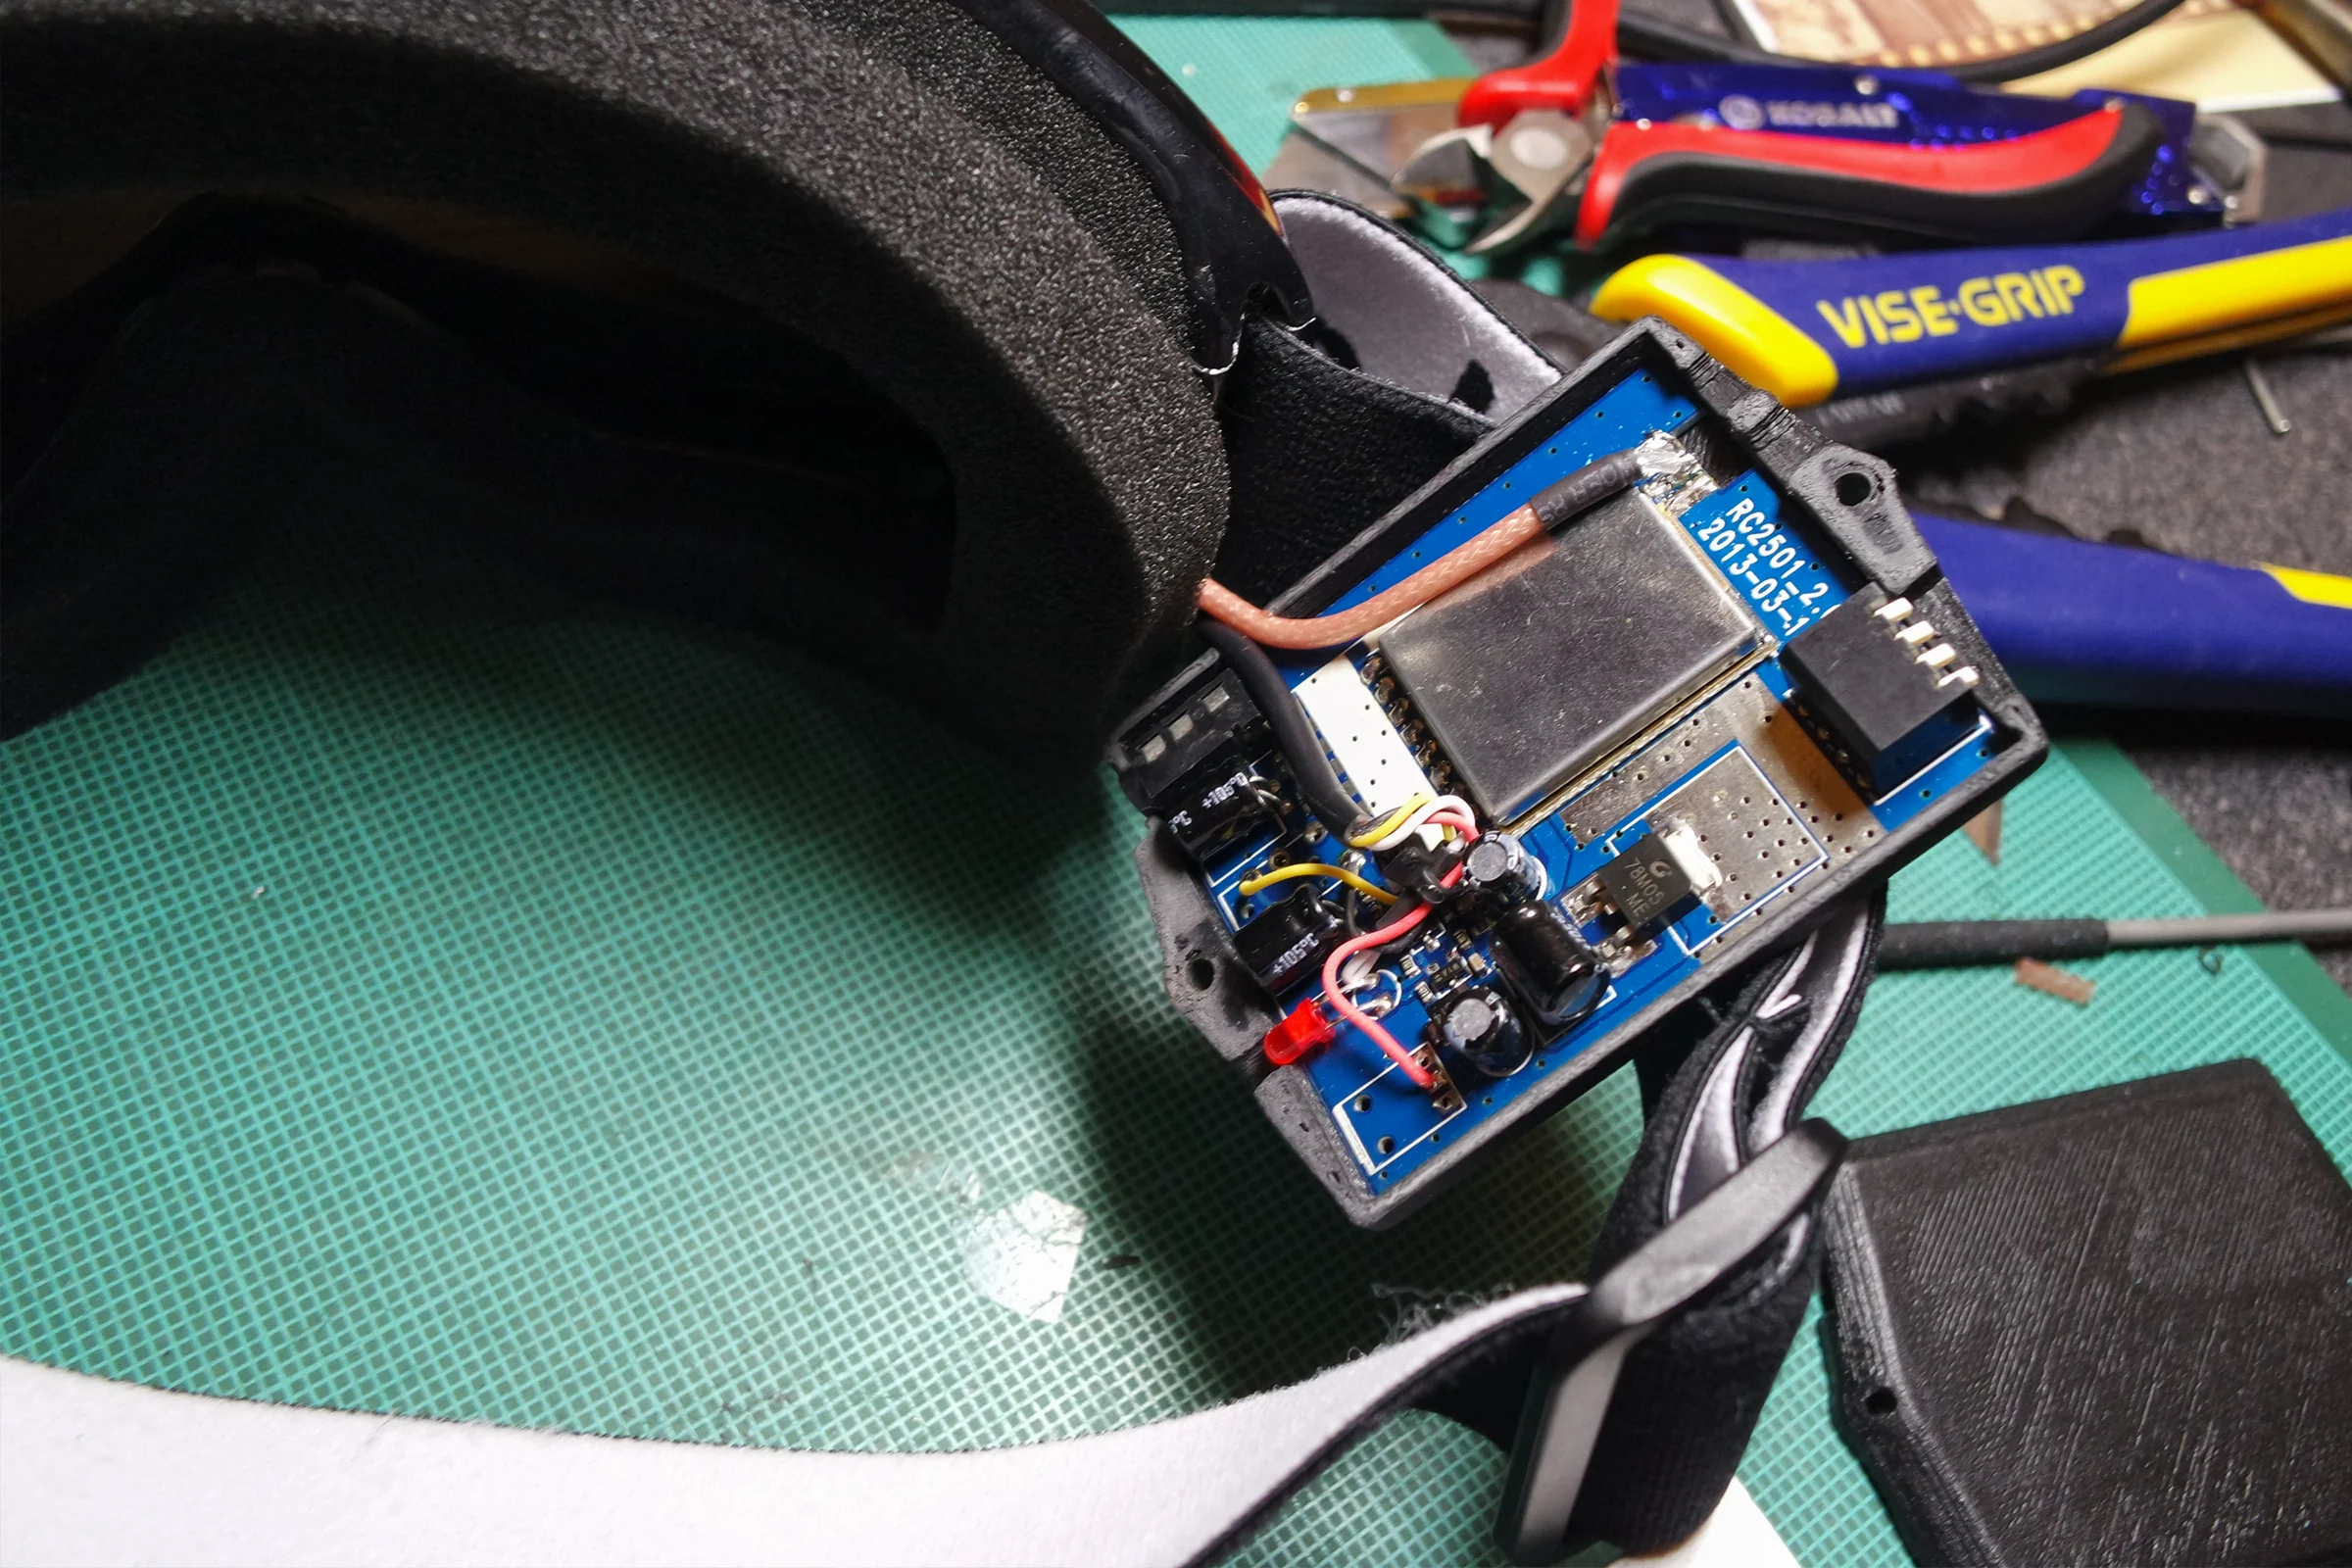
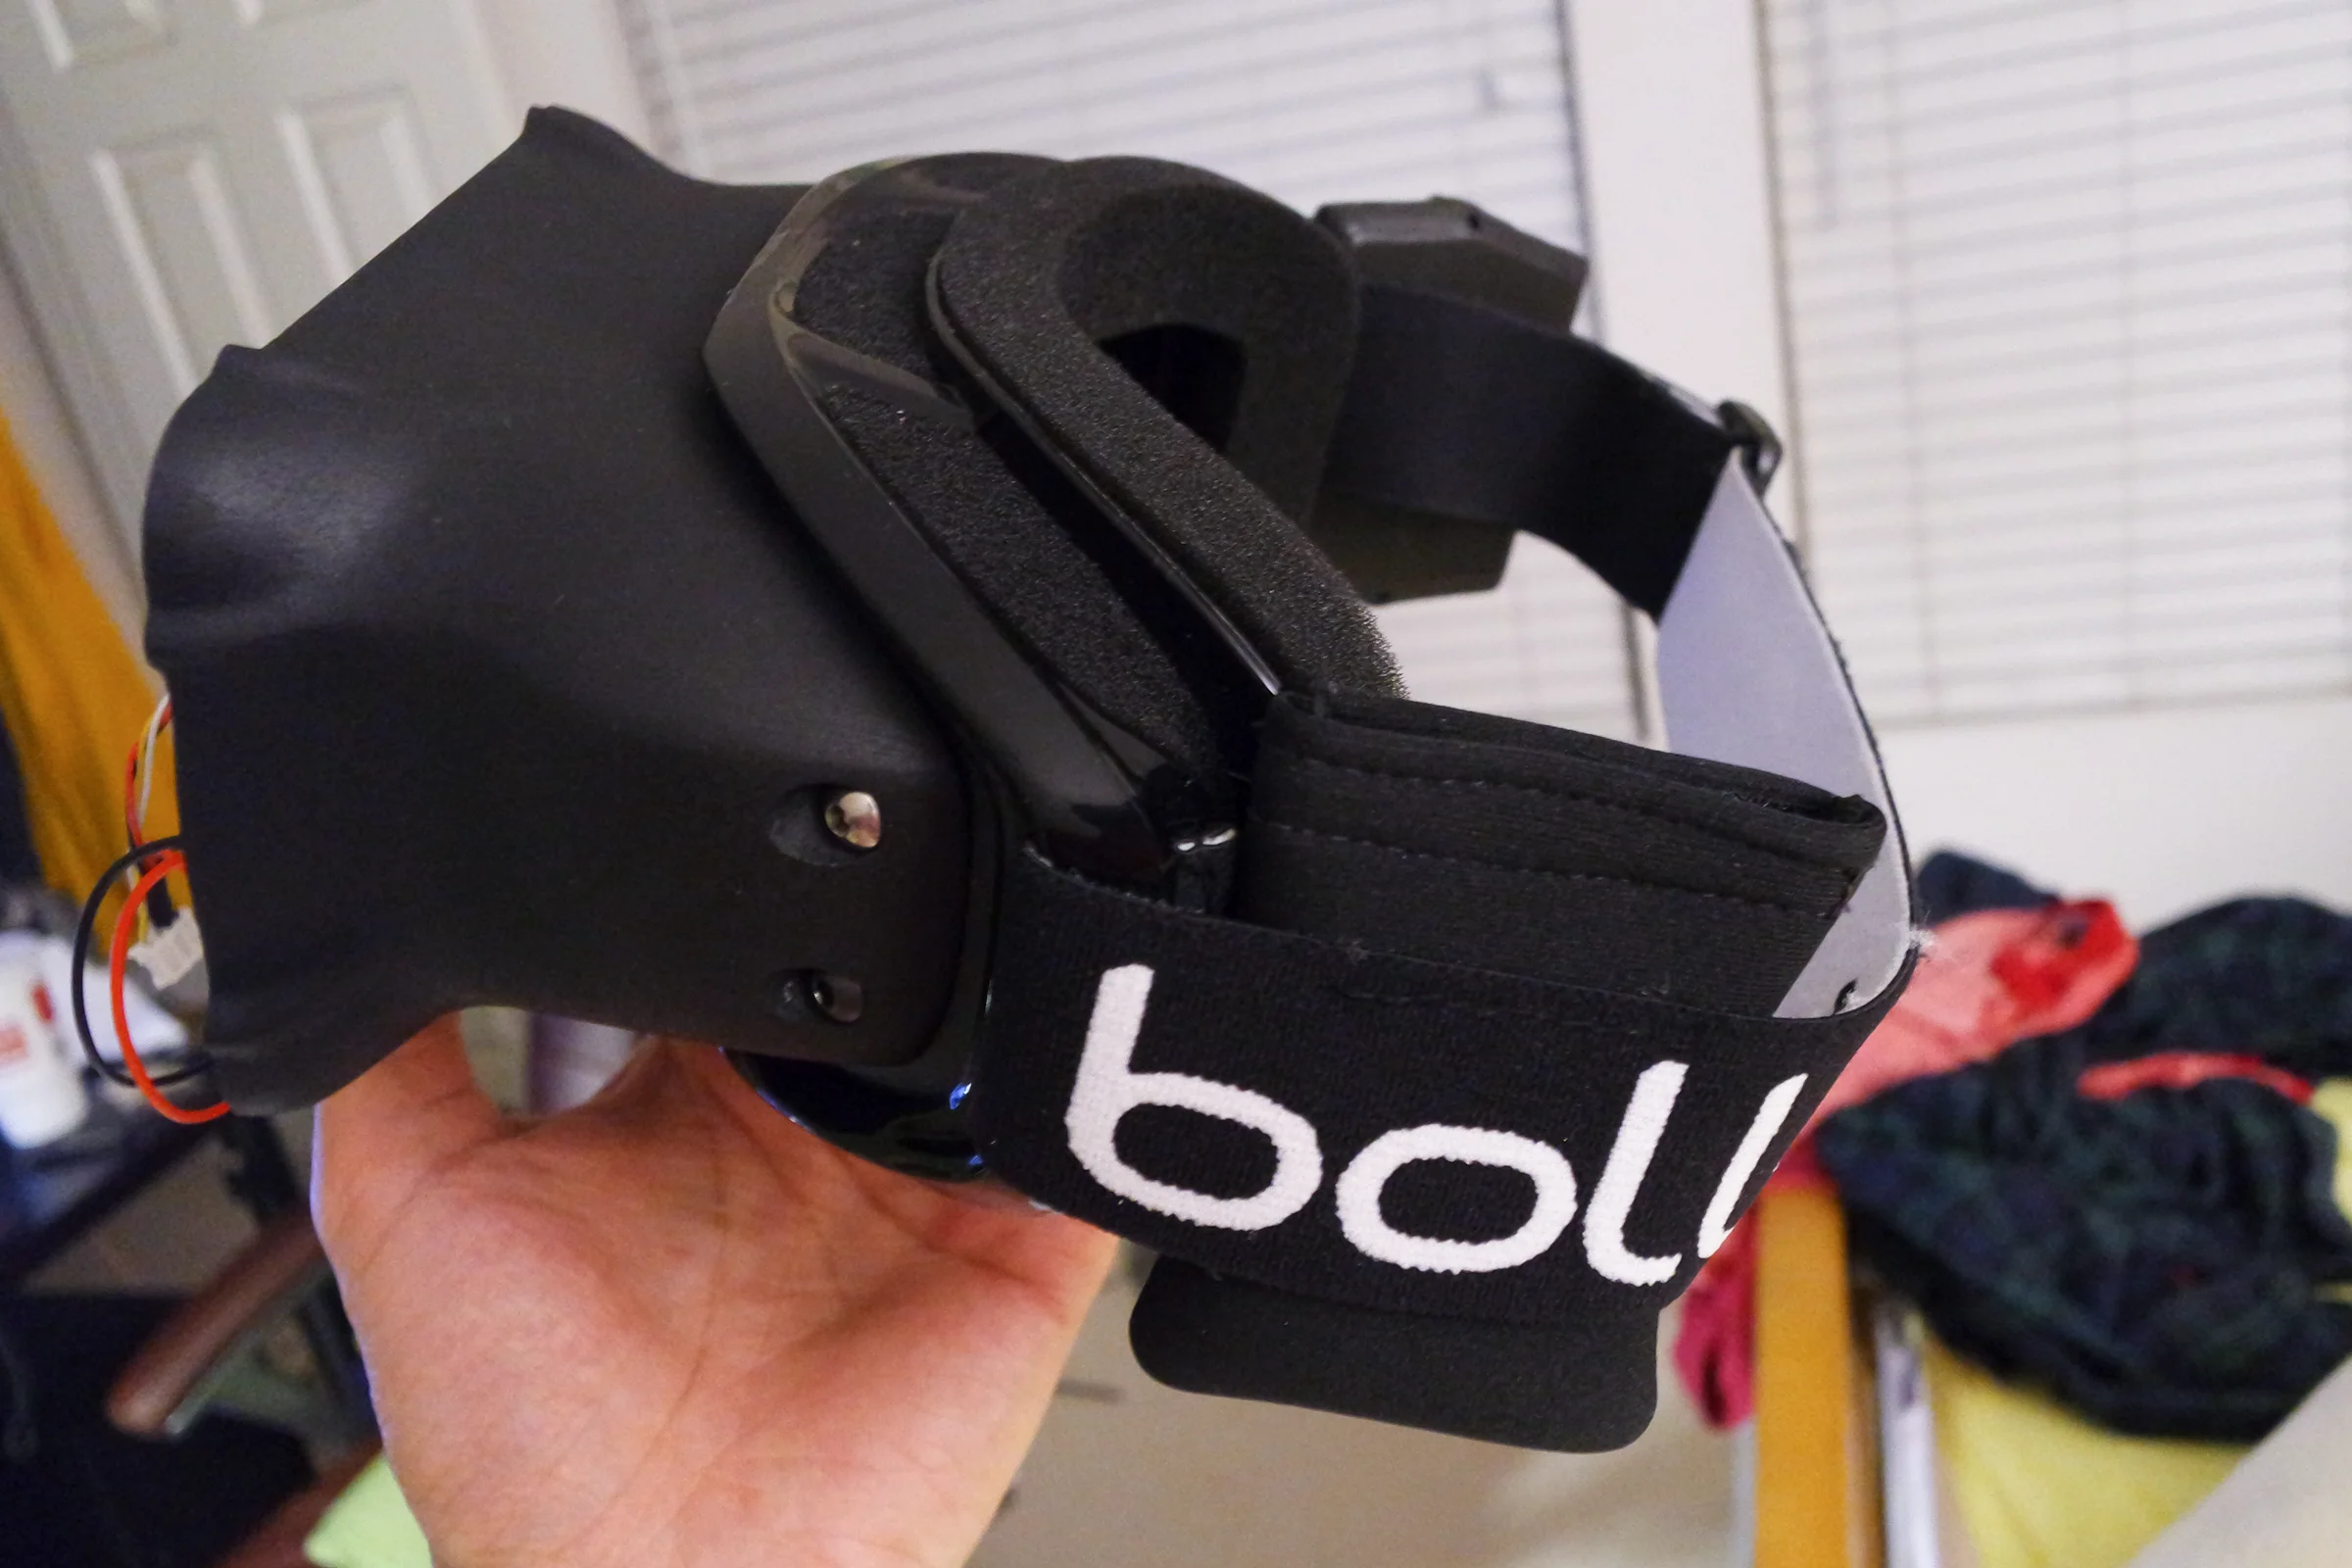
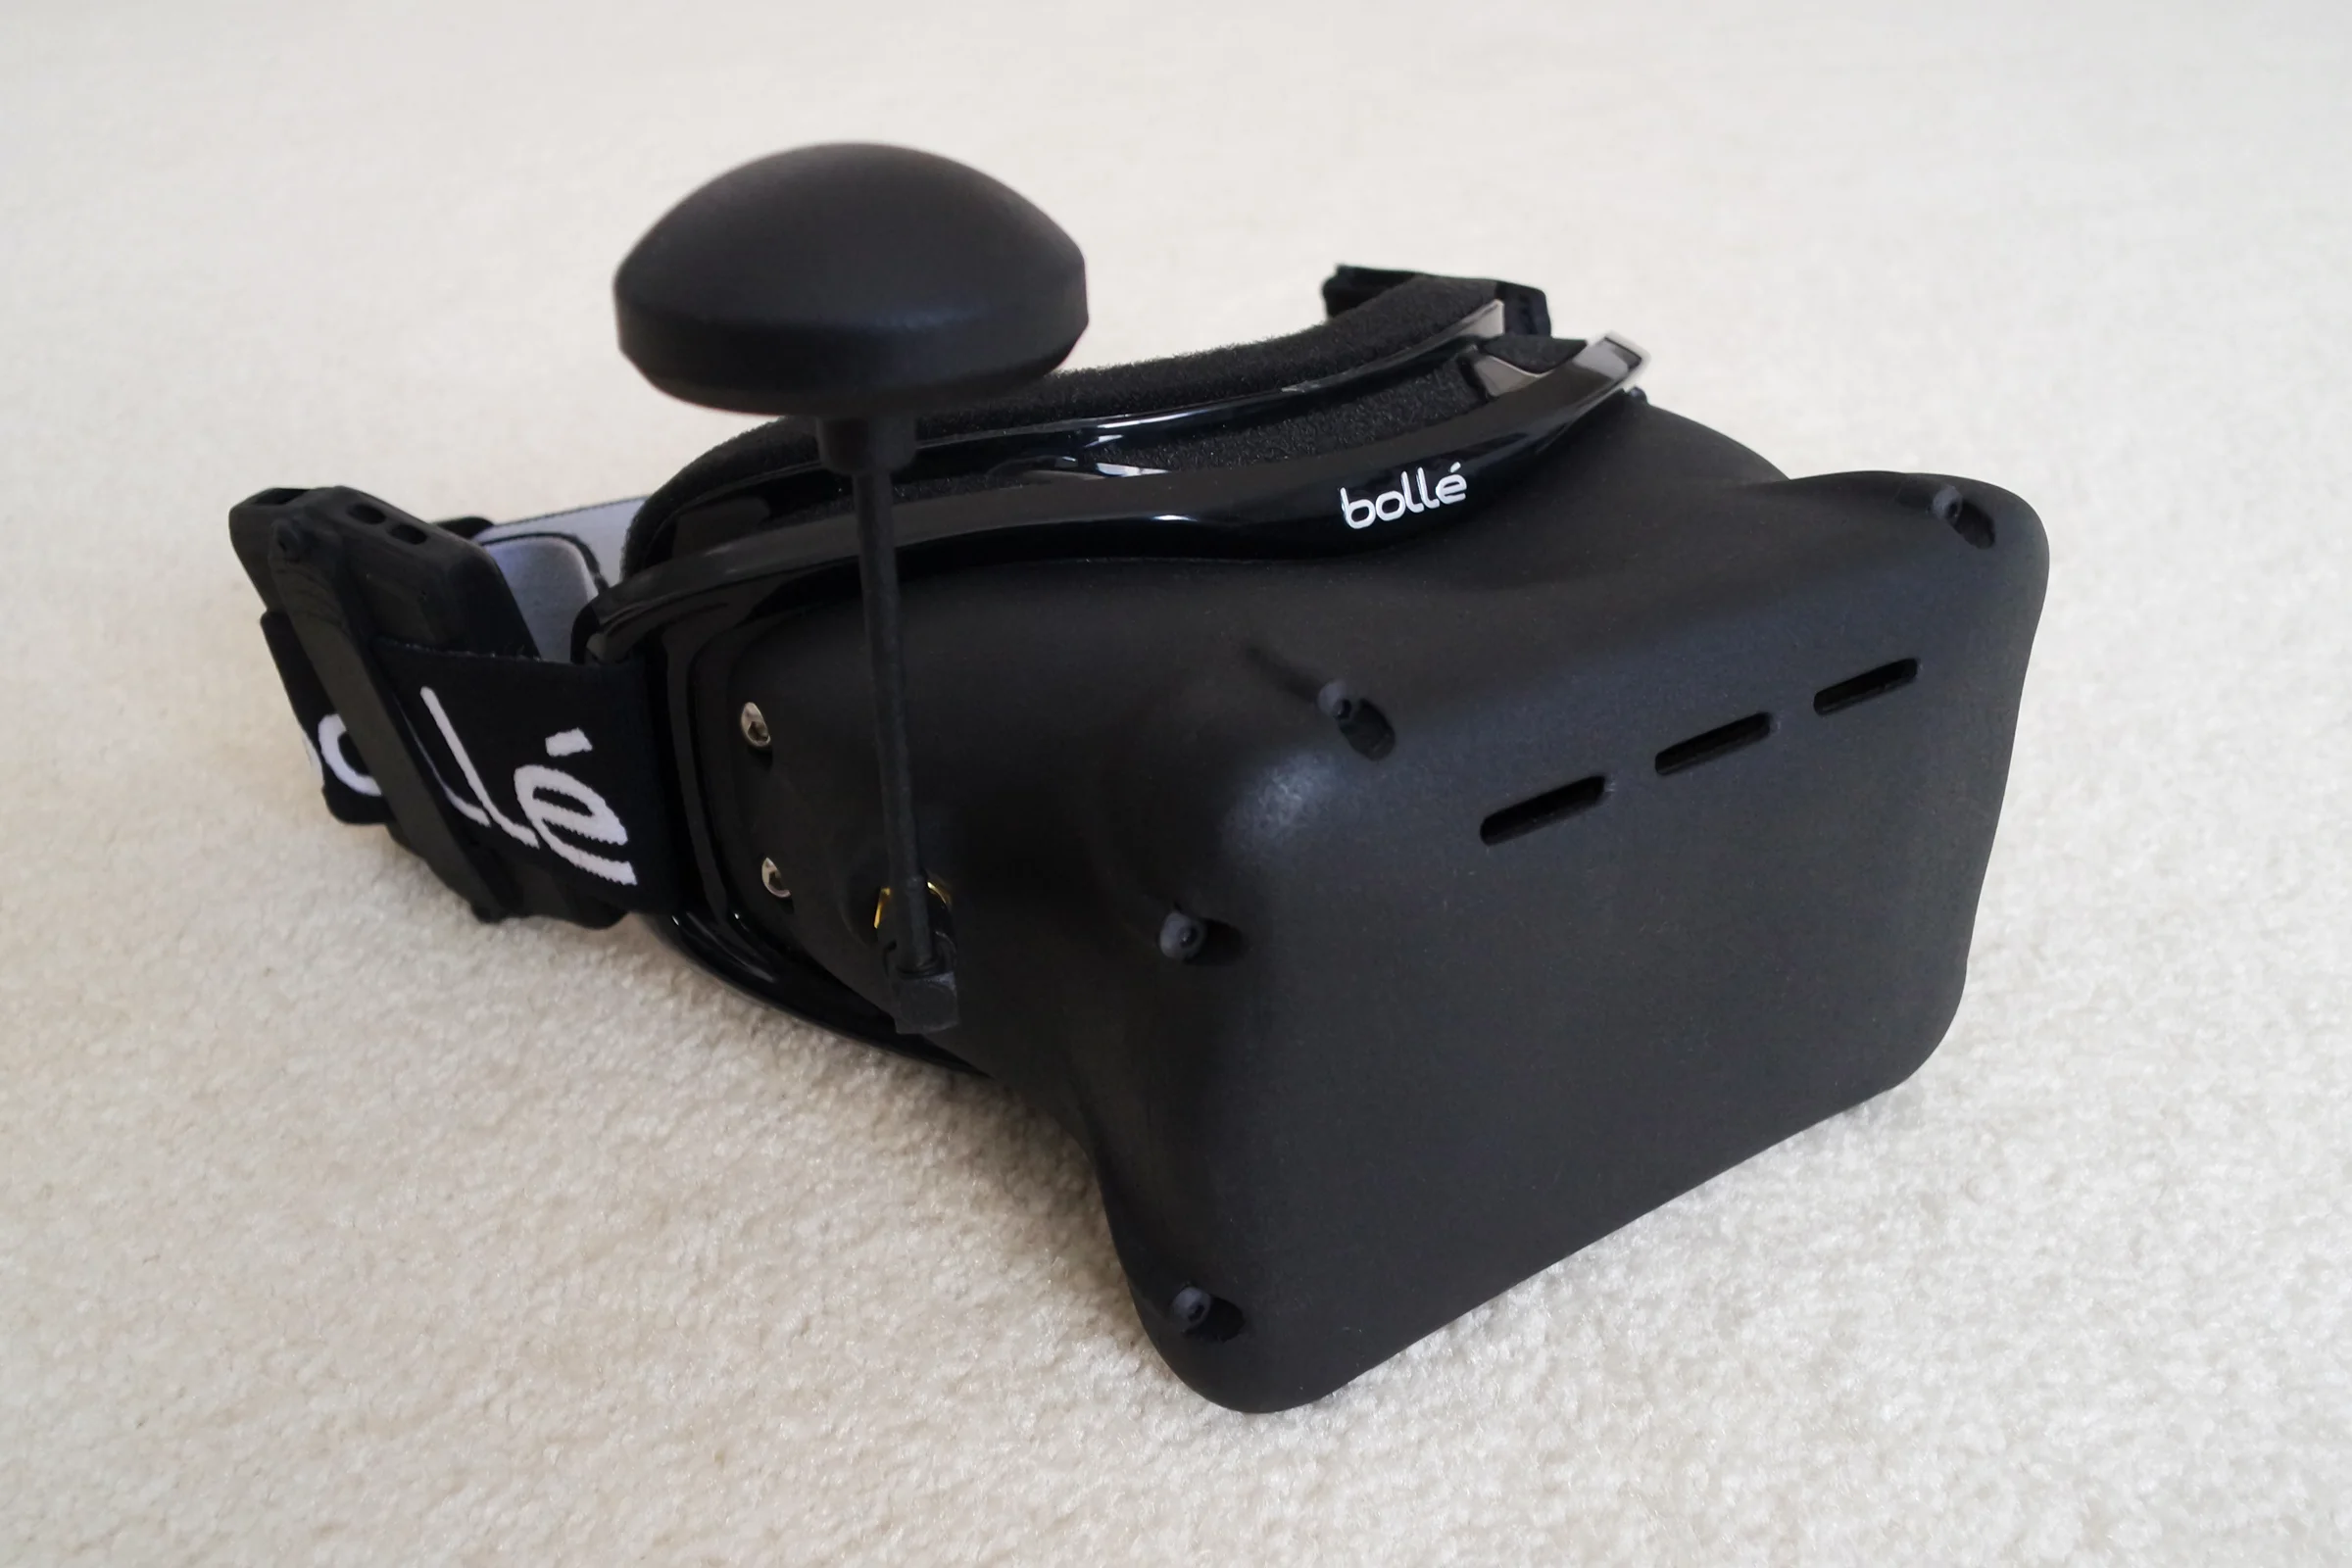
For the housing, snowboarding goggles were the obvious base: thick foam face padding, heavy-duty straps capable of supporting real weight, and large lens openings. I popped the lens out of a Bolle snowboarding goggle, measured the opening, and modeled it in CAD along with the LCD panel and magnifier optics. Experimented with the physical components in front of my face to establish the correct eye relief distance, translated those measurements into a 3D printed enclosure mounting directly into the goggle frame. All the electronics — receiver, battery regulator, battery, antenna — were stripped of their original enclosures, made as compact as possible, and integrated into the headset housing. The entire system was self-contained in one package, Oculus-style, with a genuinely wide field of view.


The Cloverleaf Antenna Jig
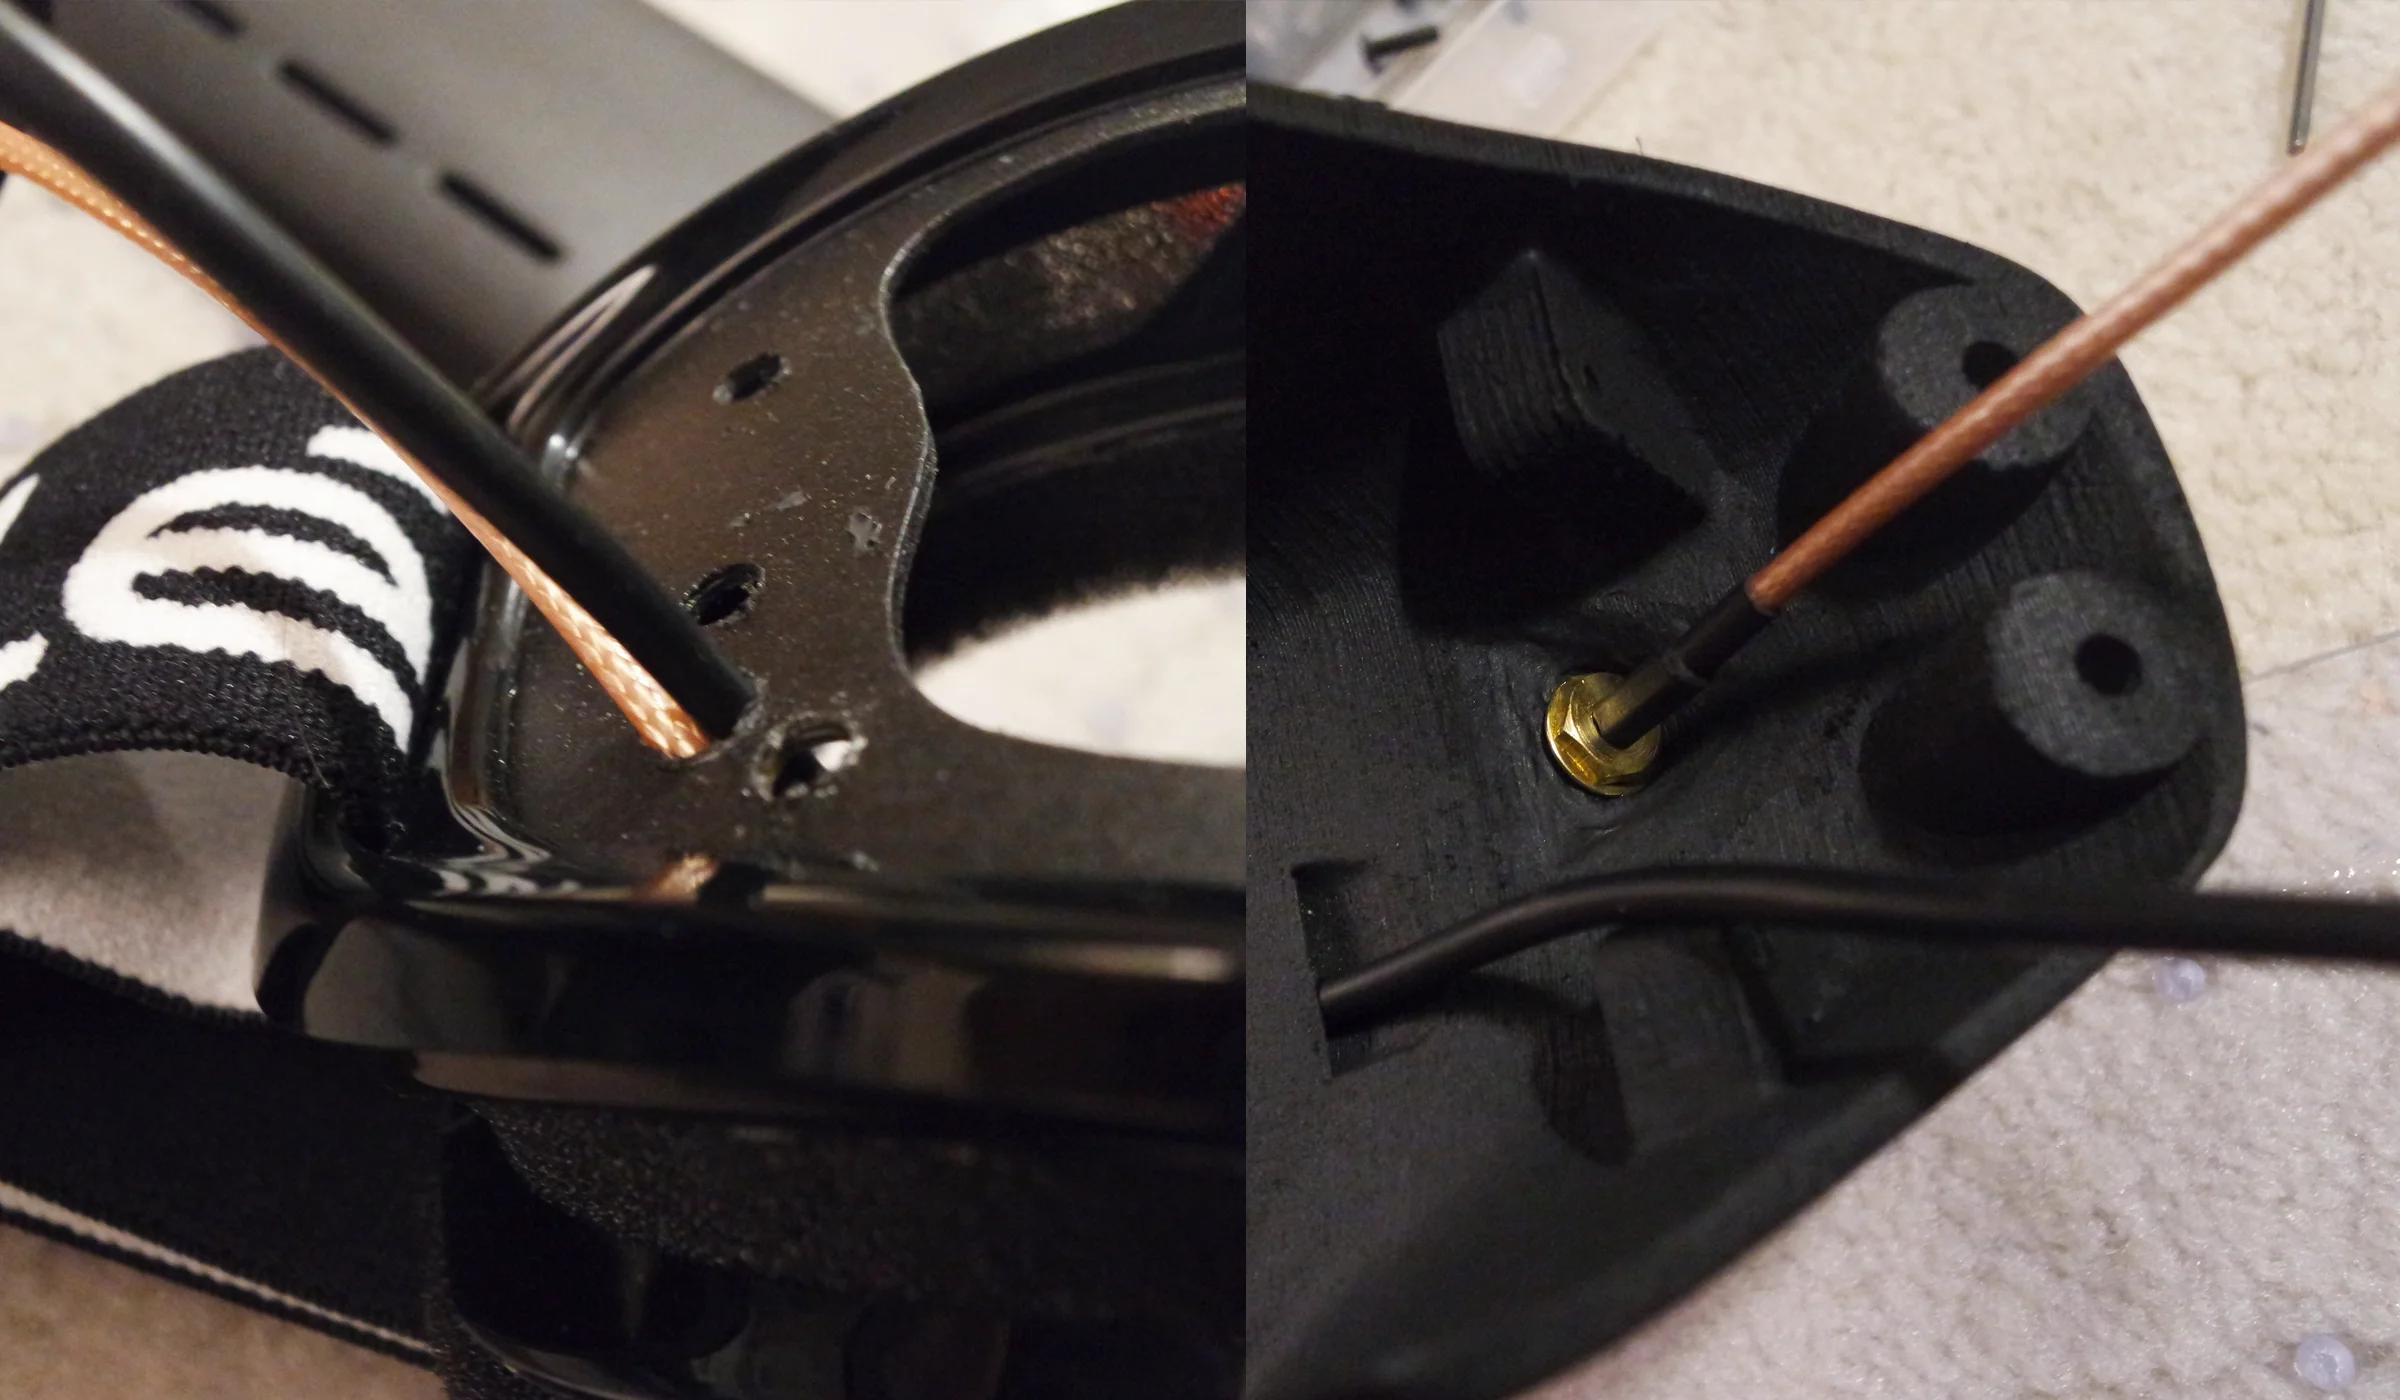
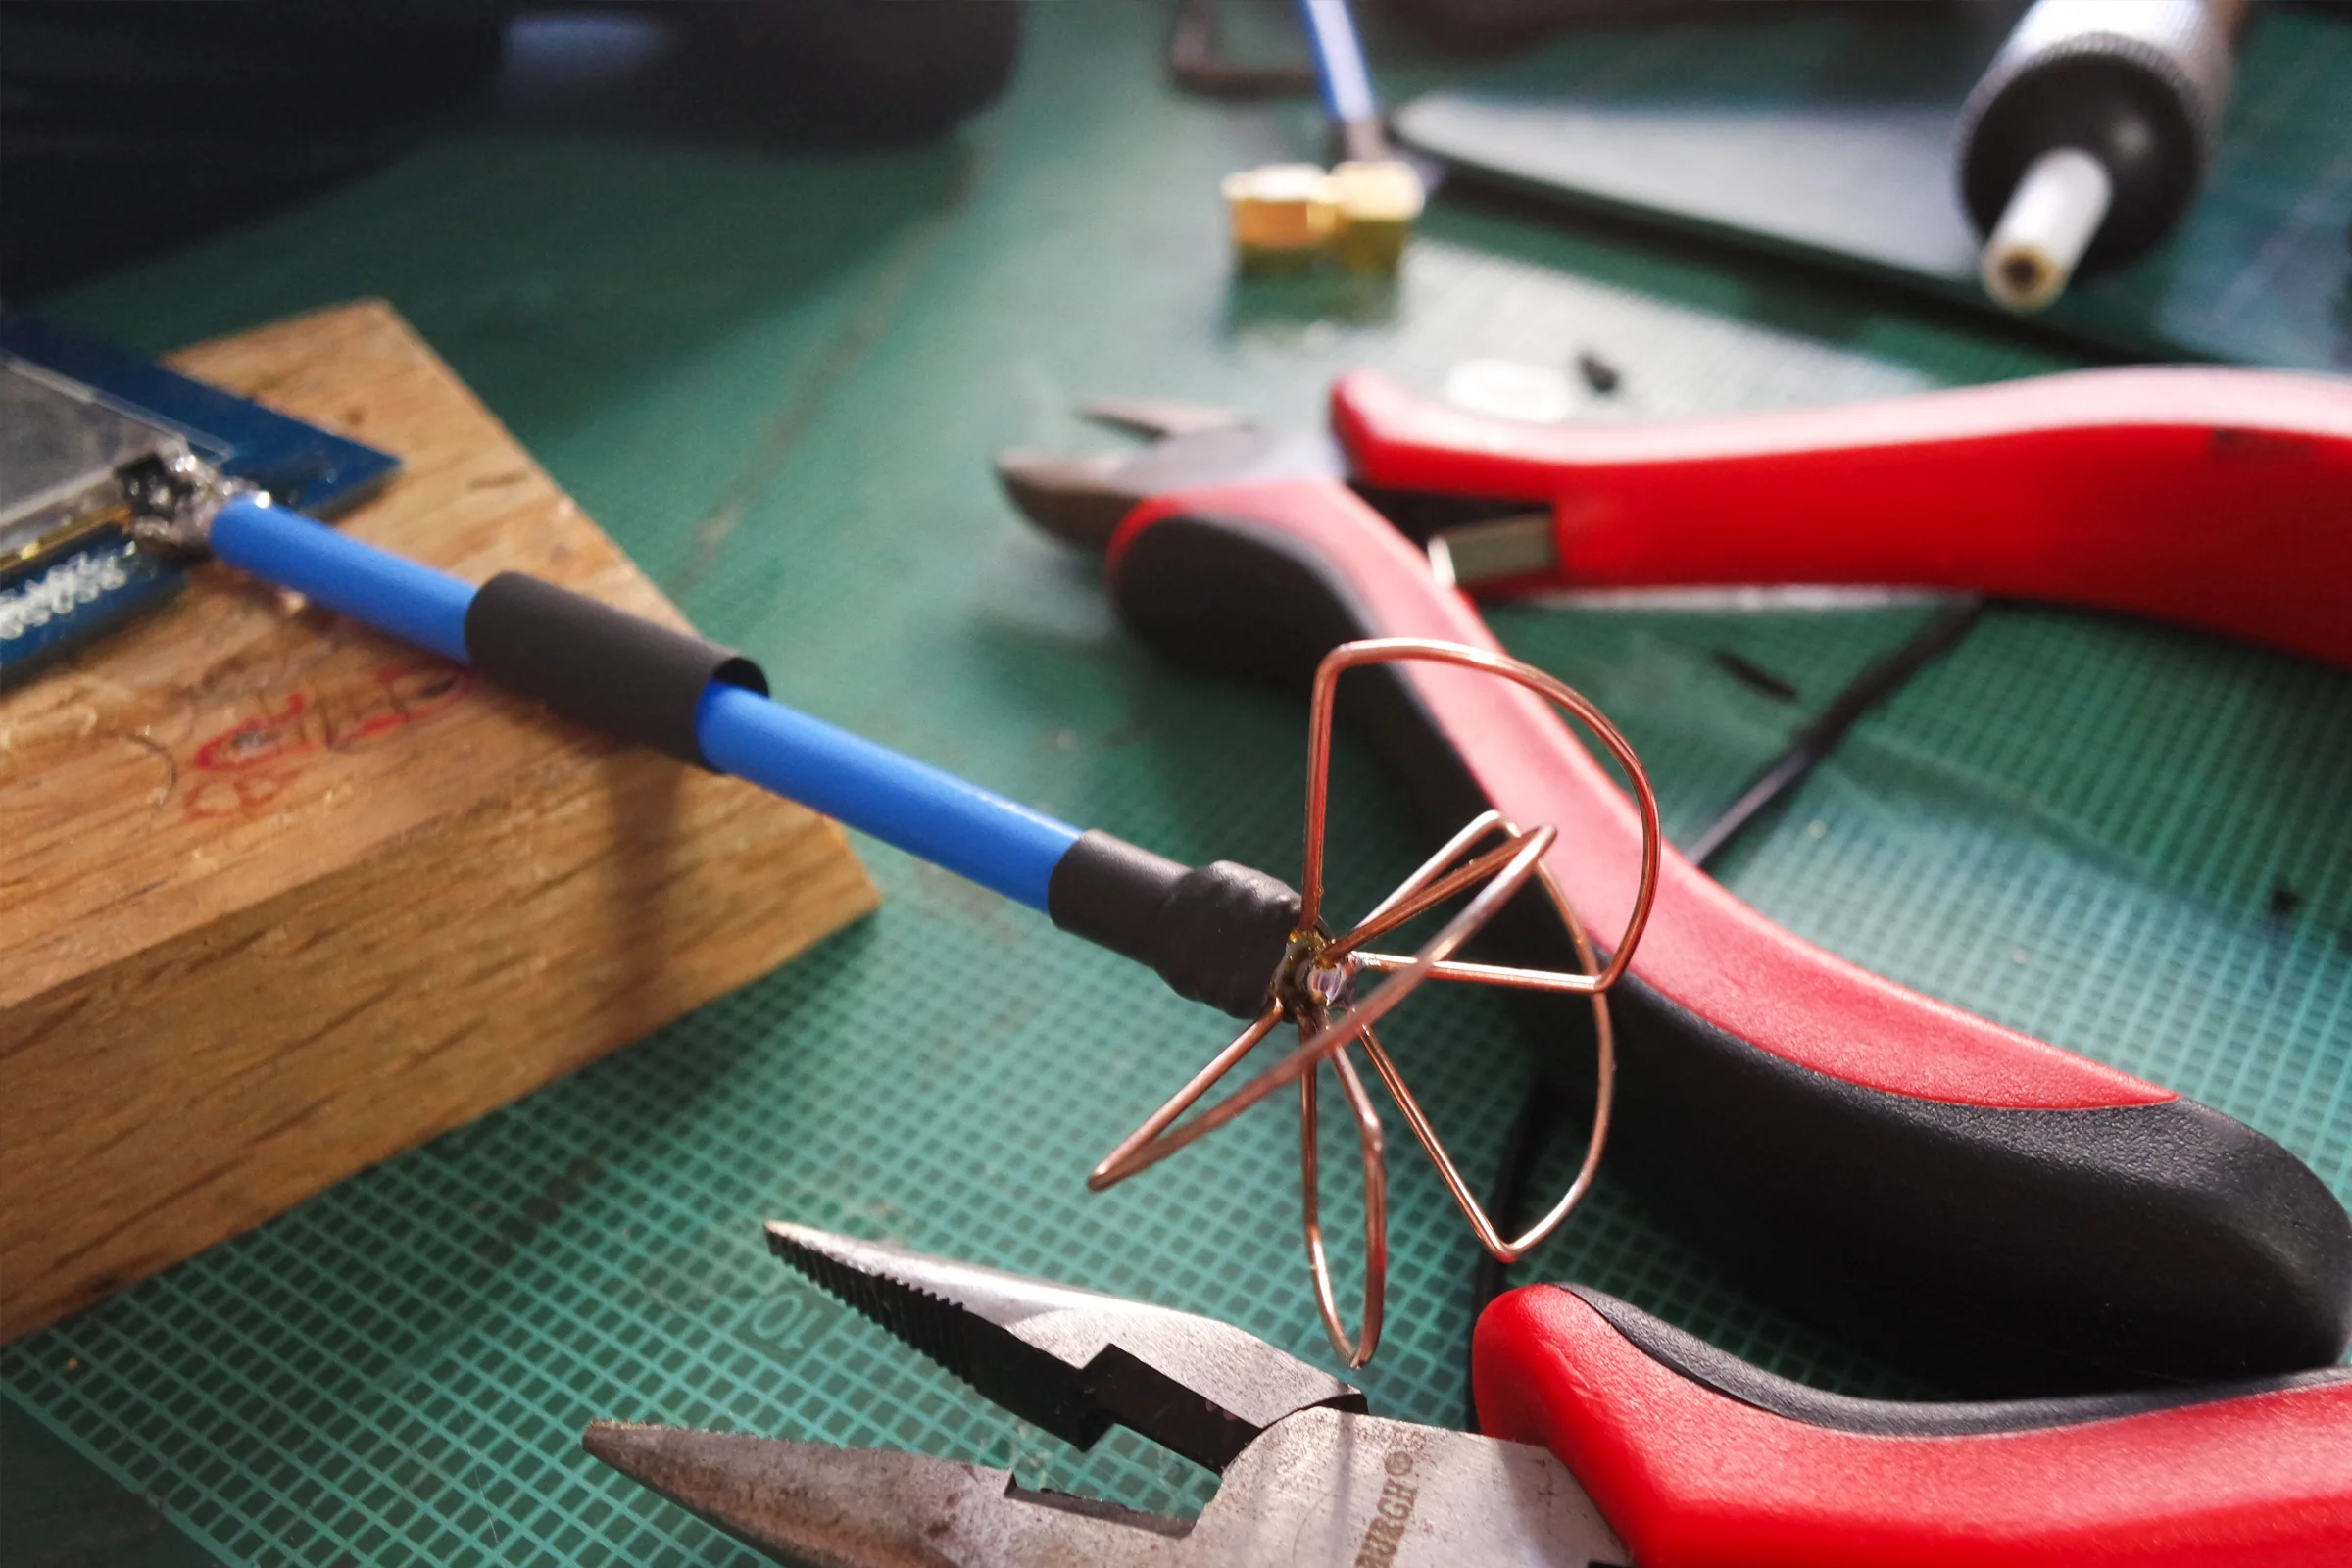
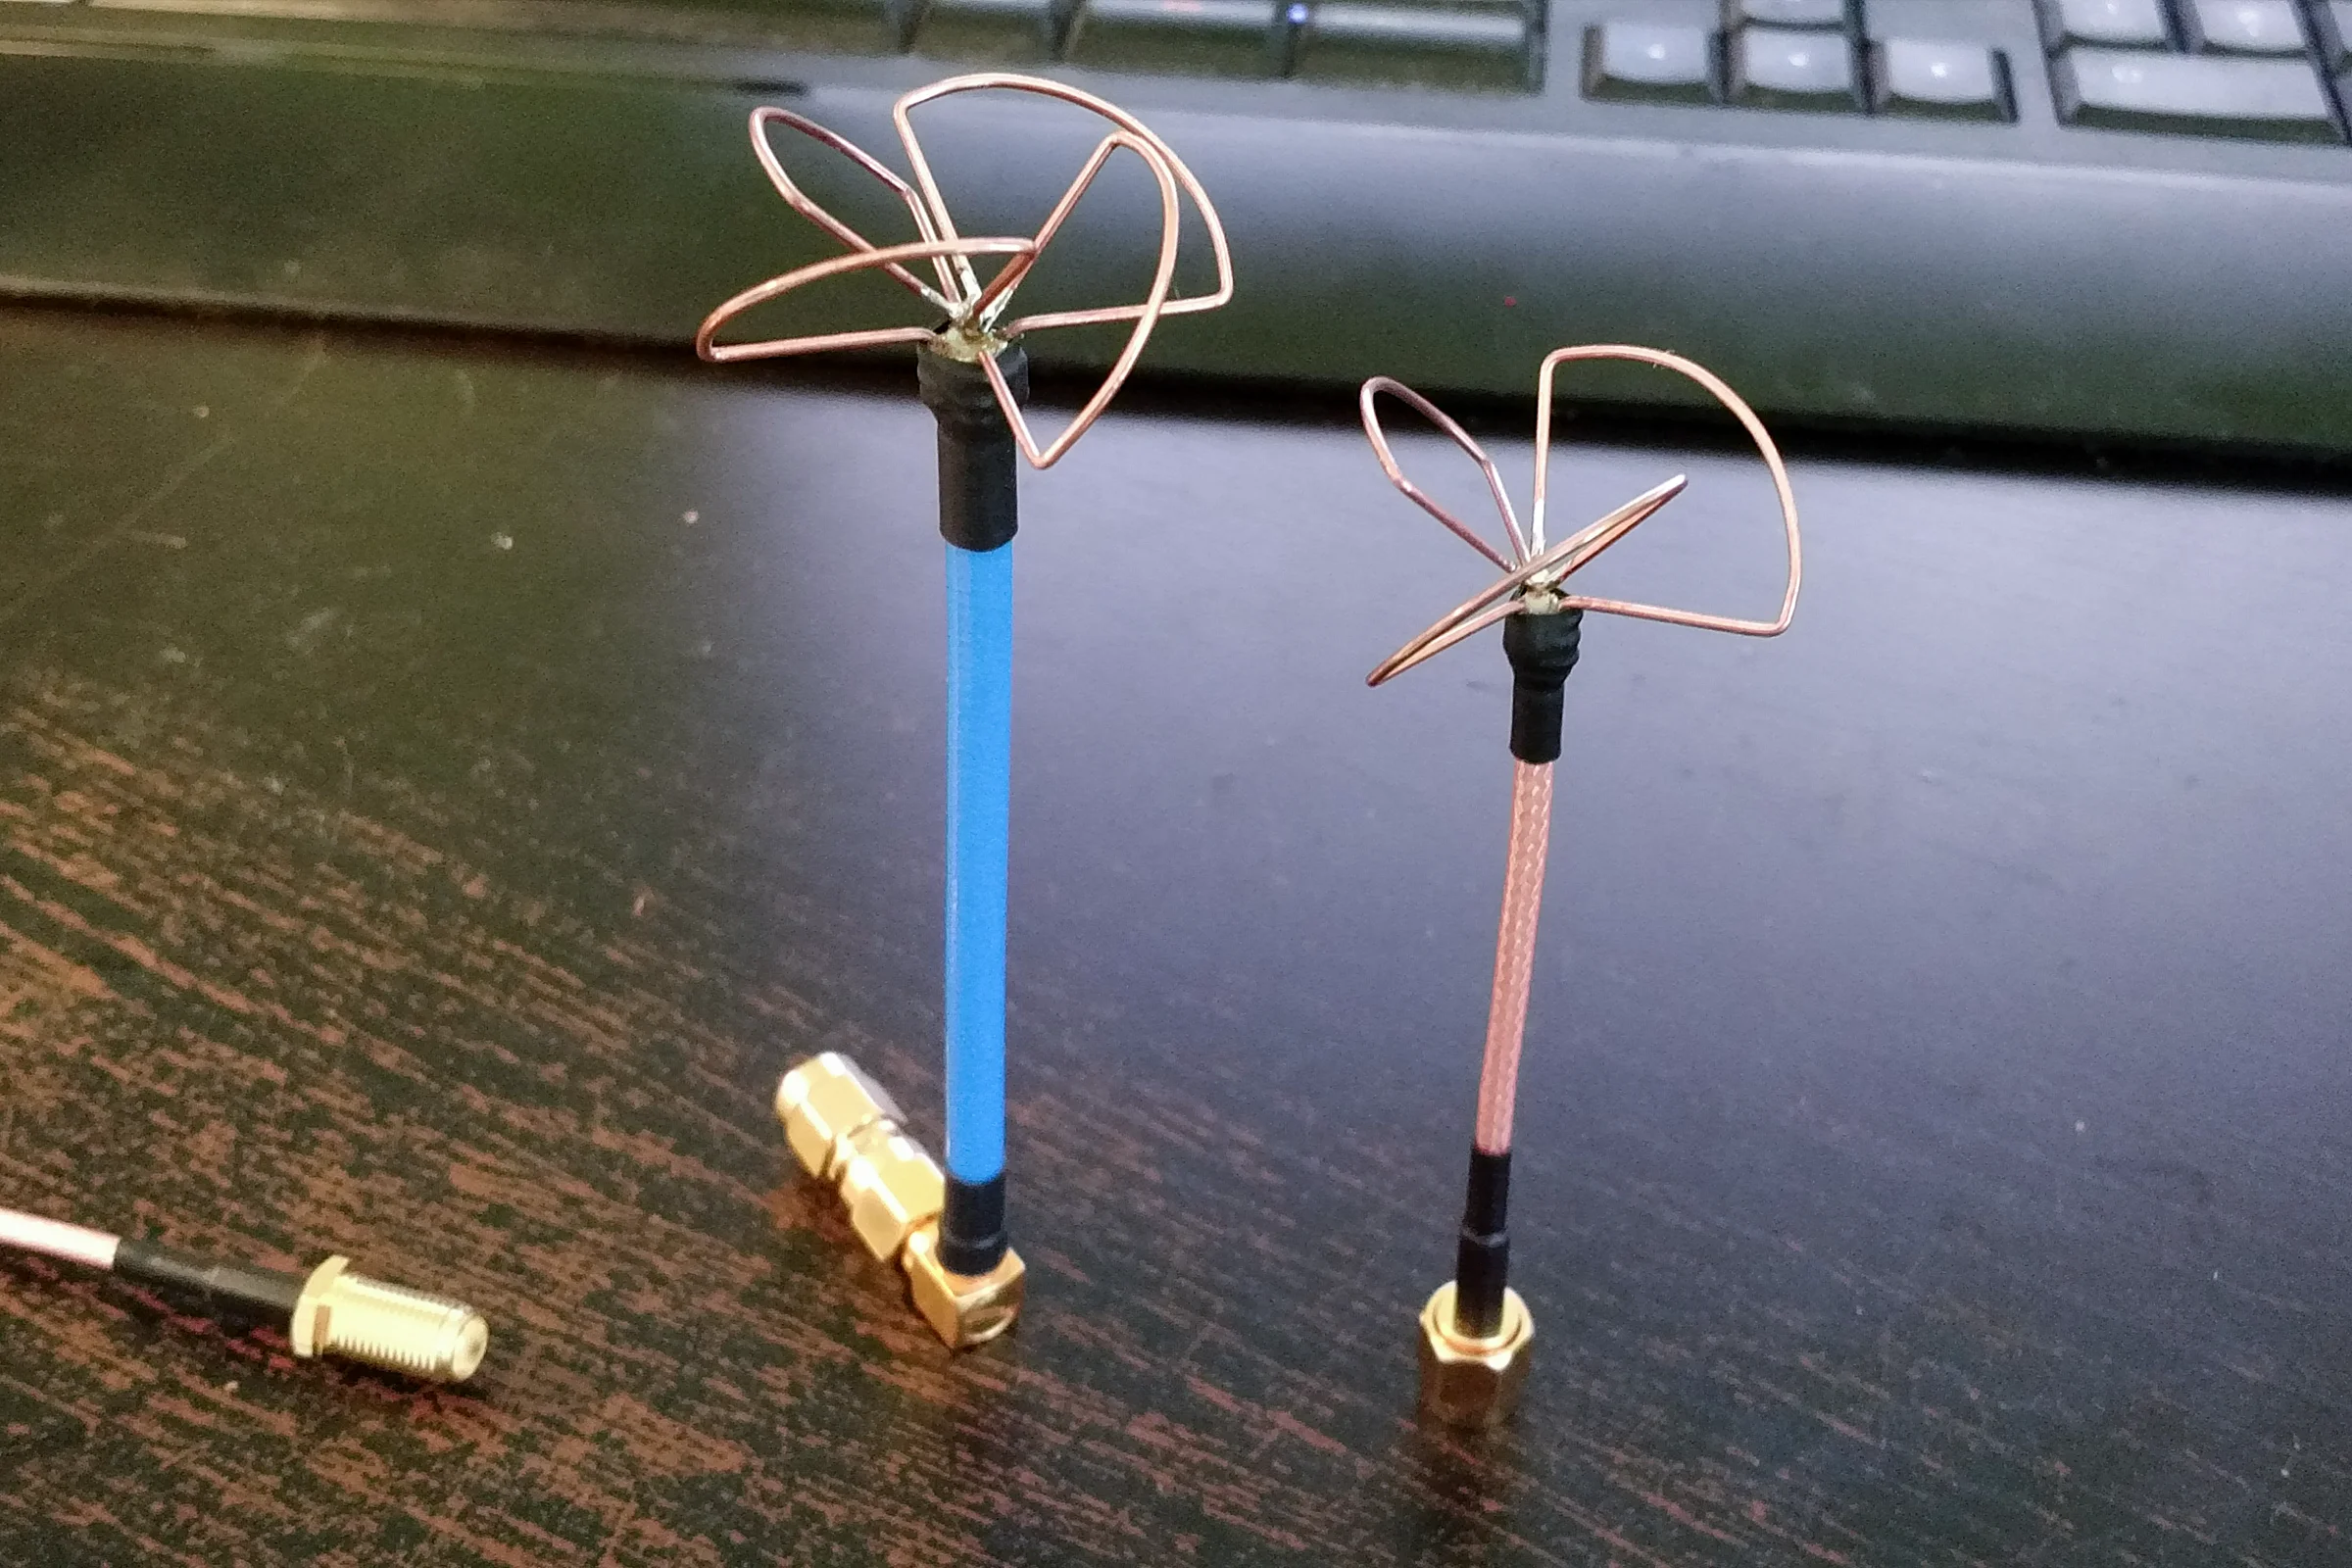
Omnidirectional FPV antennas at the time were unreliable. They had preferred directions and would cut out behind obstacles as minor as a fence post or a single tree. A radio frequency engineer published an open-source omnidirectional Clover Leaf Mushroom antenna design that became widely adopted in the racing FPV community. Cheap Chinese import versions performed poorly because manufacturing variance in wire bending took the antenna out of spec. The information was publicly available but consistently hand-bending MIG welding wire into correct cloverleaf geometry was difficult, especially when building a matched pair for drone and goggle.
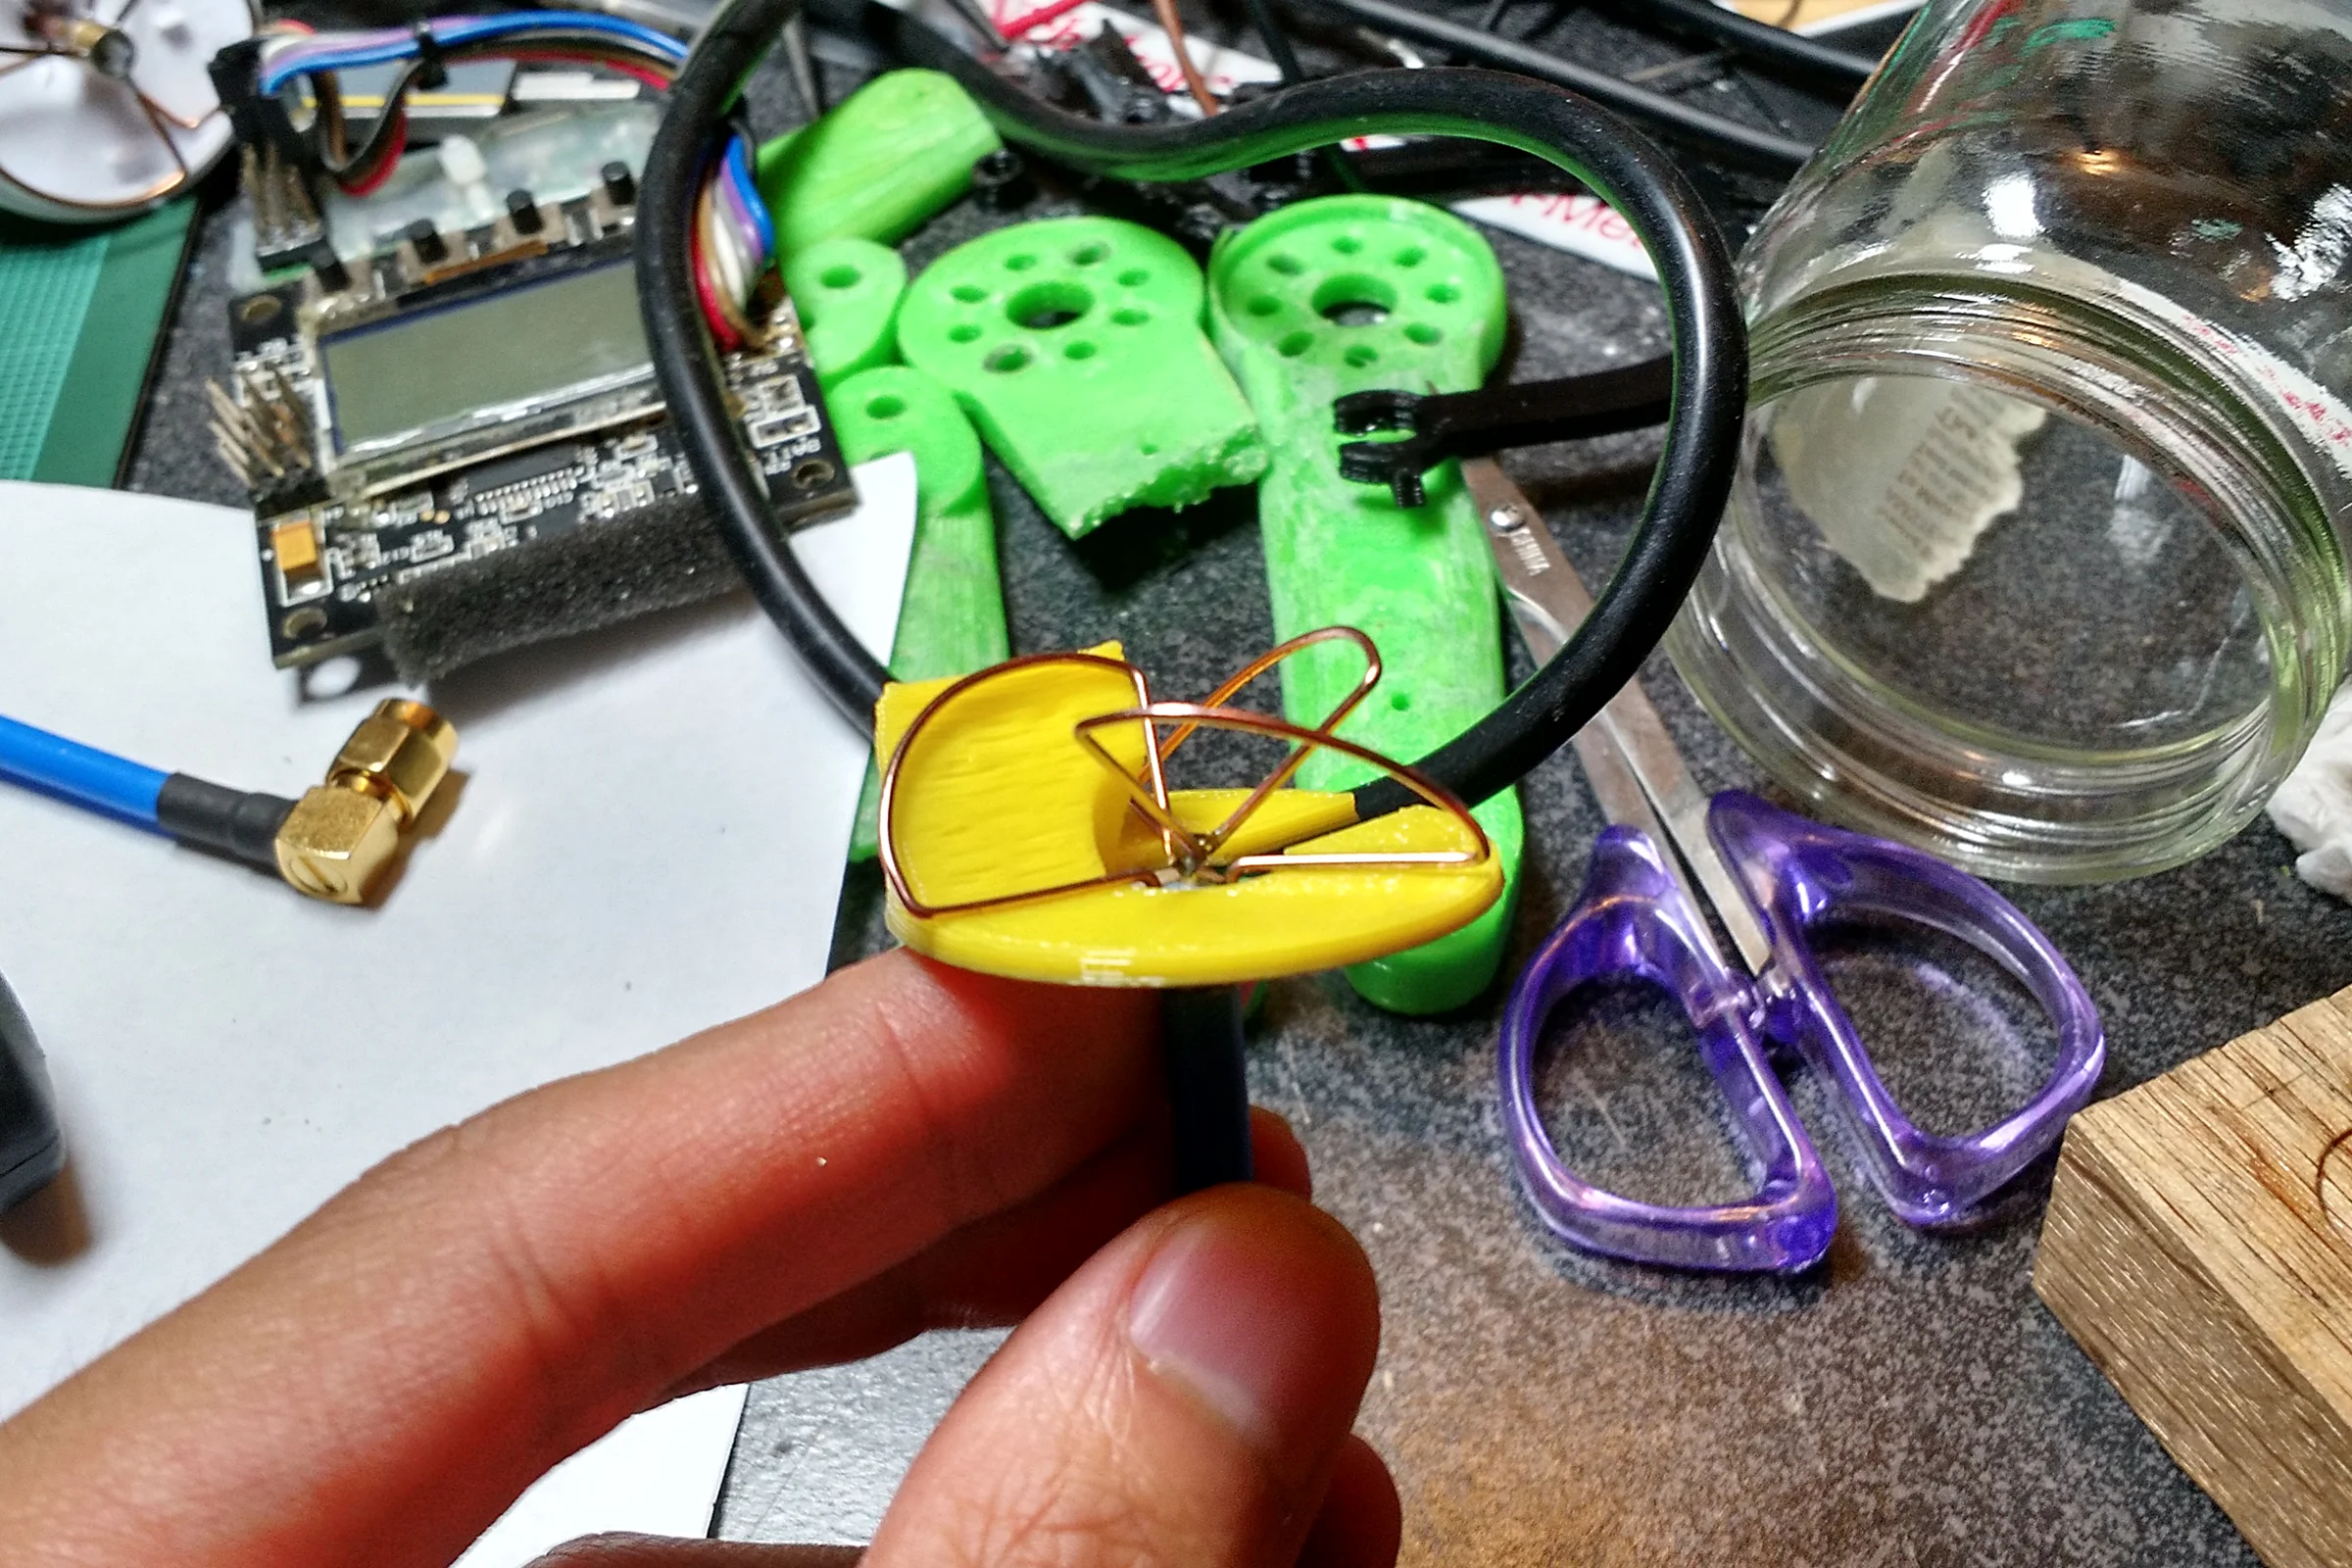
I took the published design, modeled it in CAD, and designed a wire bending jig around it. 3D printed the jig. Building cloverleaf antennas with the jig was faster, more consistent, and produced a matched pair every time — the same problem that made commercial imports unreliable was solved at the prototyping level by building tooling that enforced the correct geometry.
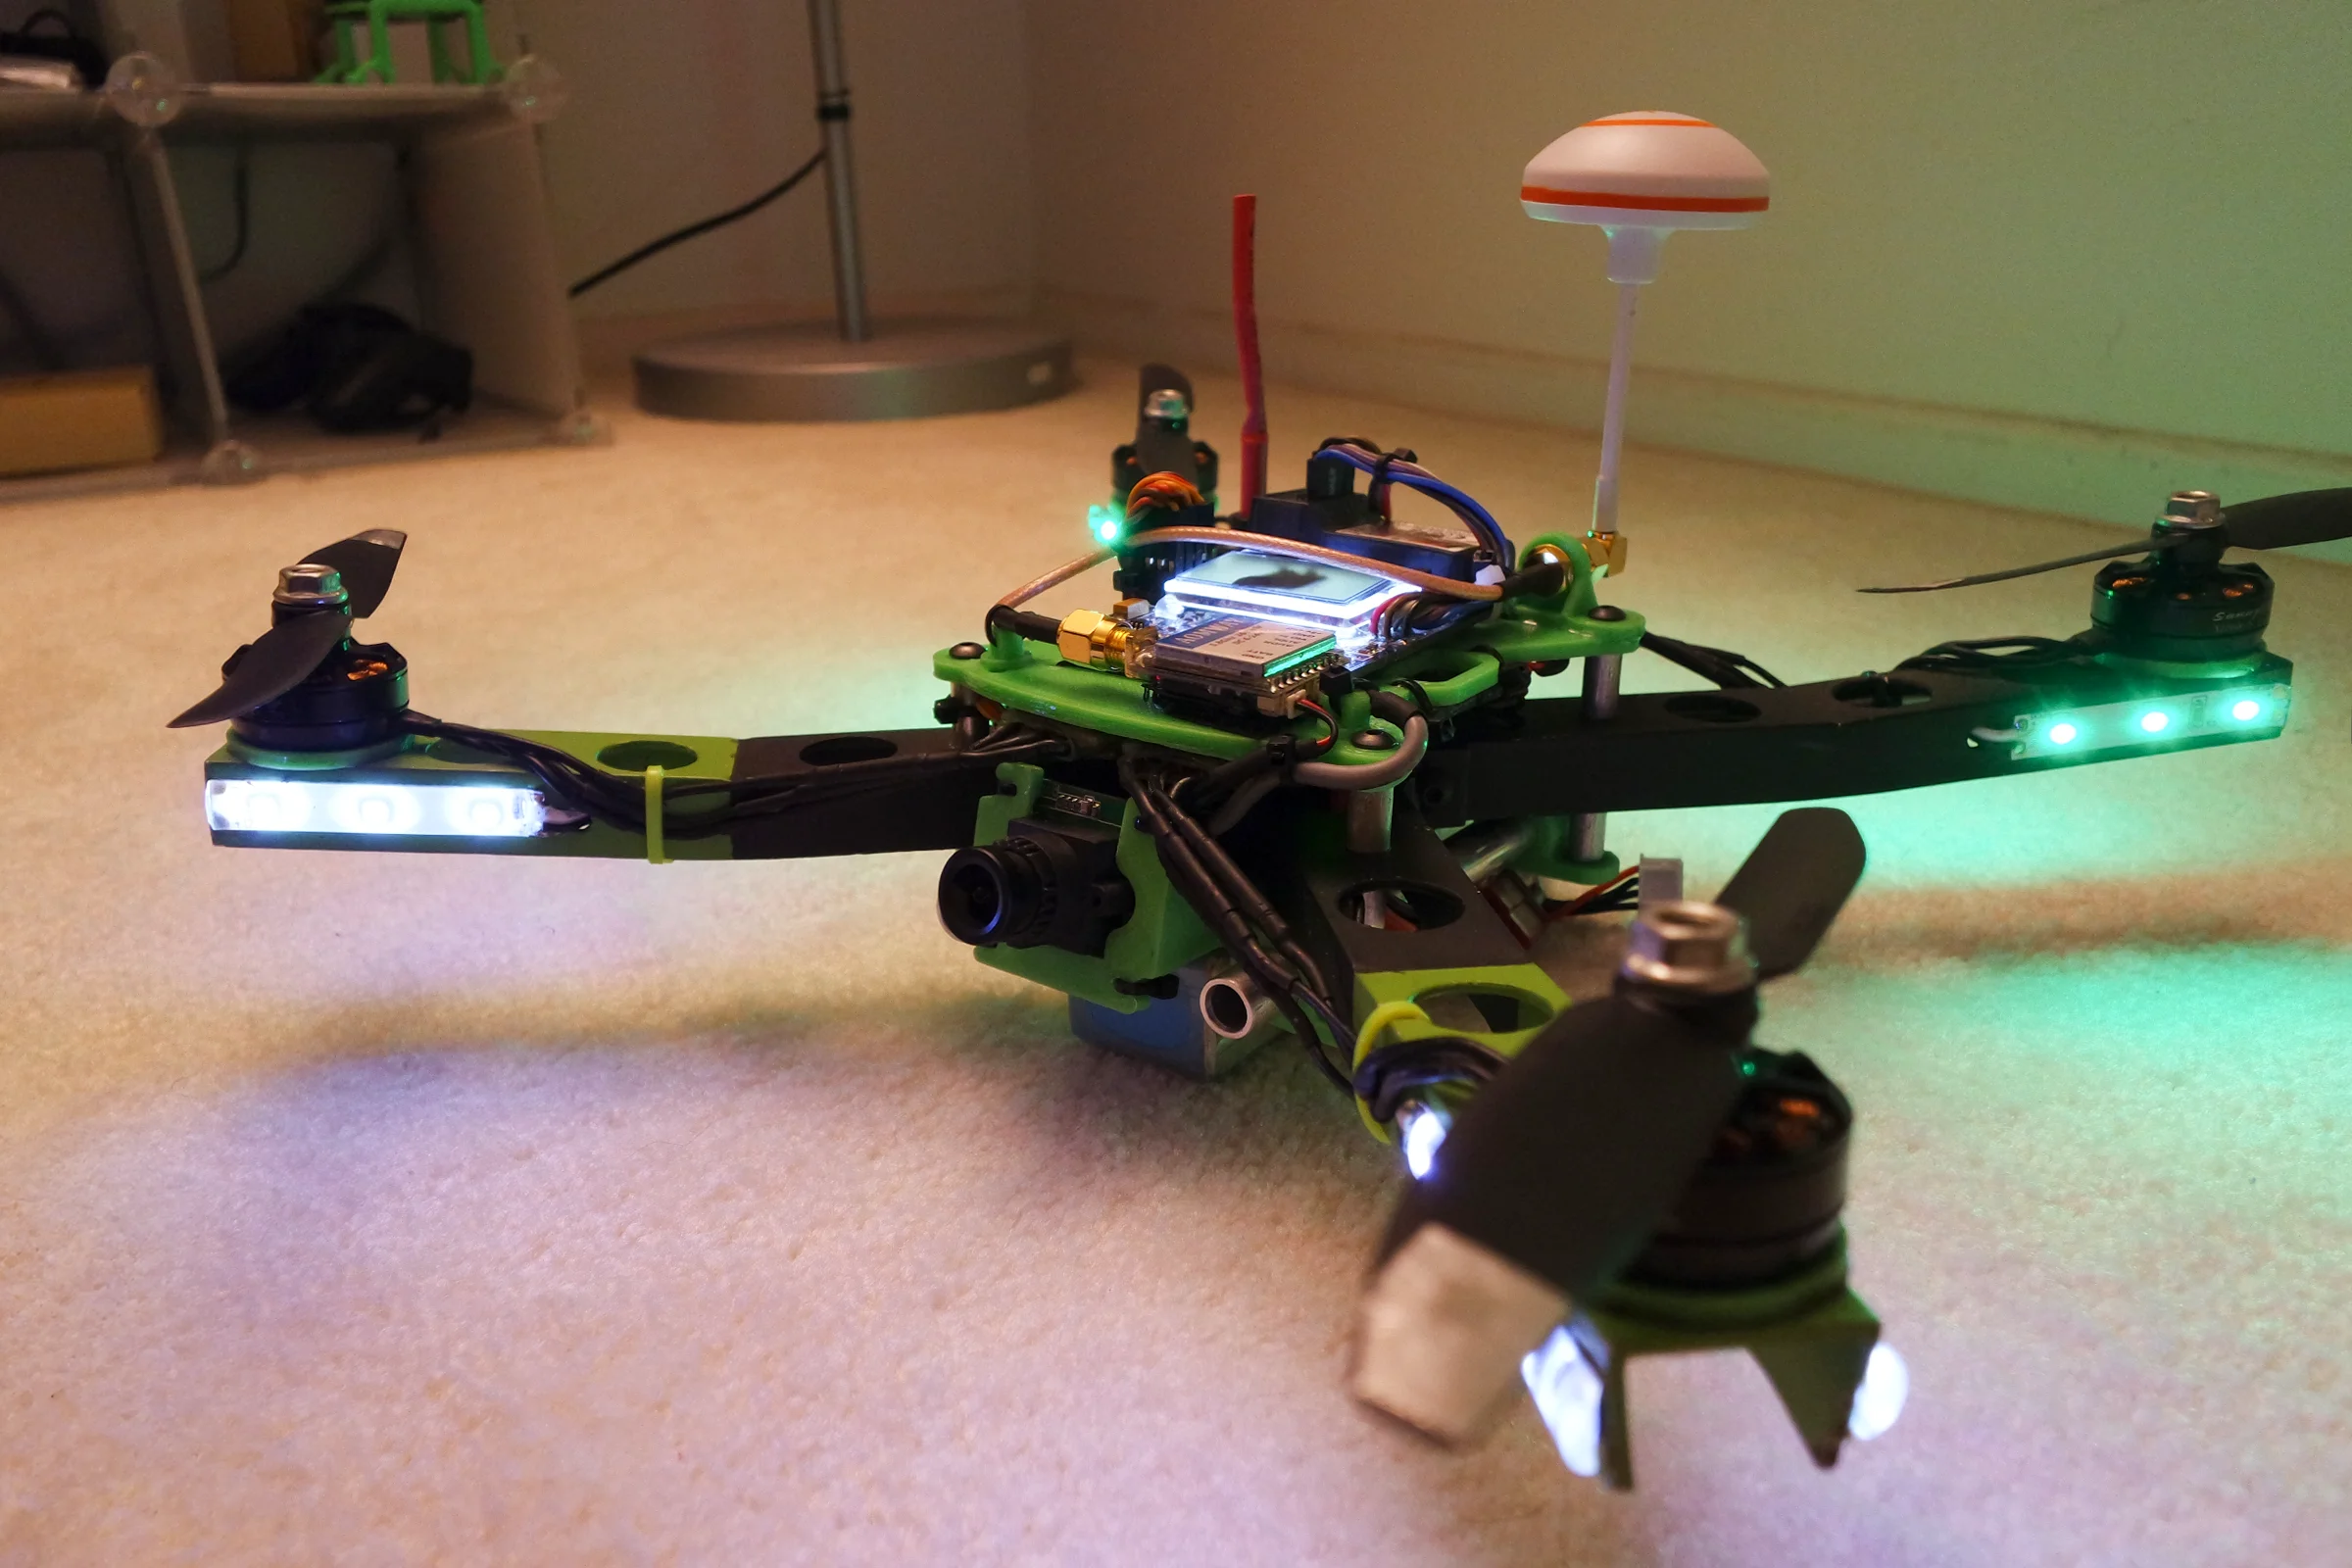
Drone 5: Everything Together
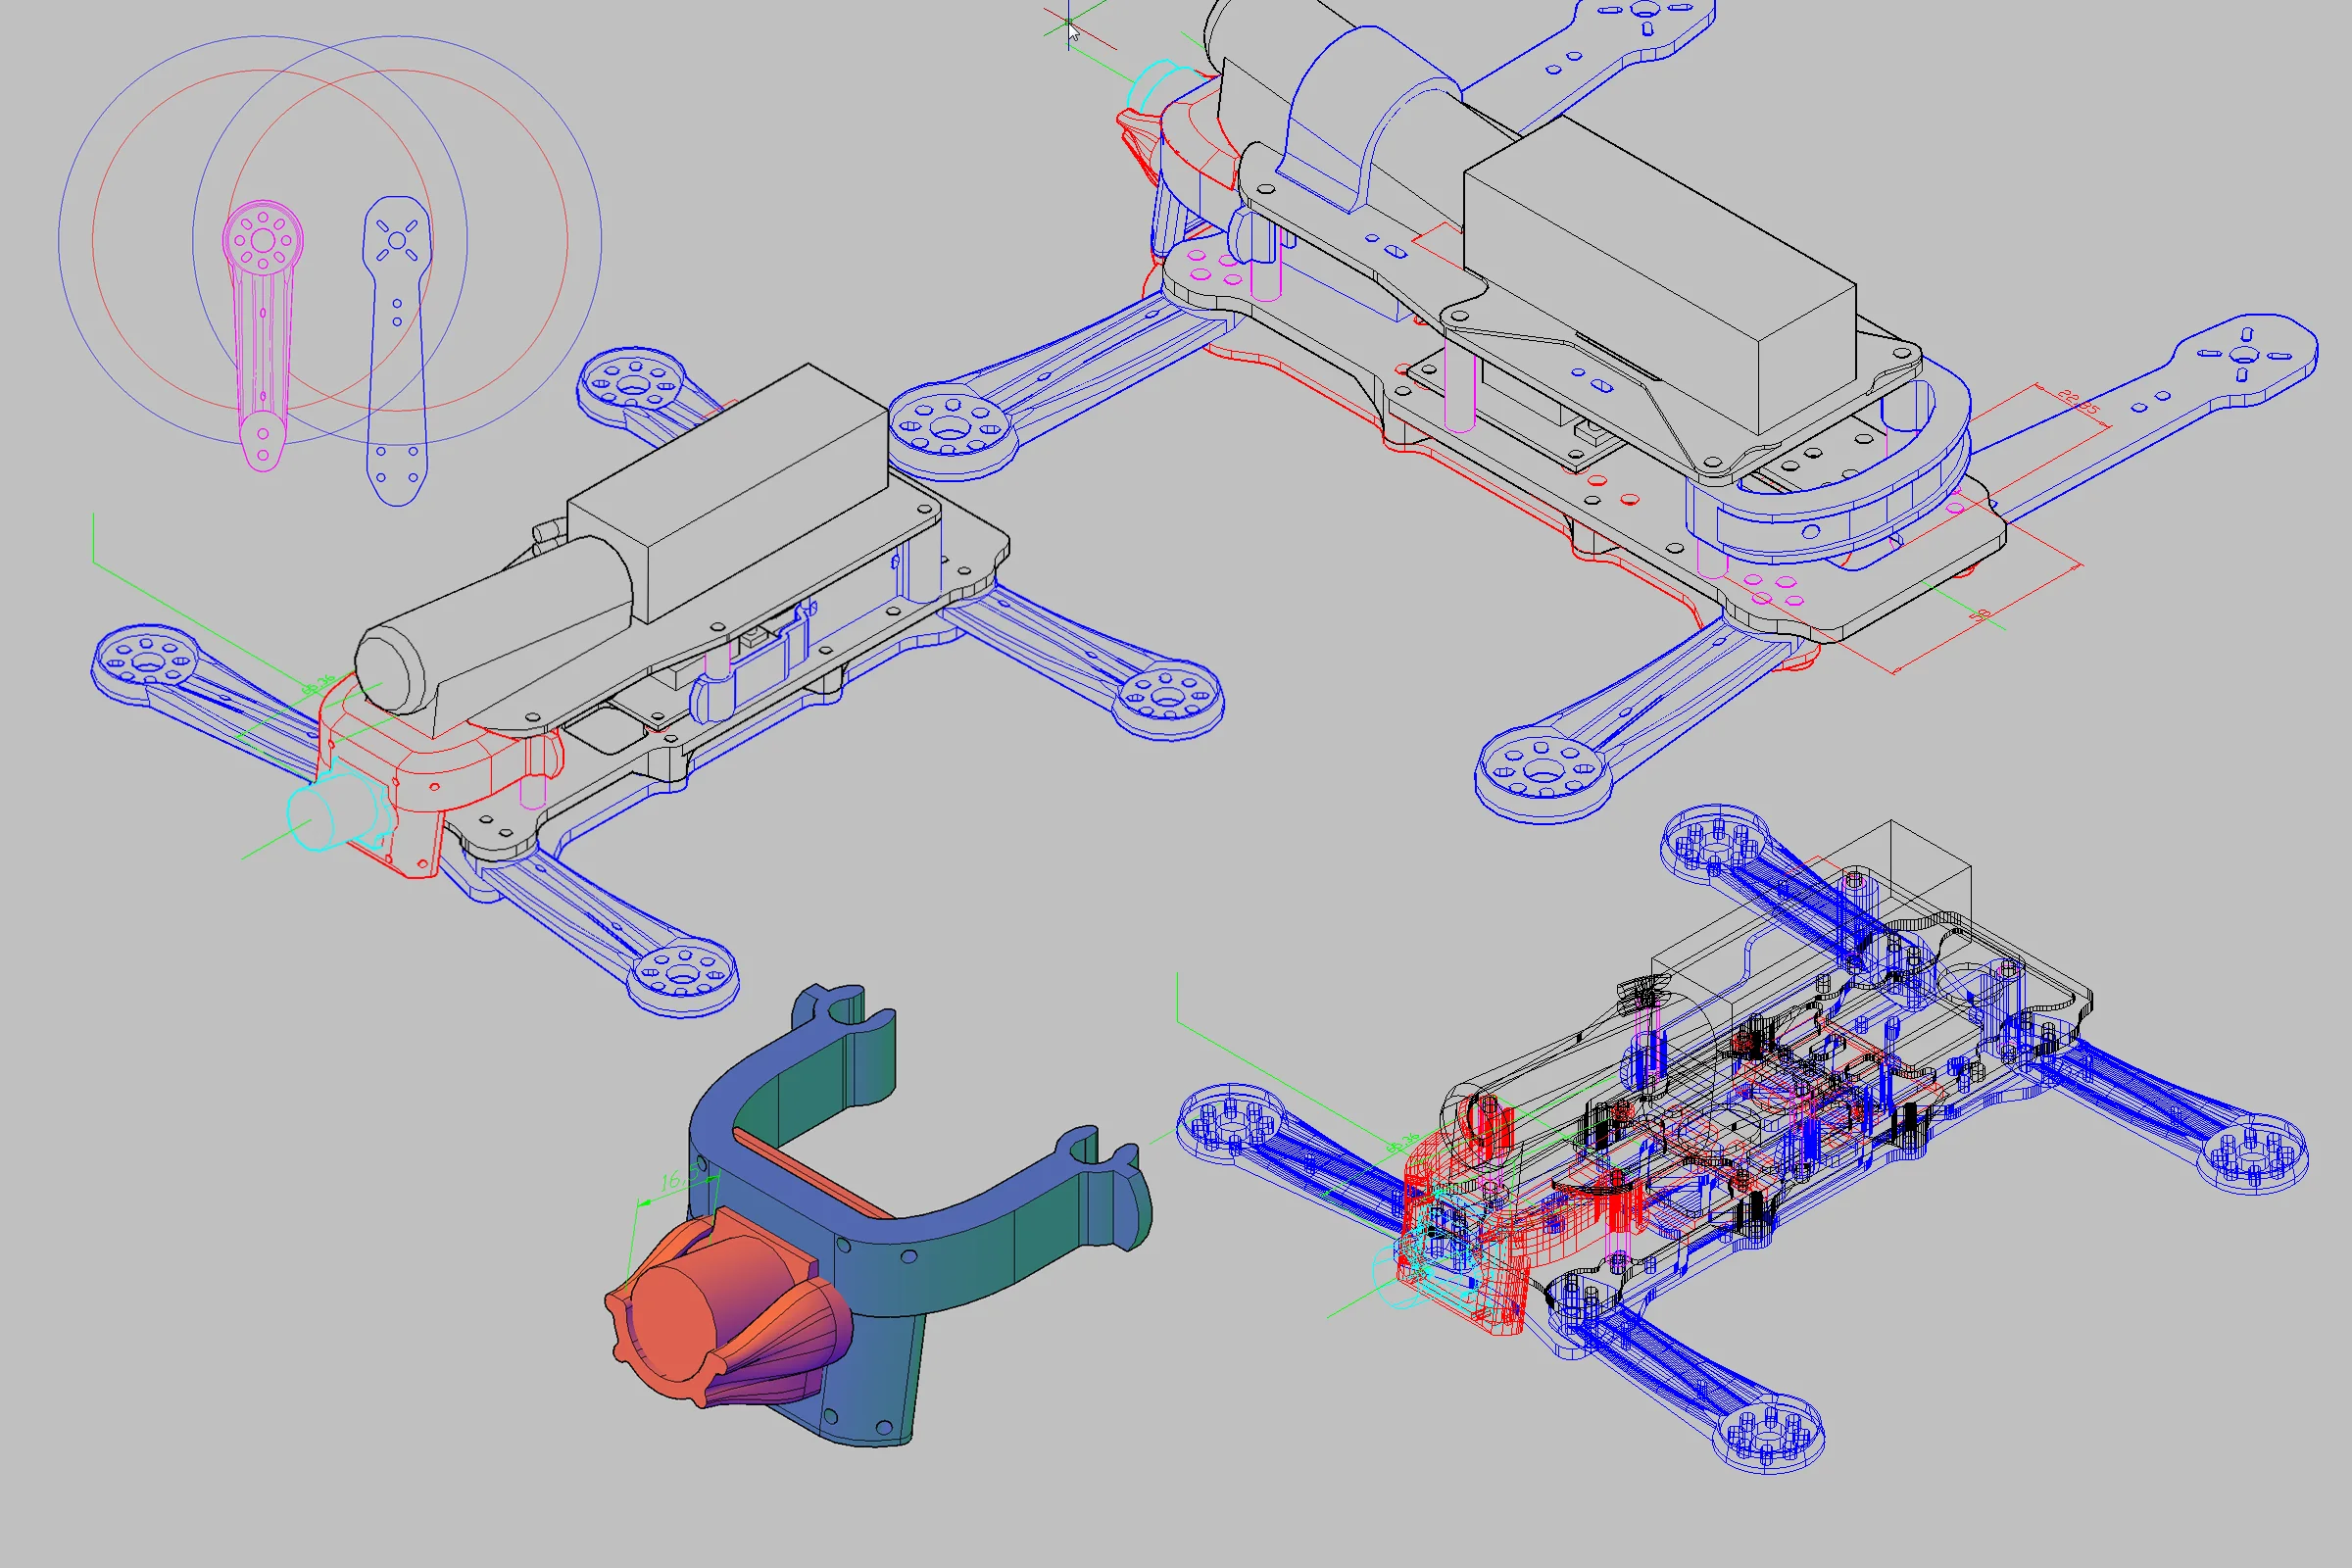
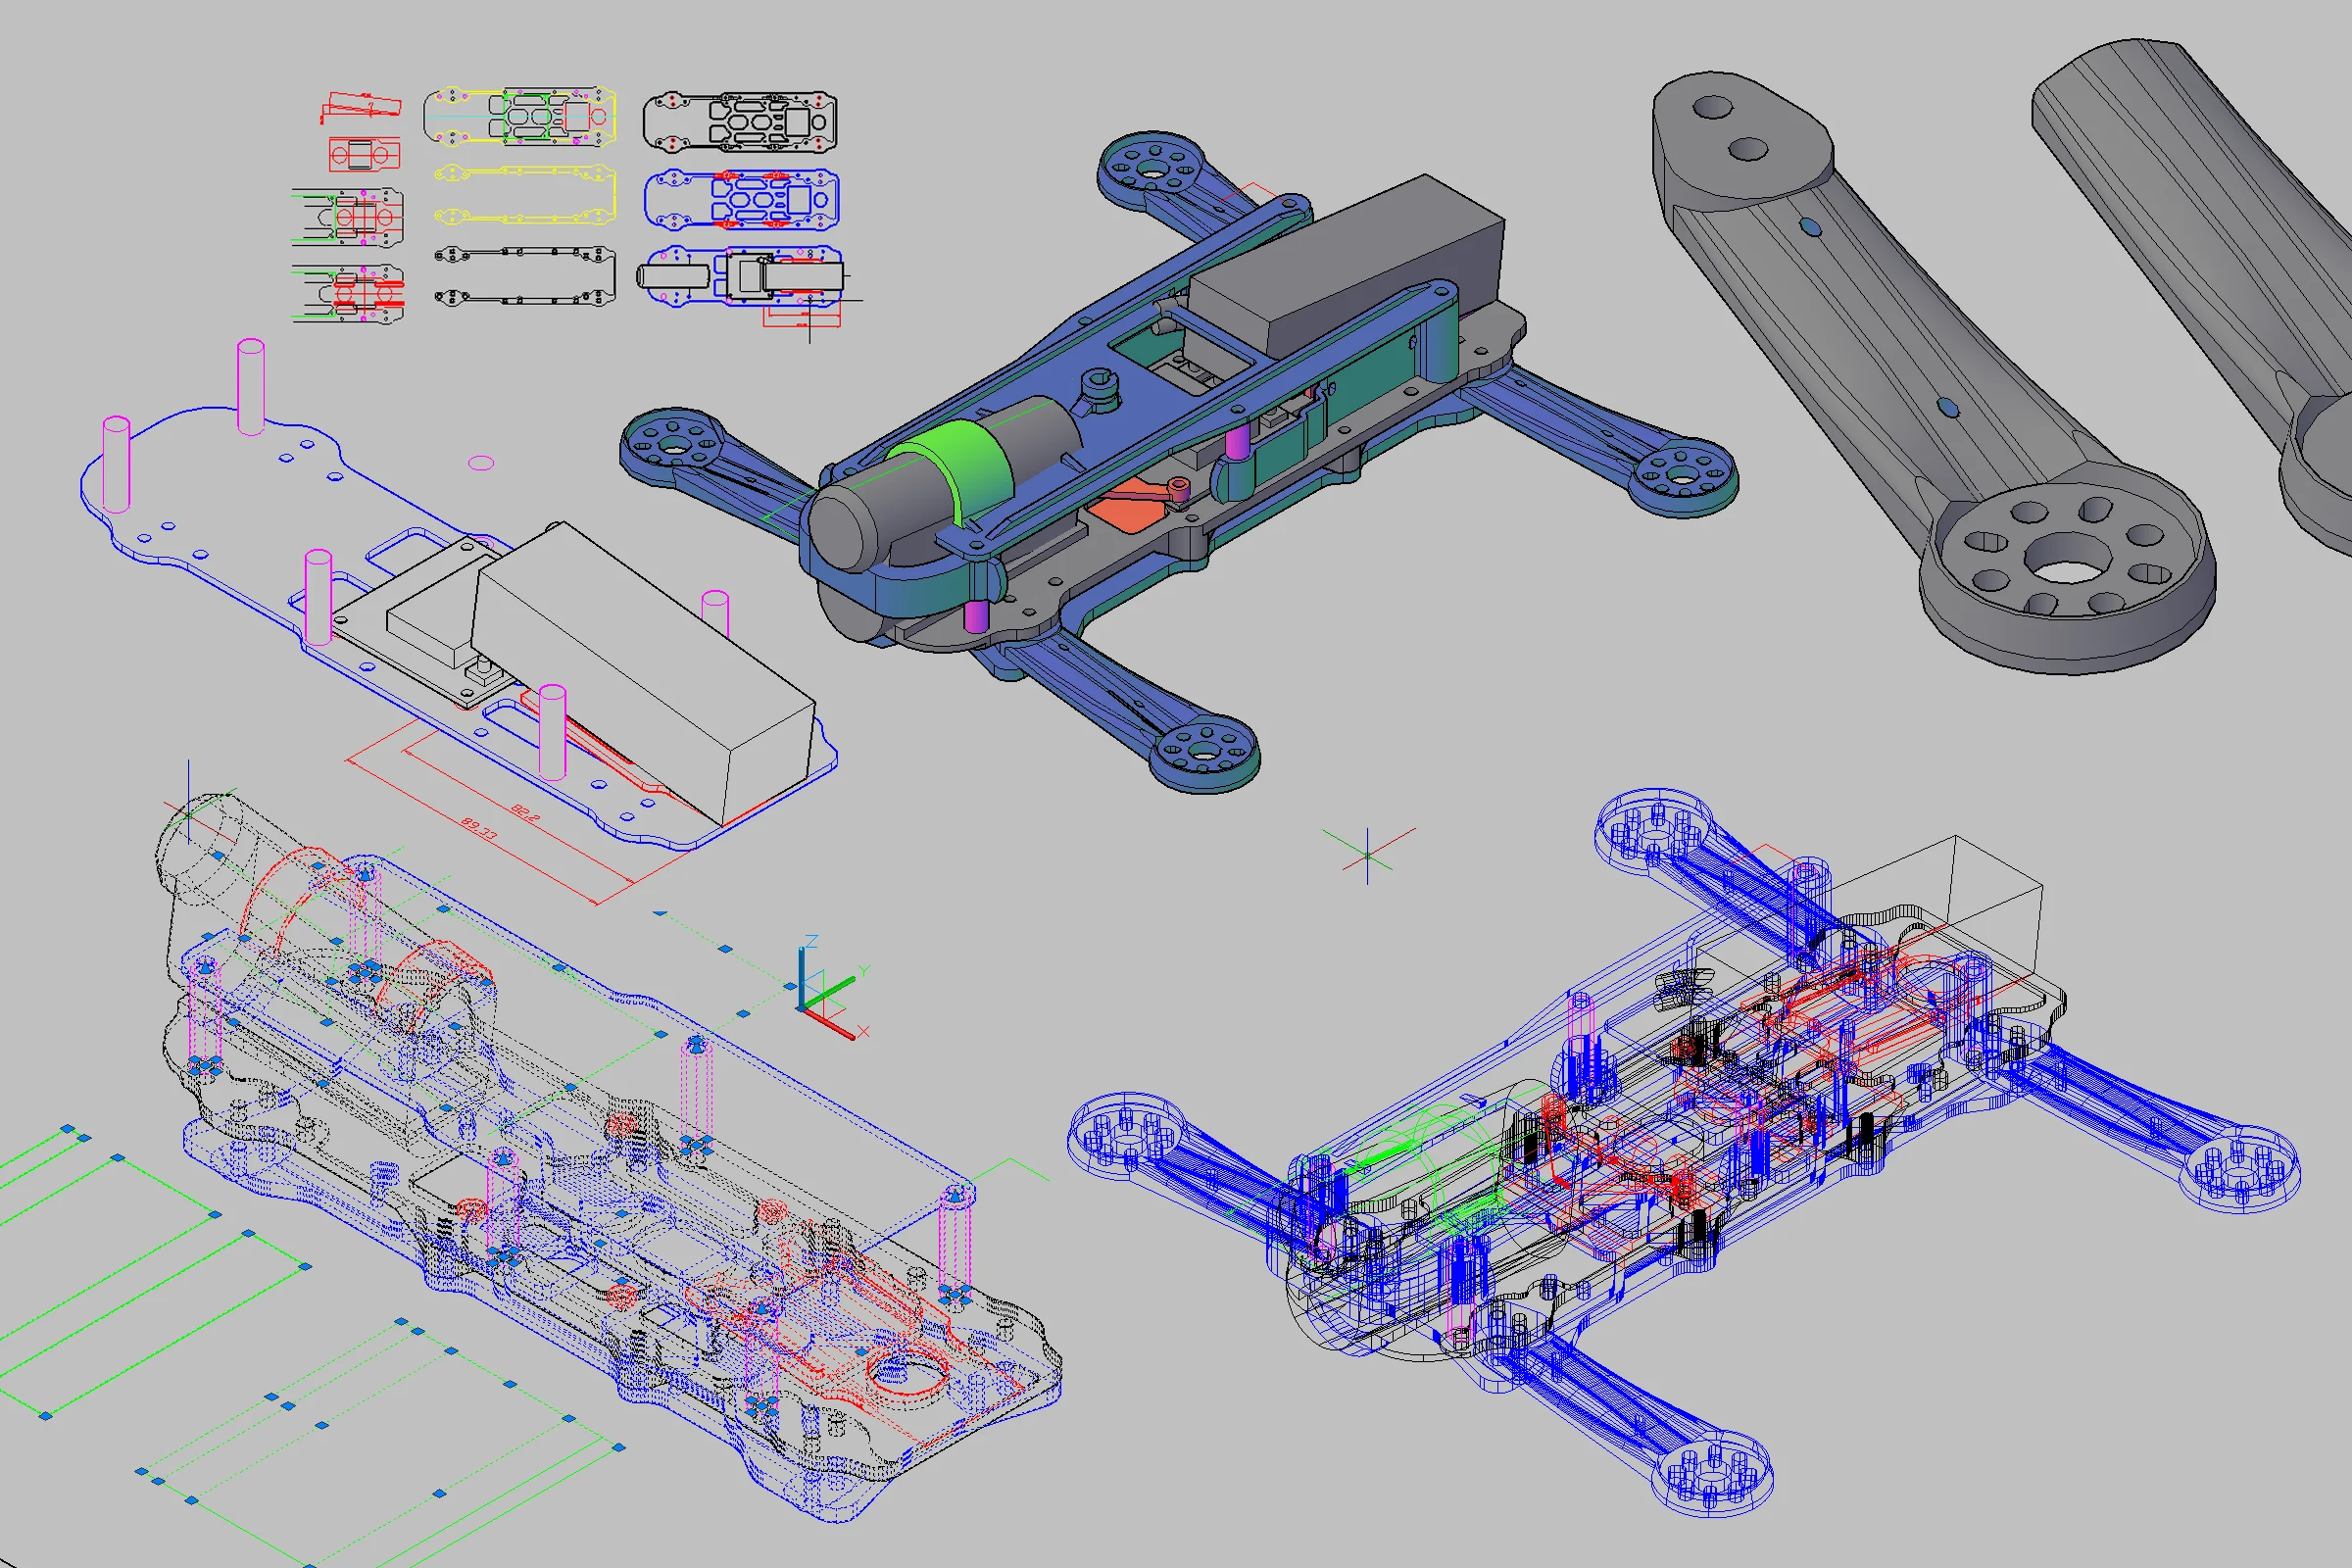
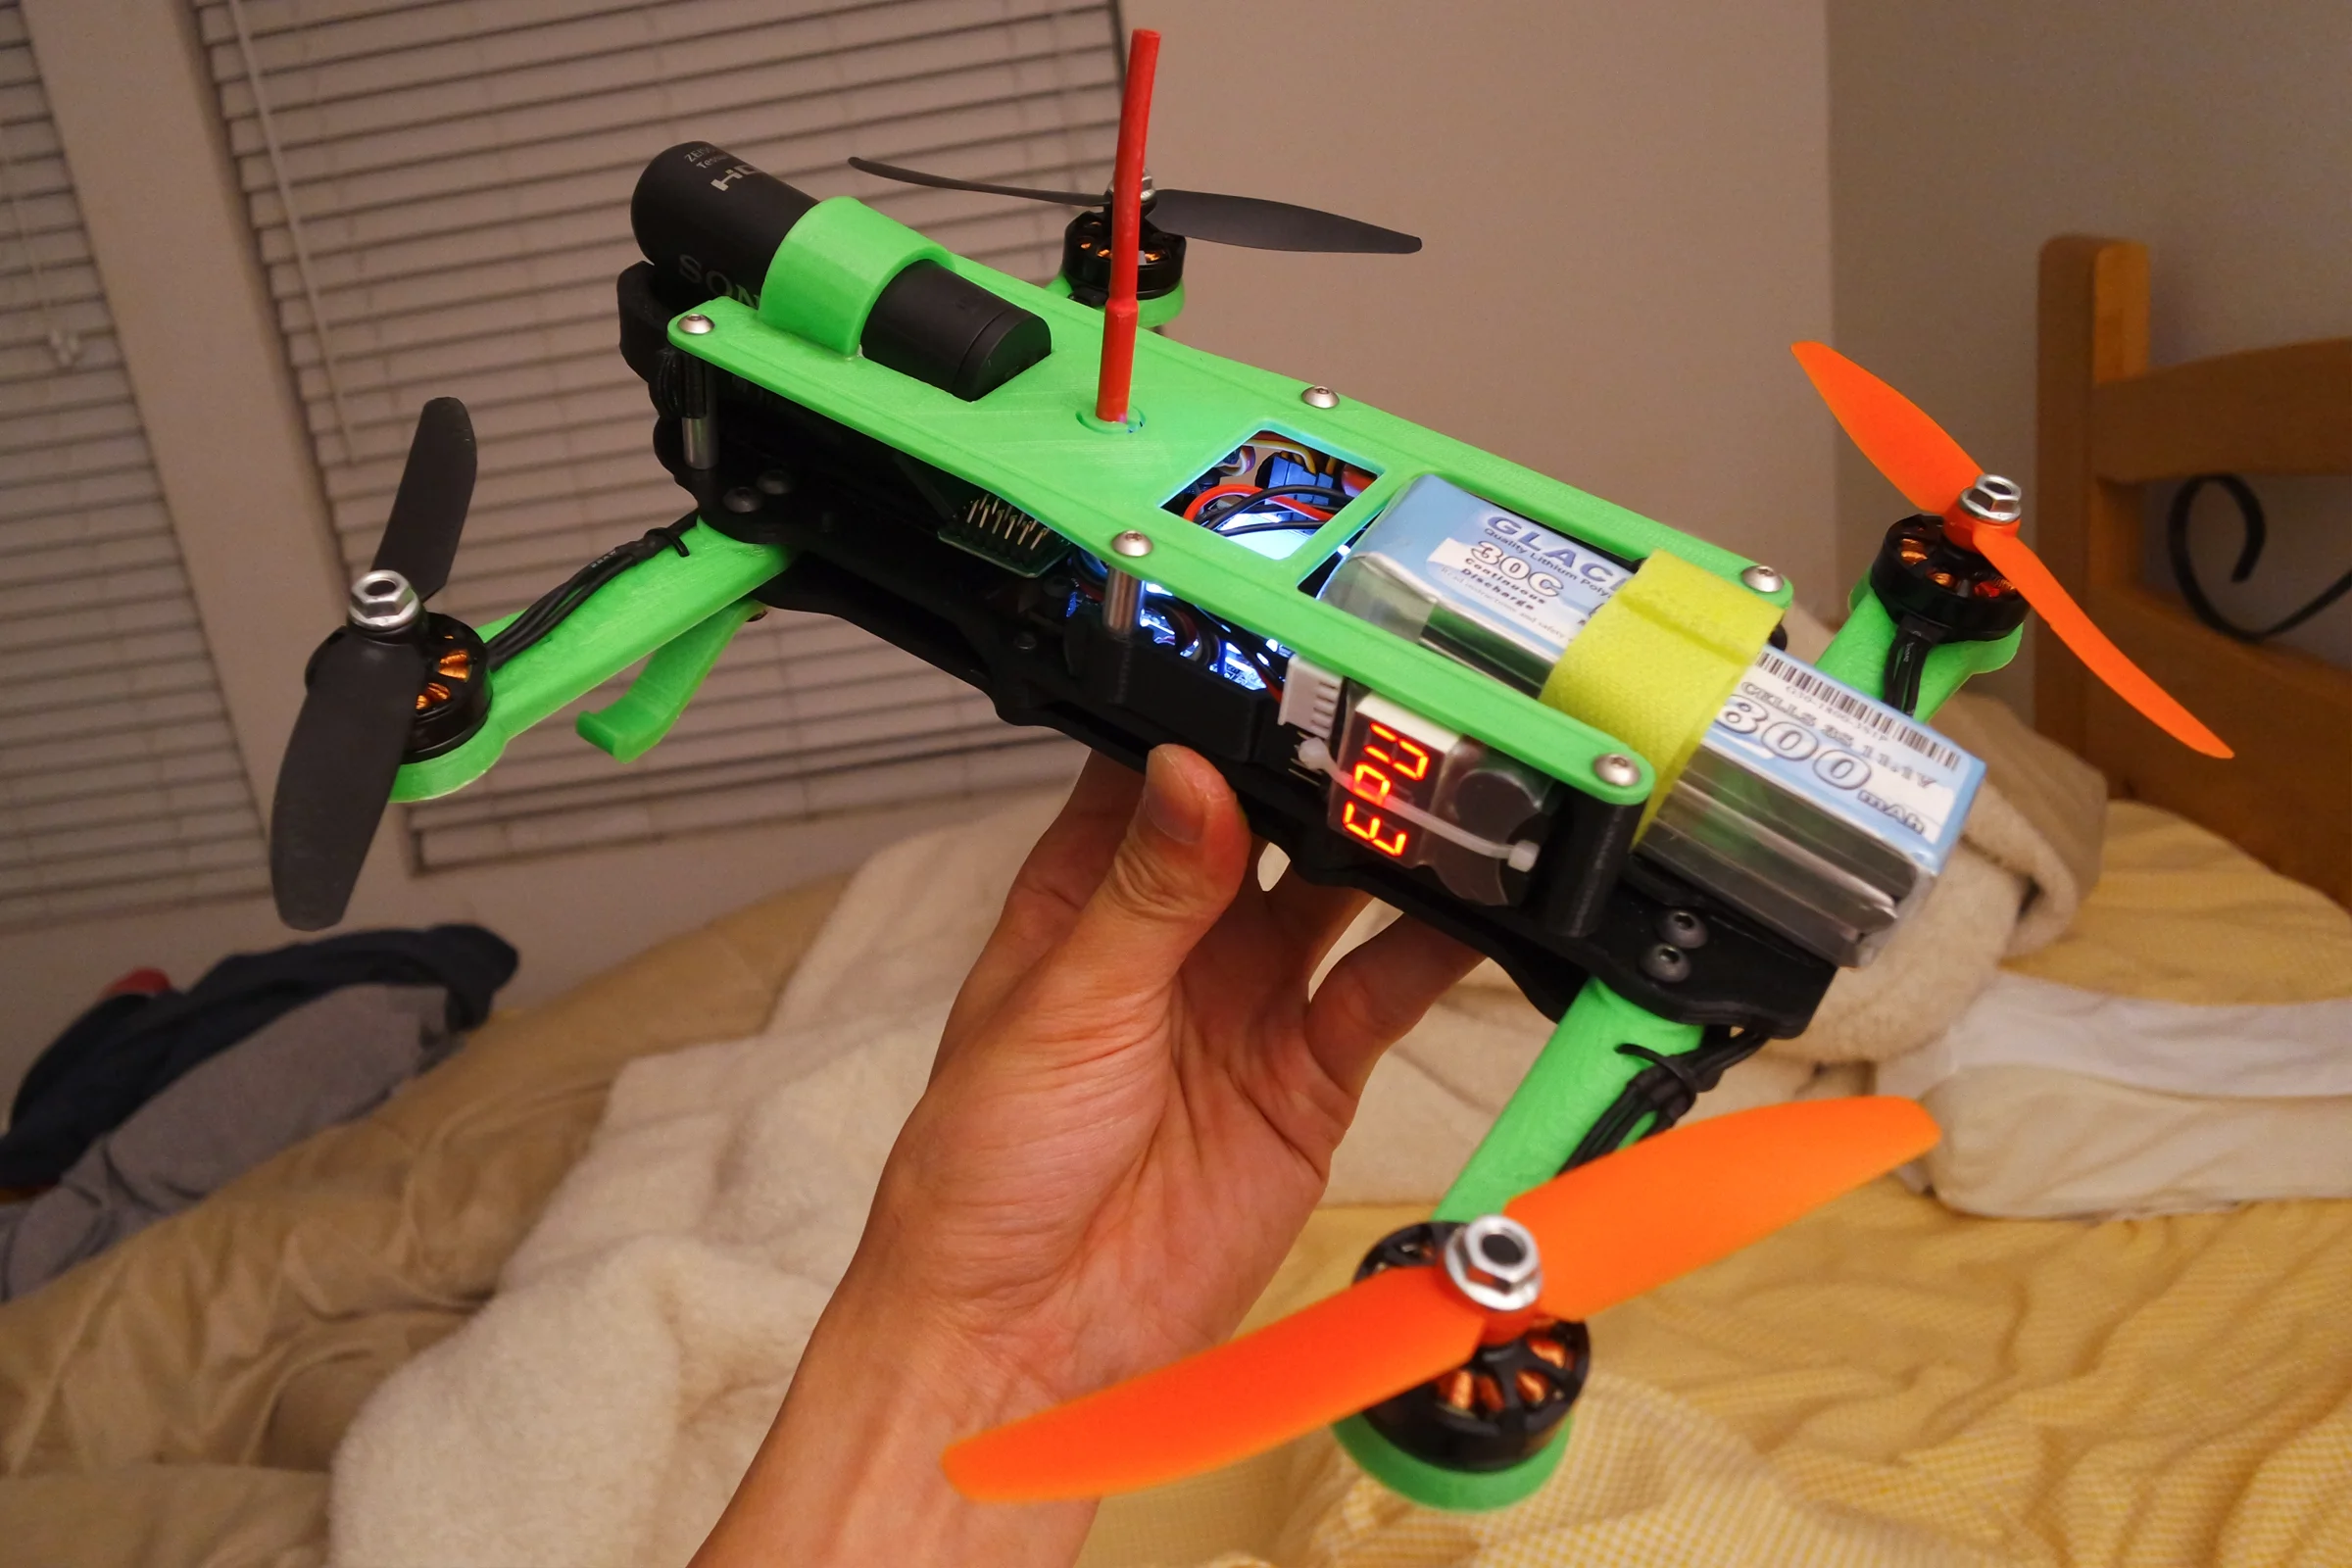
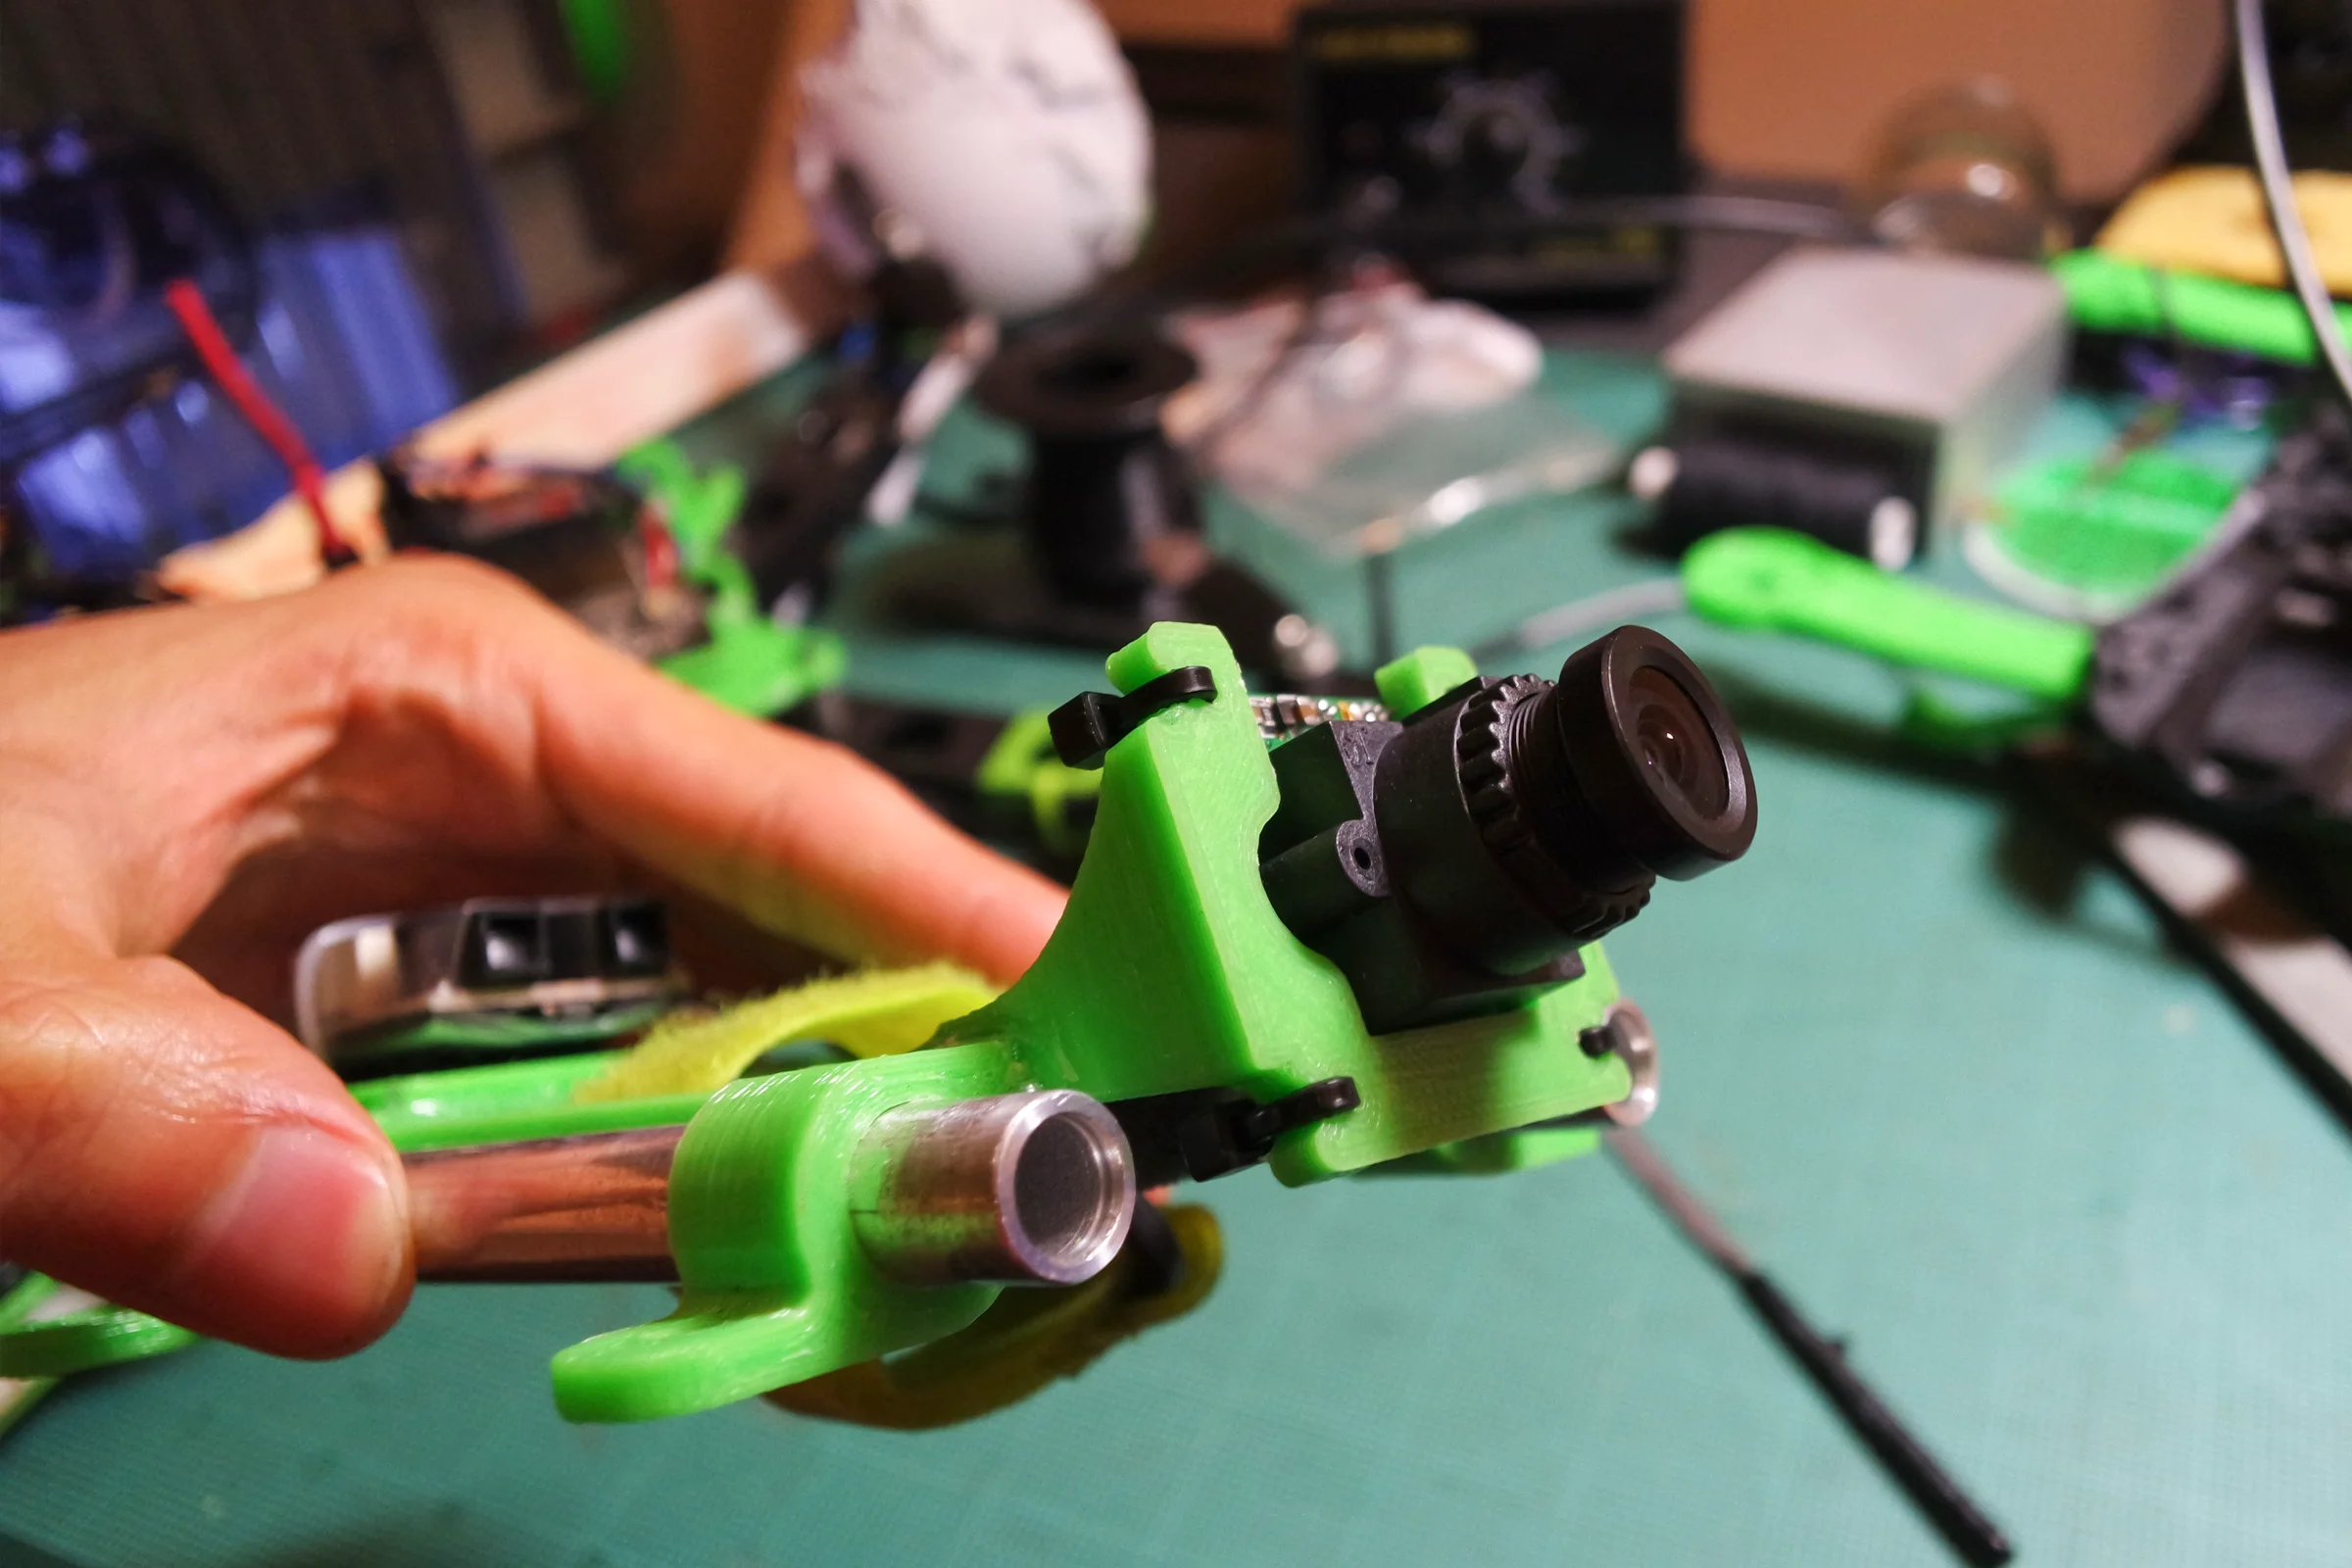
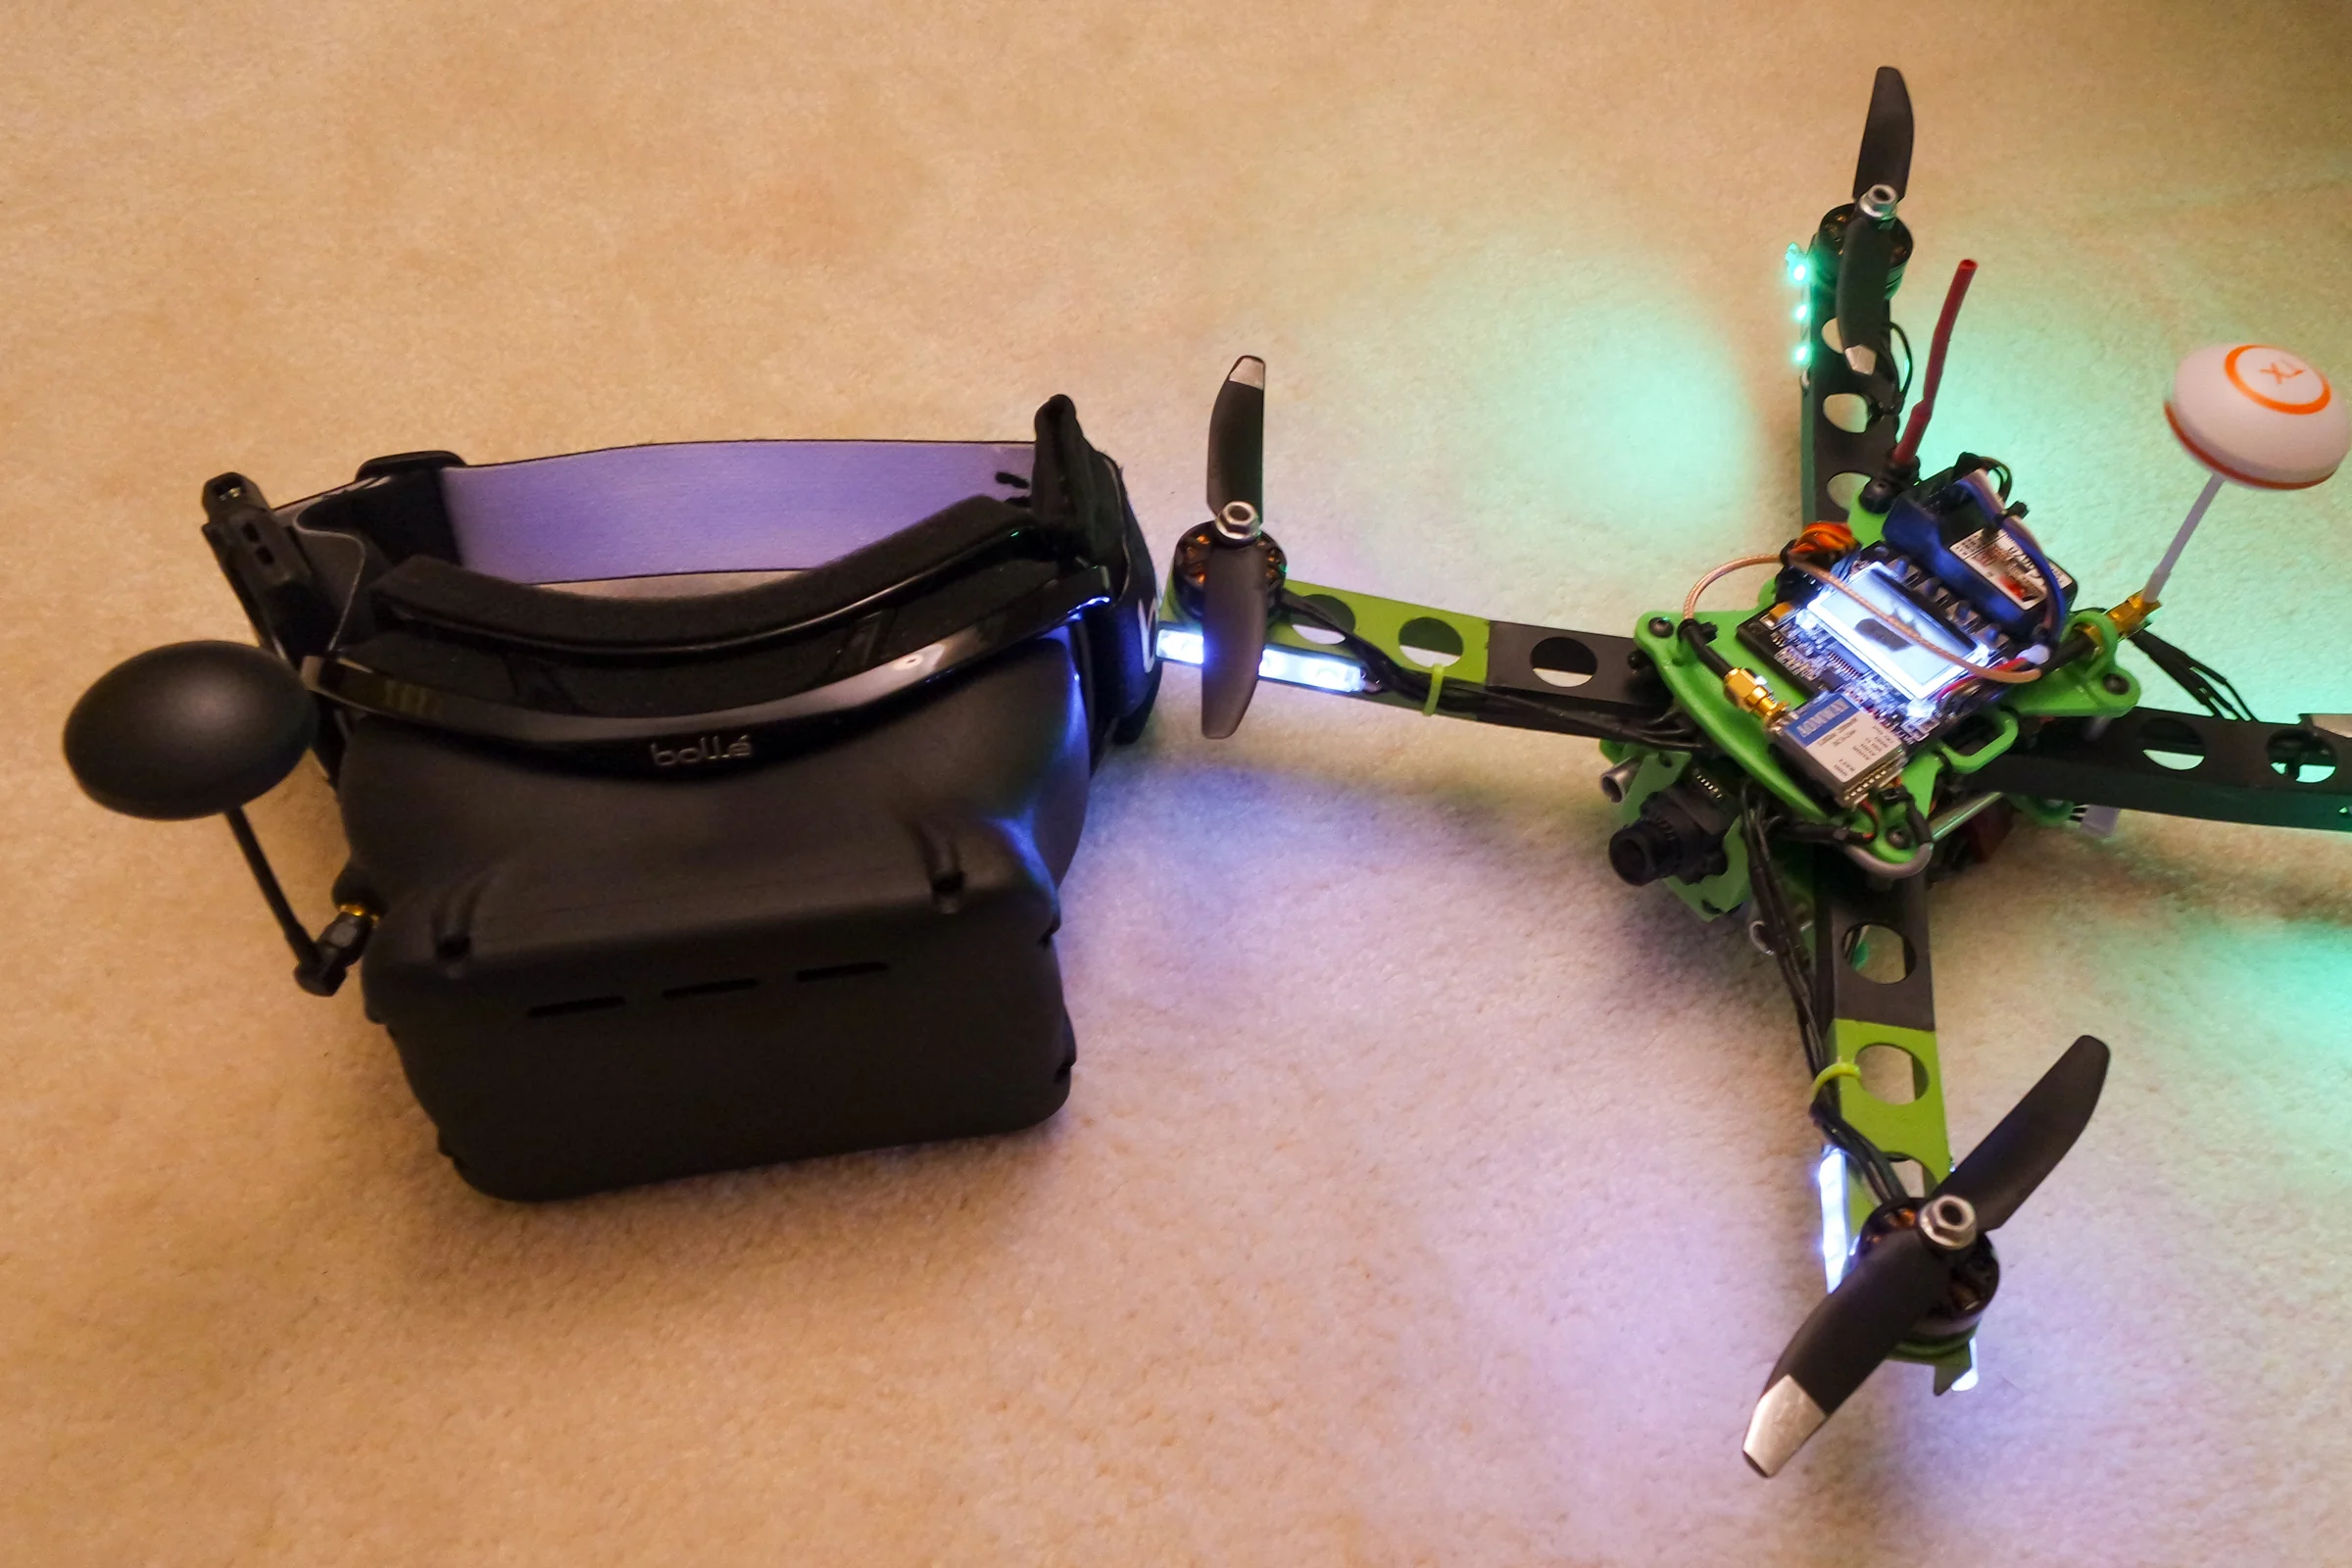
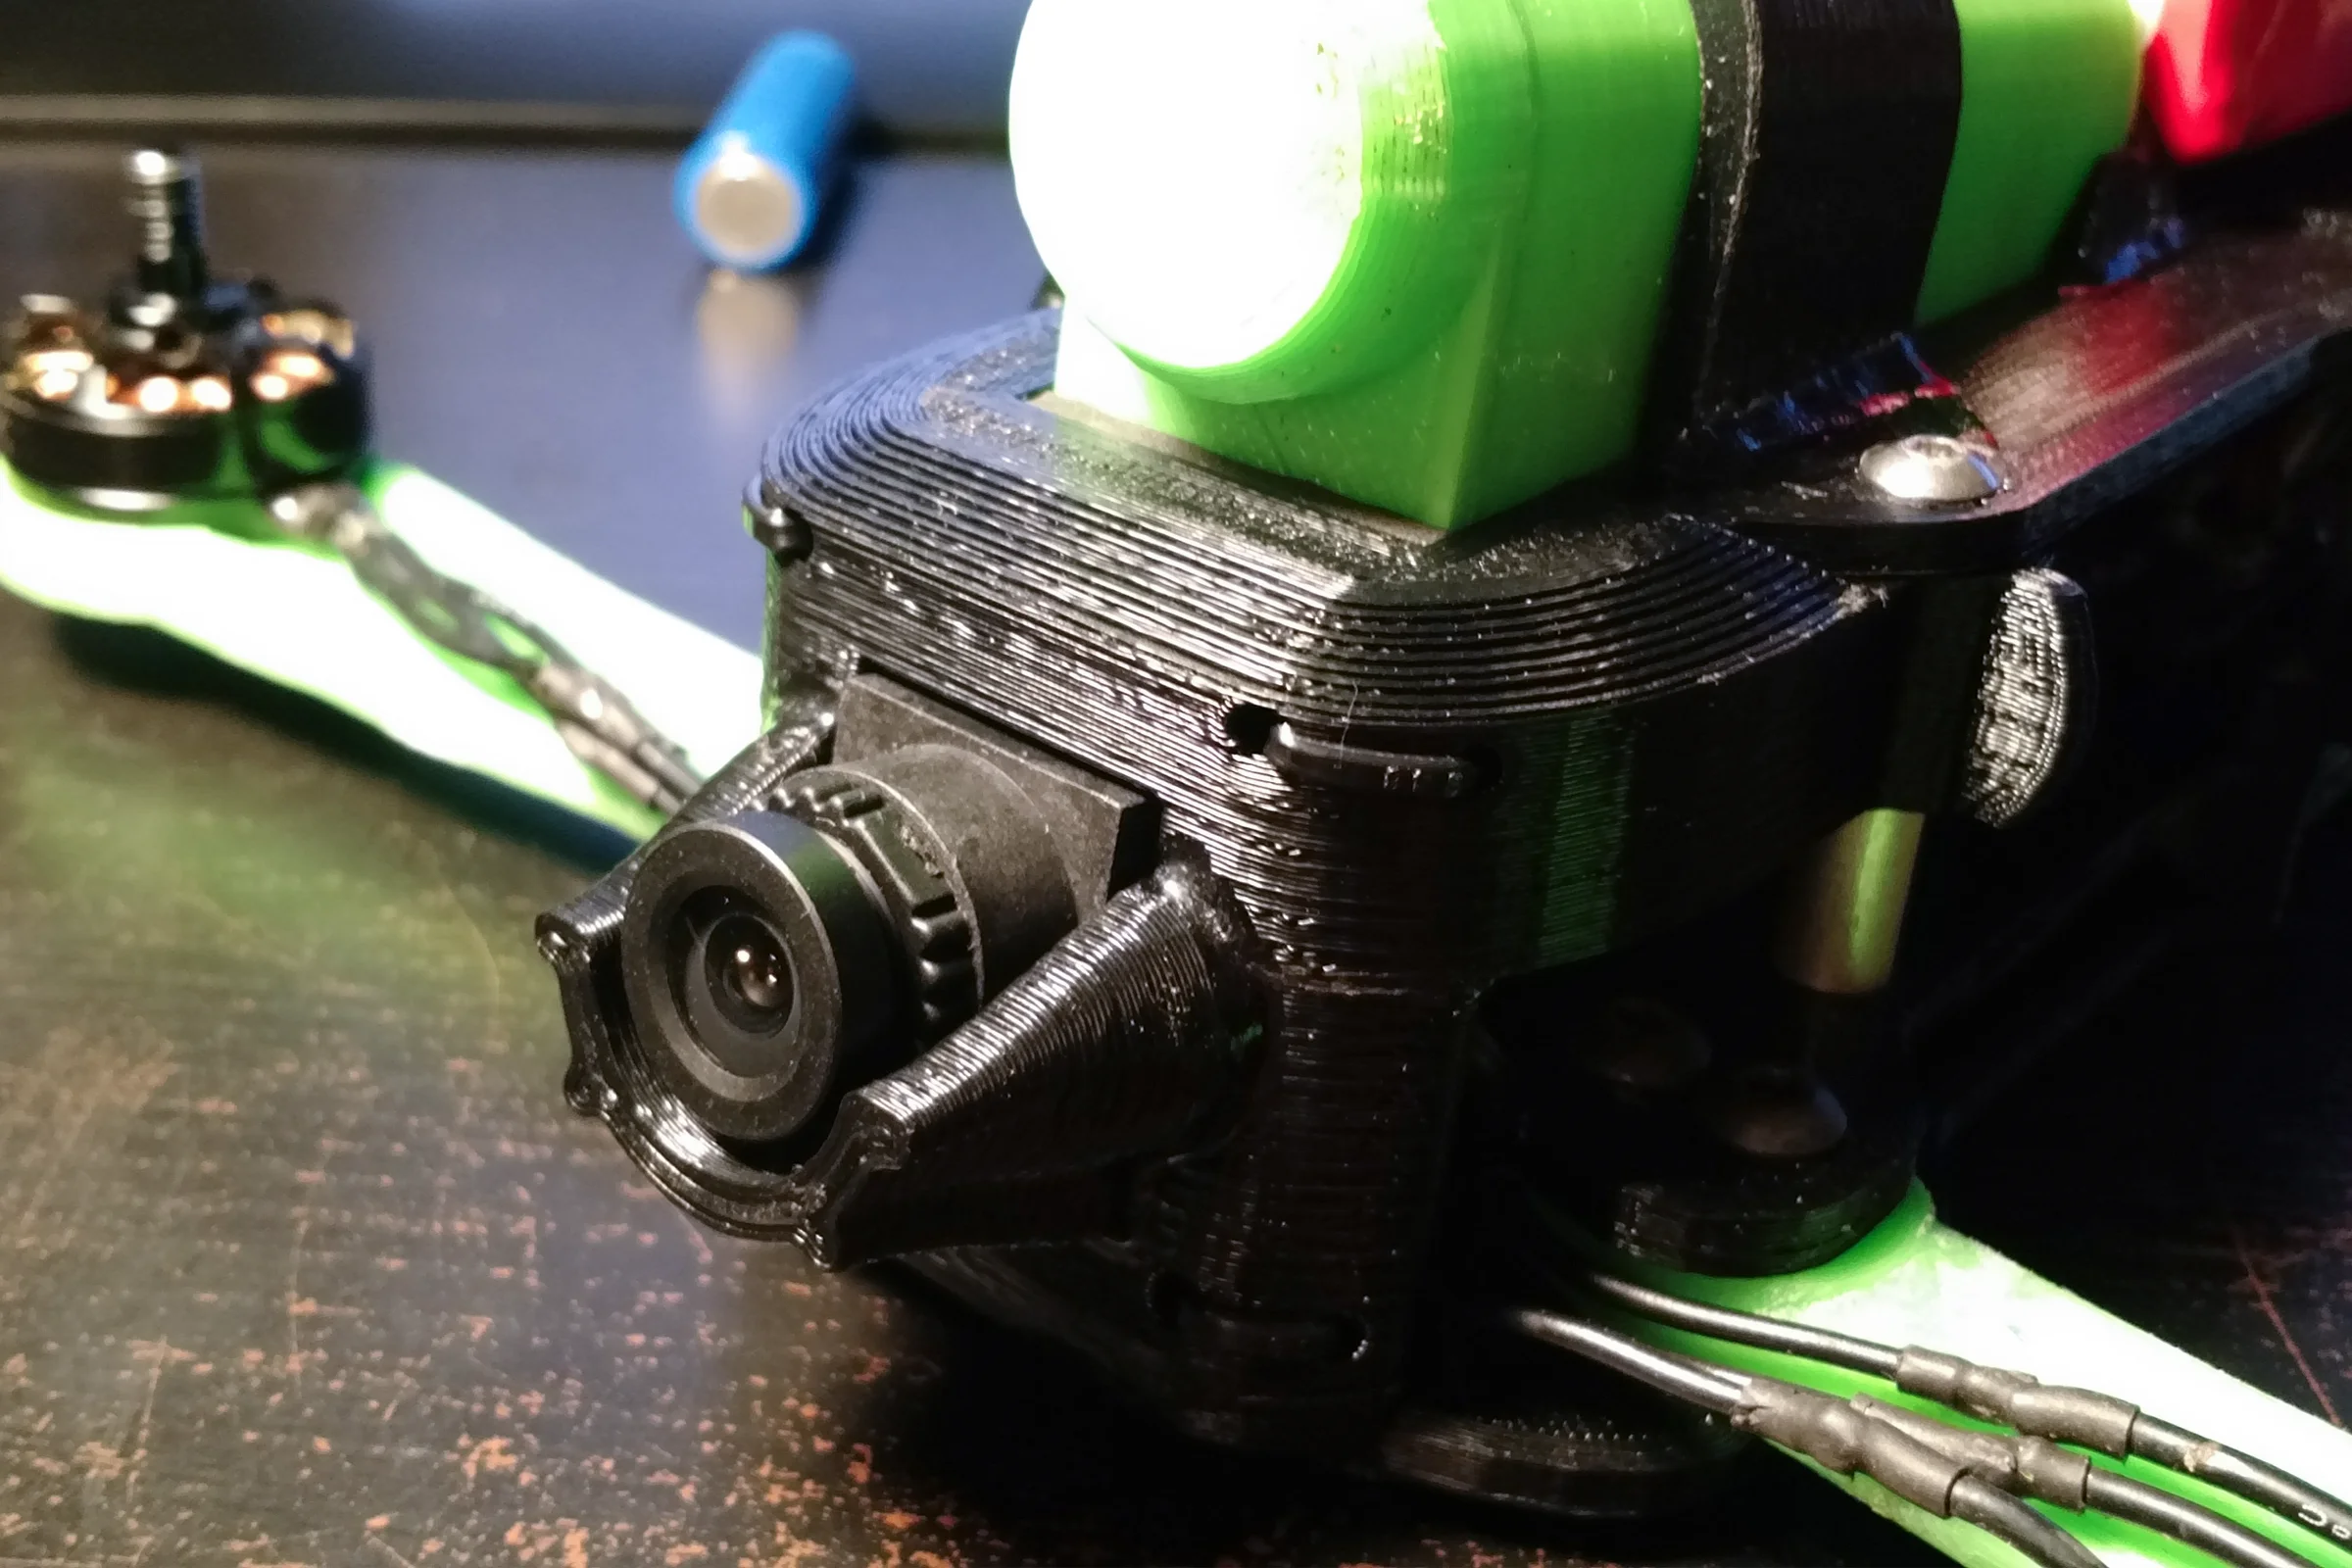
Drone 5 integrated everything learned from the previous four platforms into one final design. Switching to the DragonFly32 flight controller allowed for a significantly lower upper deck. To centralize weight and improve the moment of inertia, I moved both the battery and the Sony Actioncam inboard toward the center of the frame—positioning the battery much further in since it represents the highest percentage of total mass. This allowed the center of gravity to stay naturally balanced without needing a tilted mounting arrangement. The front retaining clip was designed for double duty: it locks the Actioncam in place and serves as the housing for the FPV board cam, with an integrated impact protector for the lens.
While the initial design used 3D-printed arms, I wanted to push the platform’s performance ceiling. I previously attempted to maximize the strength of printed arms by strategically shaping their profiles to force the slicer into creating continuous, high-strength perimeter walls. However, the torque loads from high-performance maneuvers eventually reached the material's fatigue limit and caused a few total frame-loss crashes. I modified the frame to accept off-the-shelf carbon fiber motor arms, which offered a better cost-to-performance ratio in bulk. Because the CF arms I selected were longer, it provided the added benefit of being able to run larger propellers for significantly more thrust.
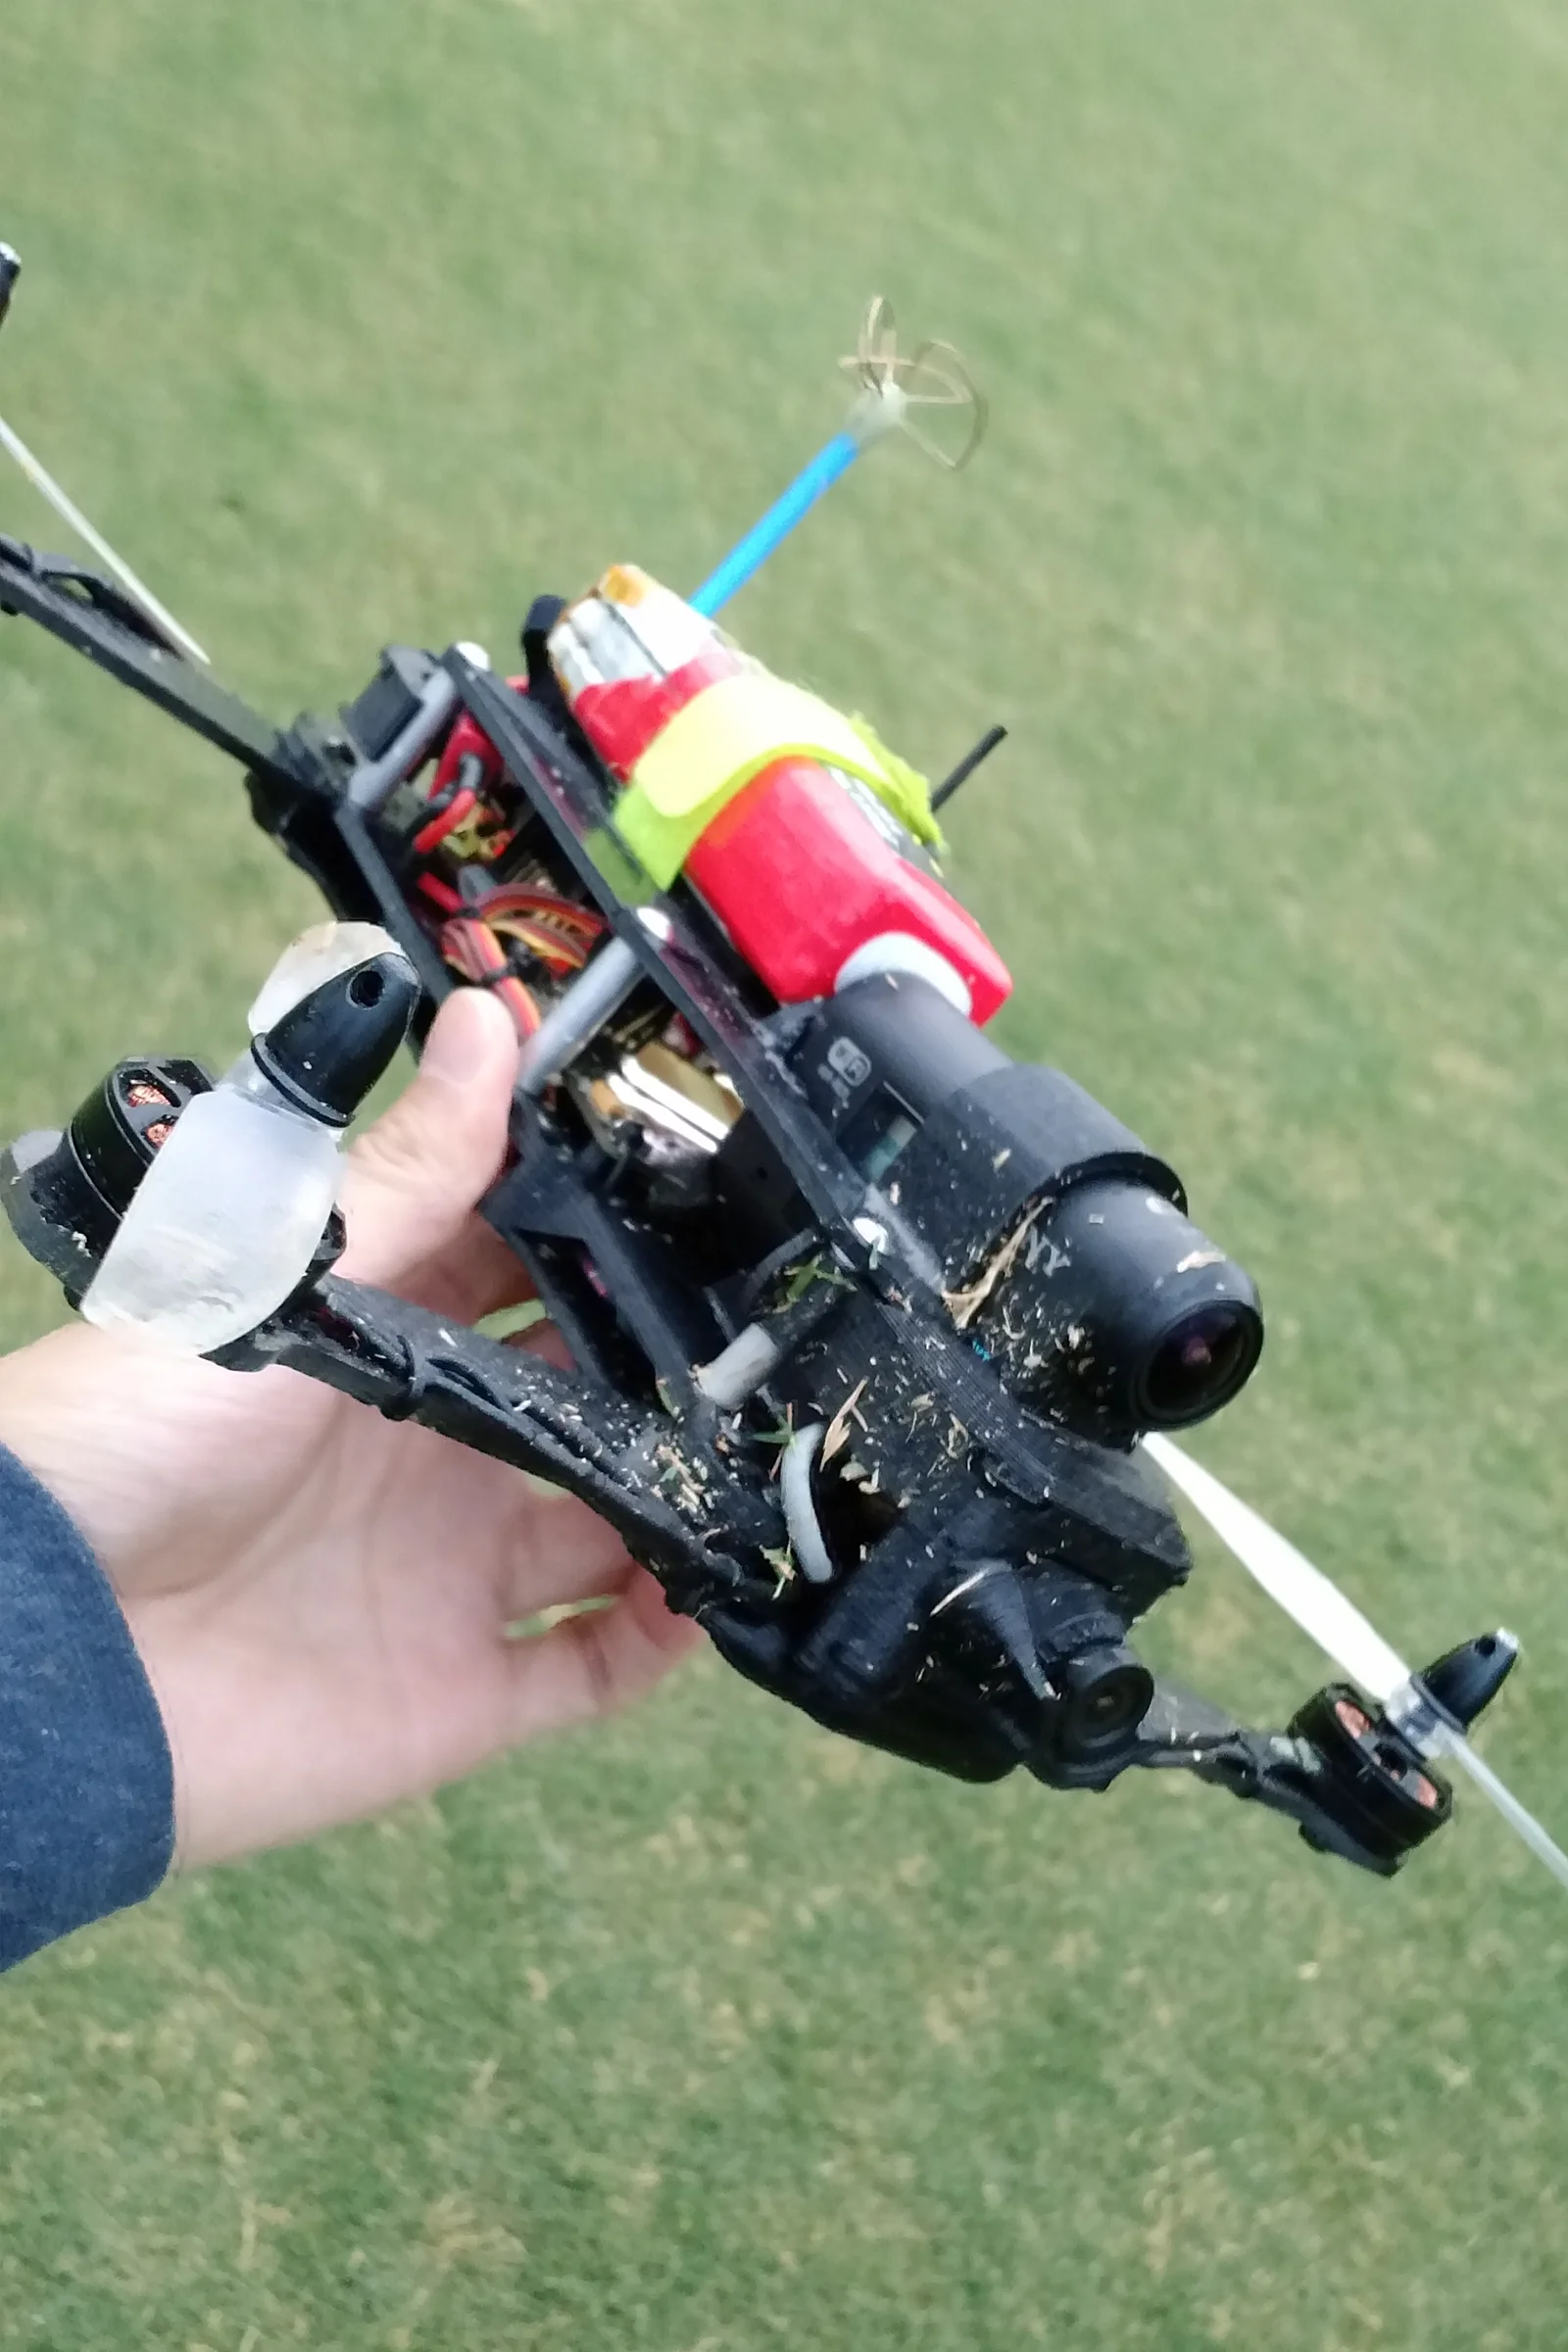
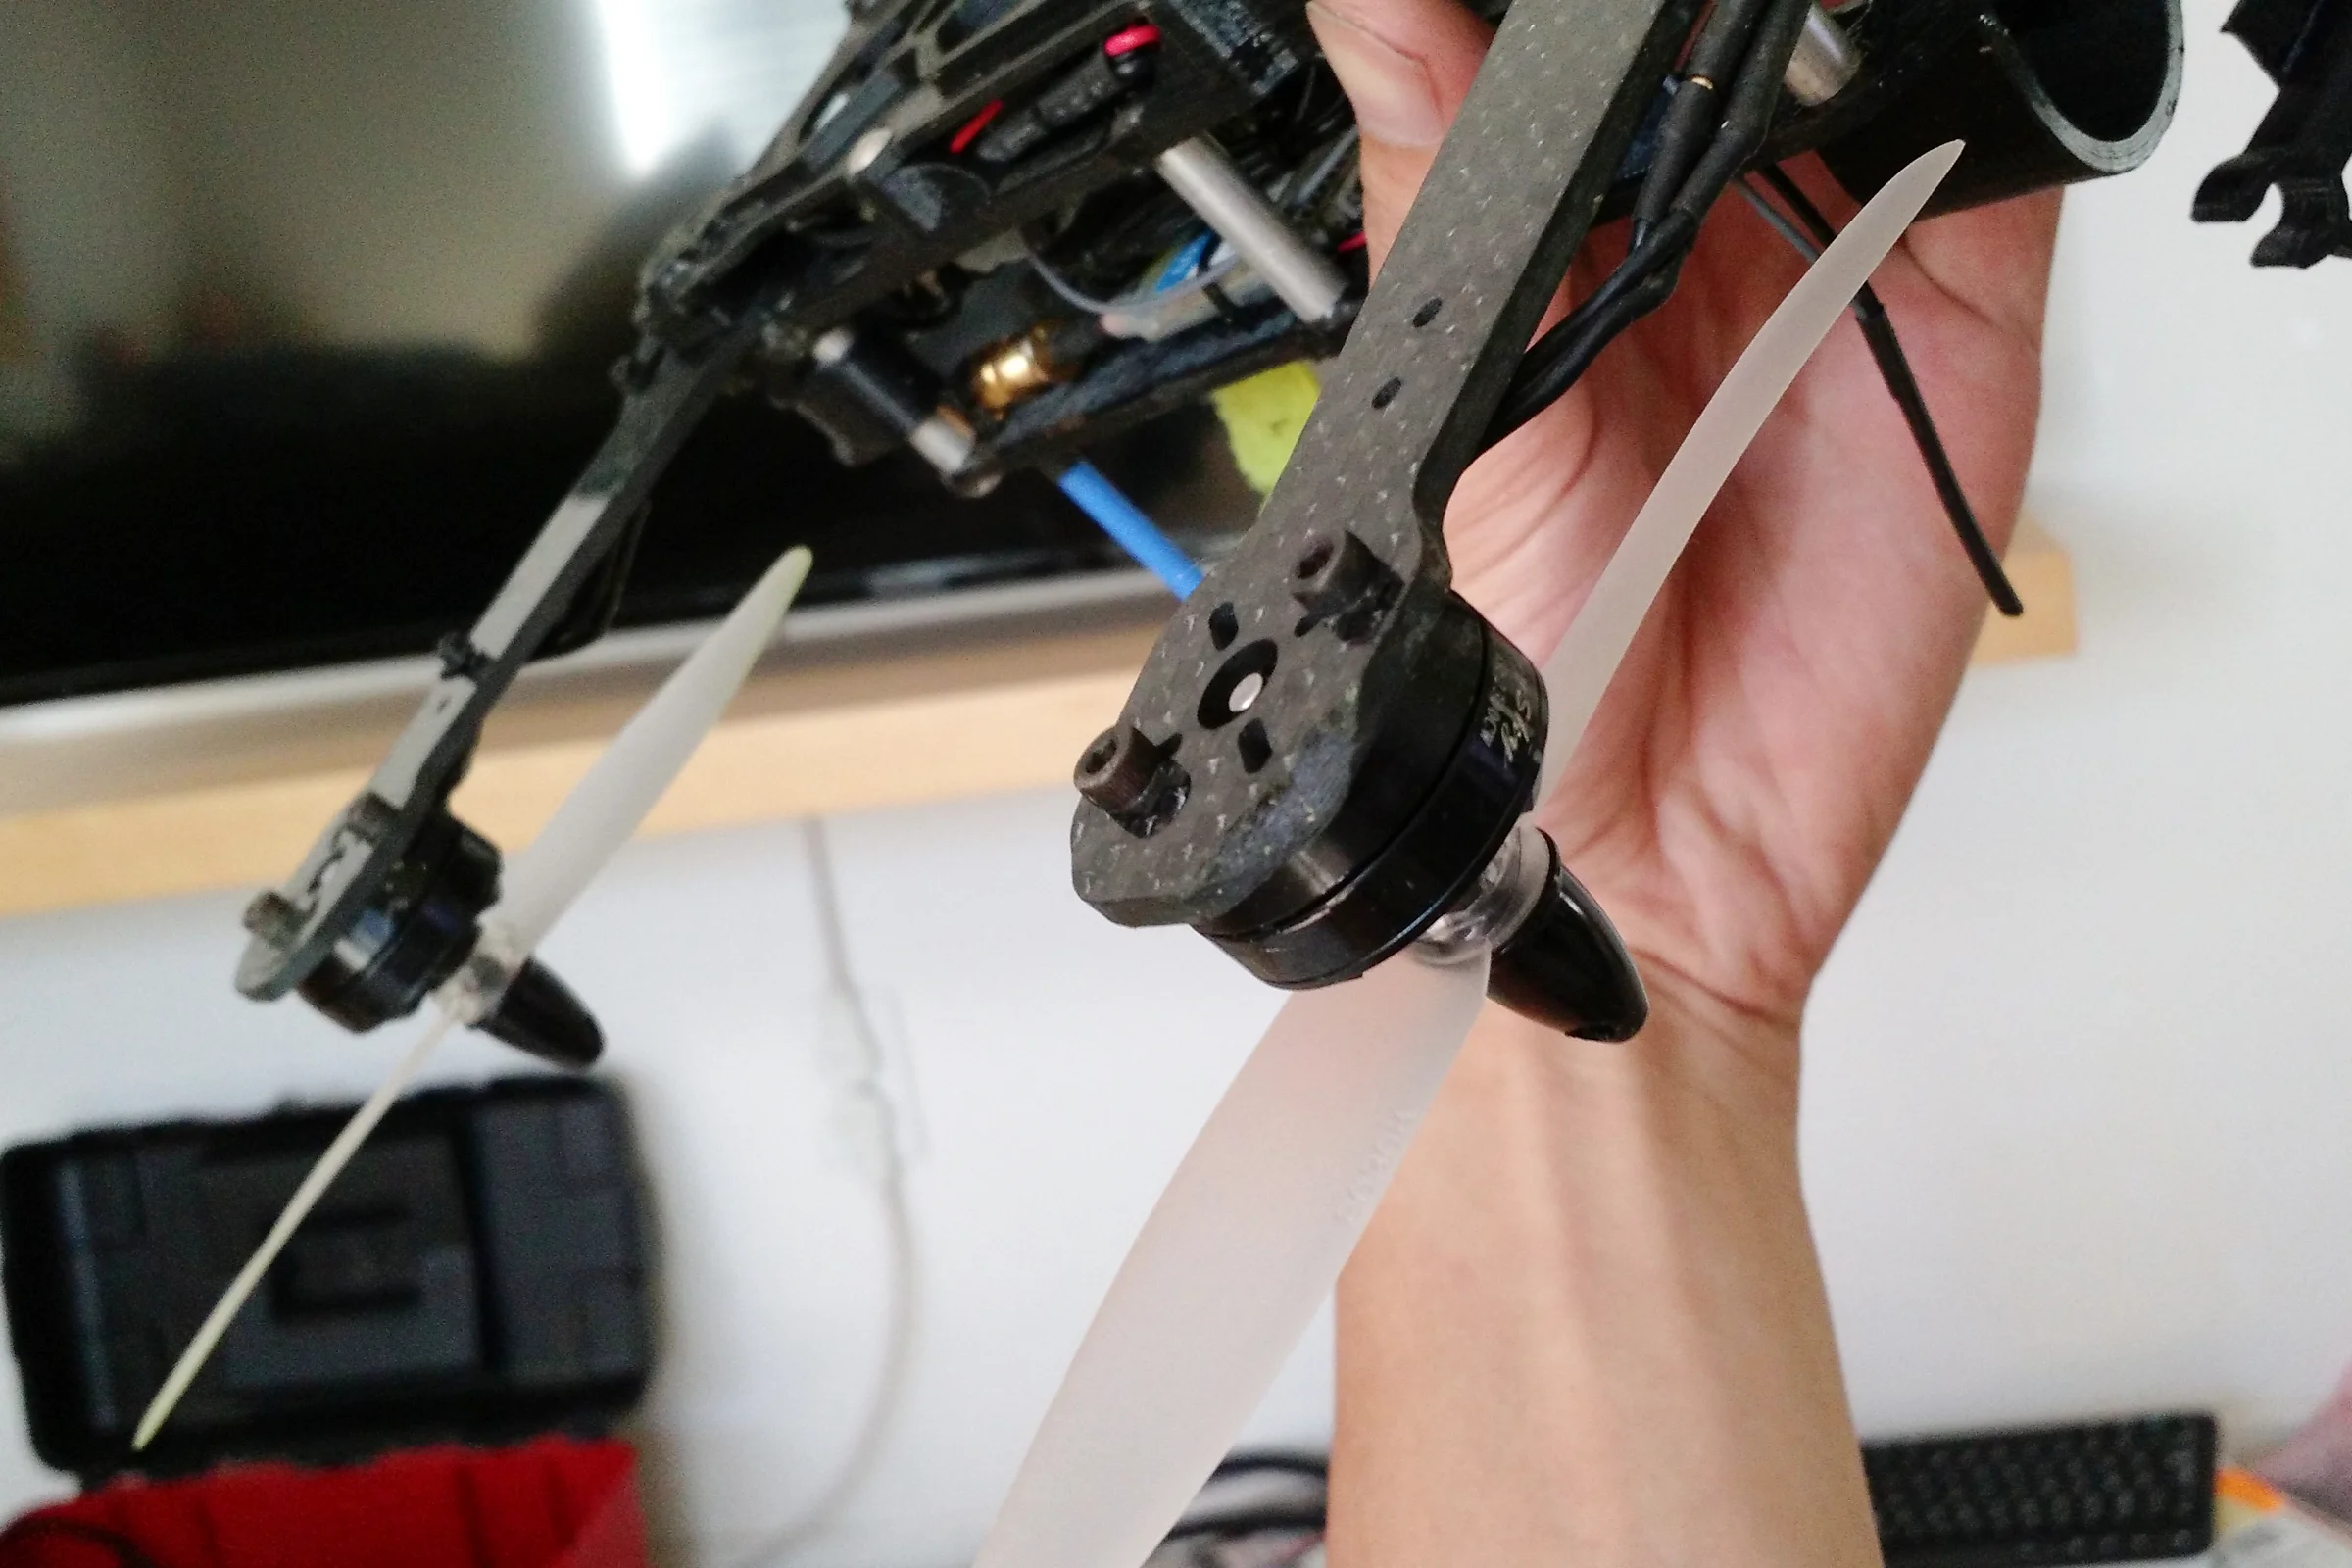
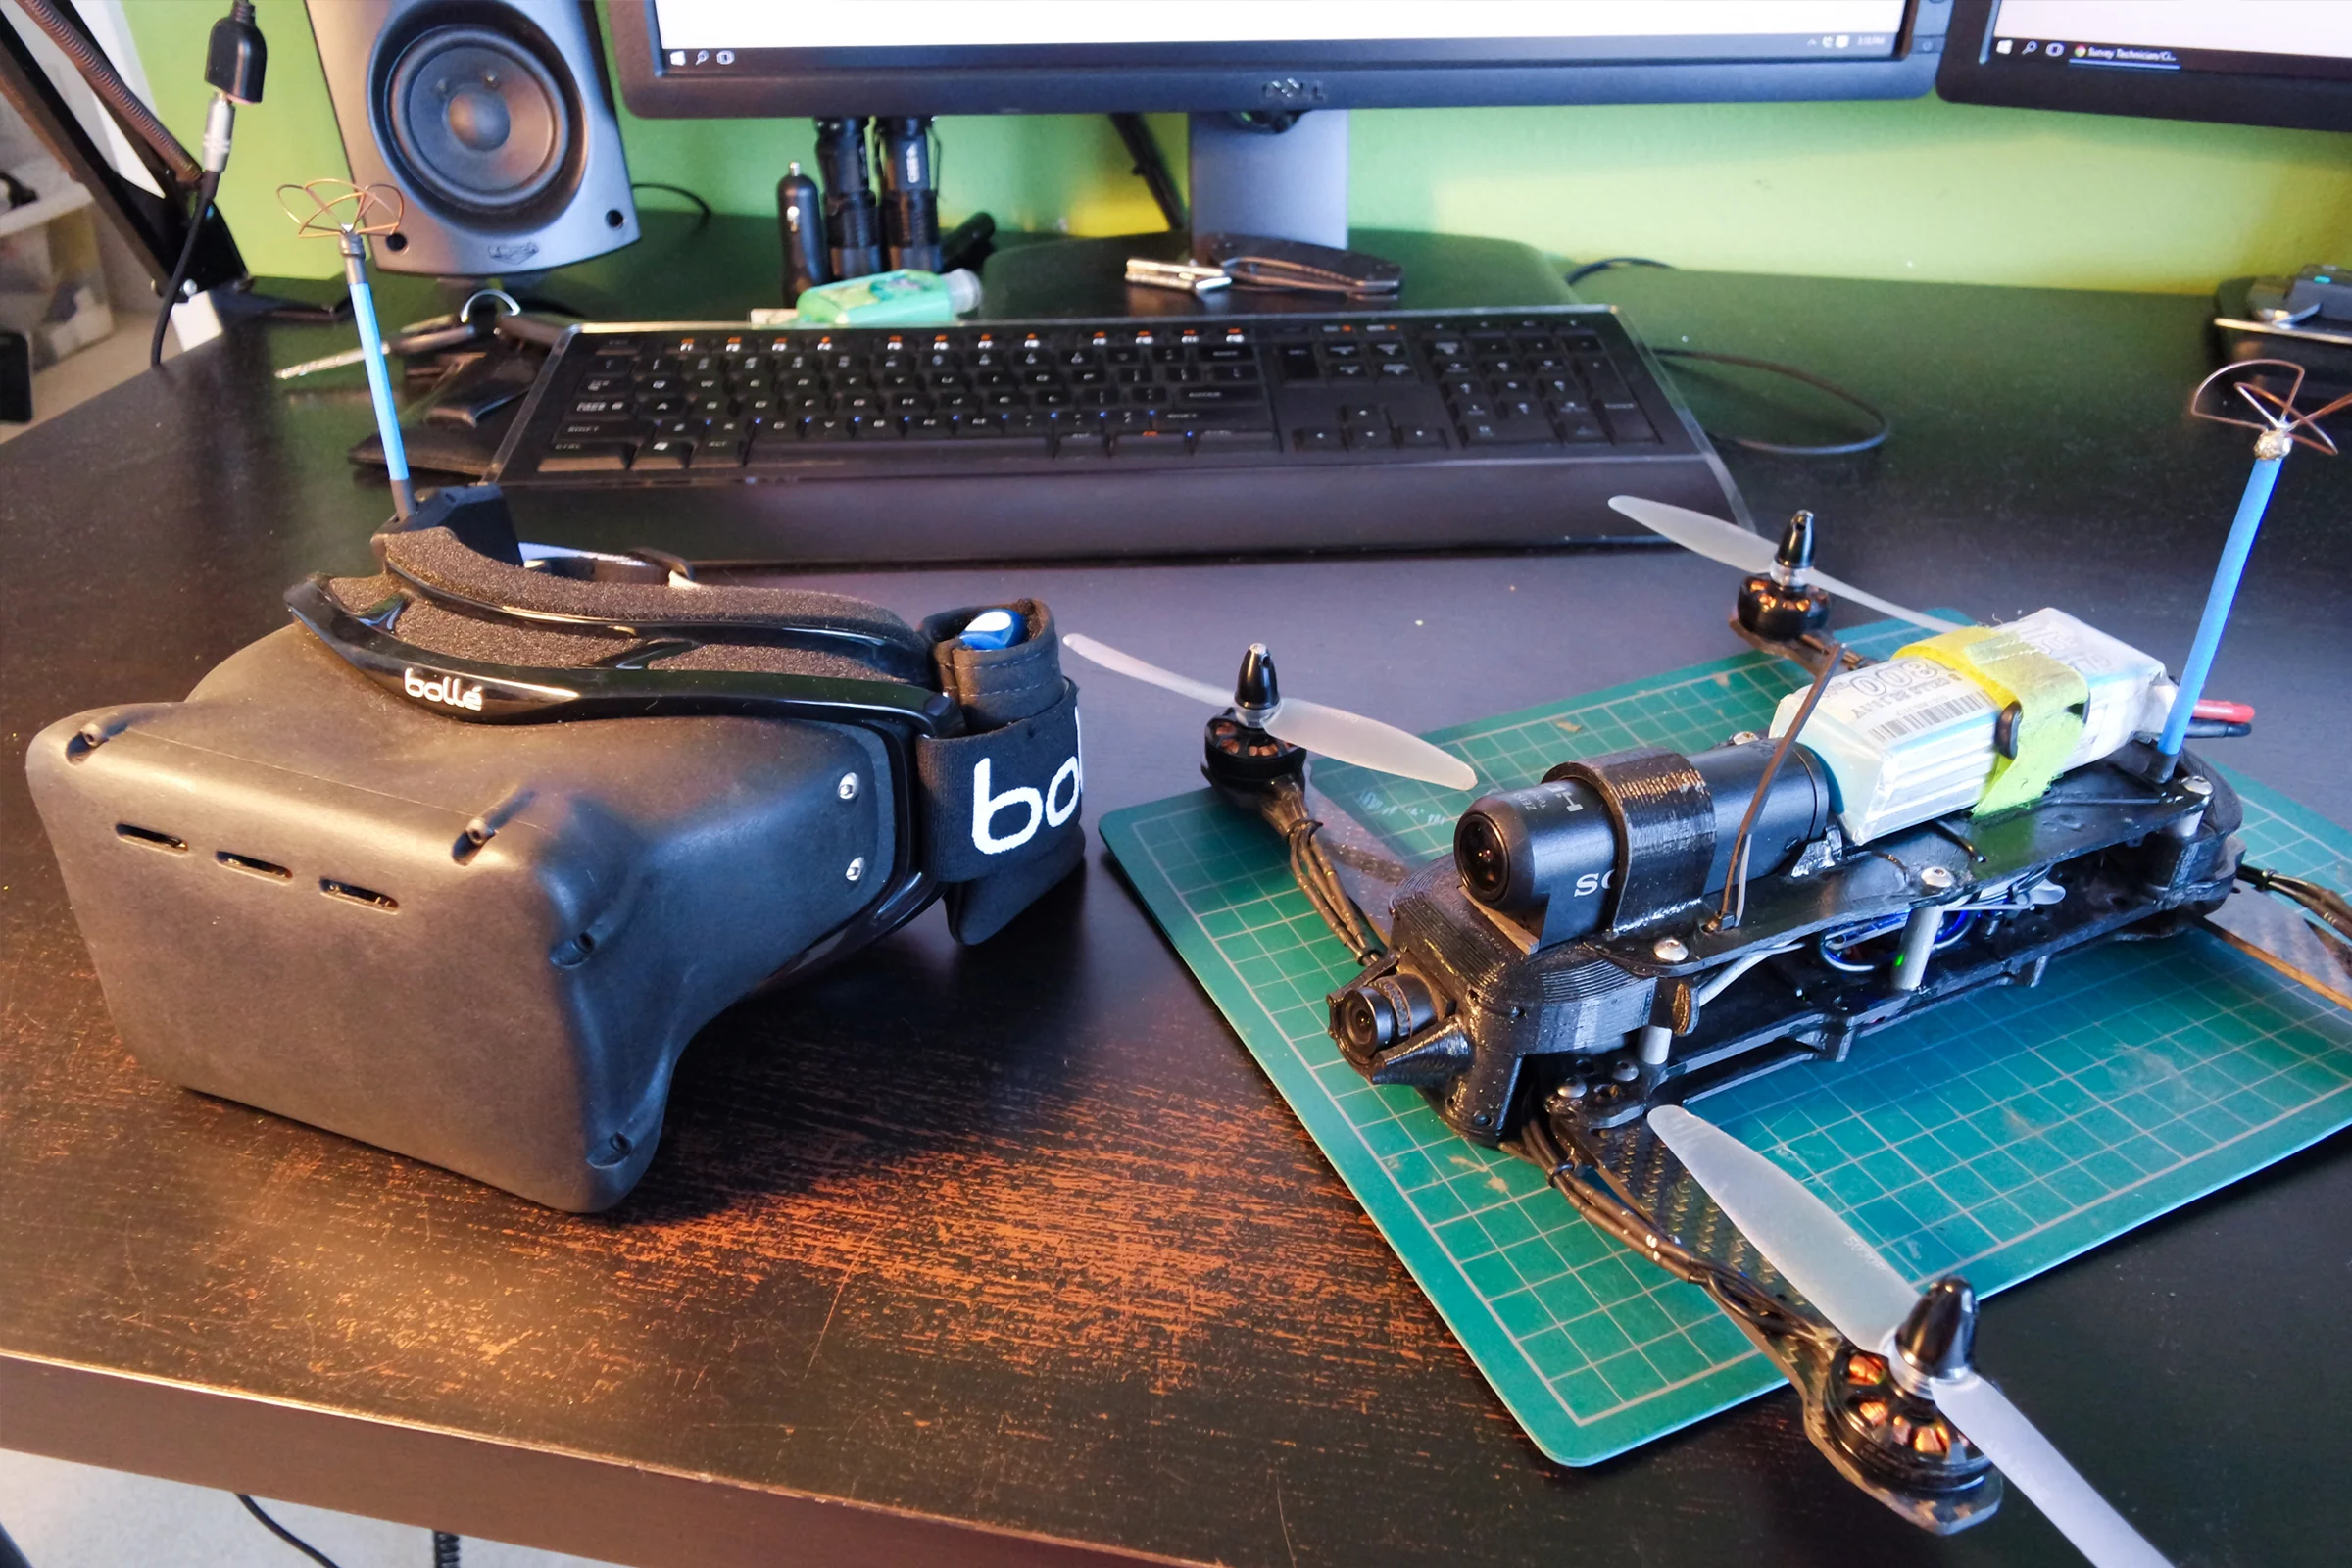
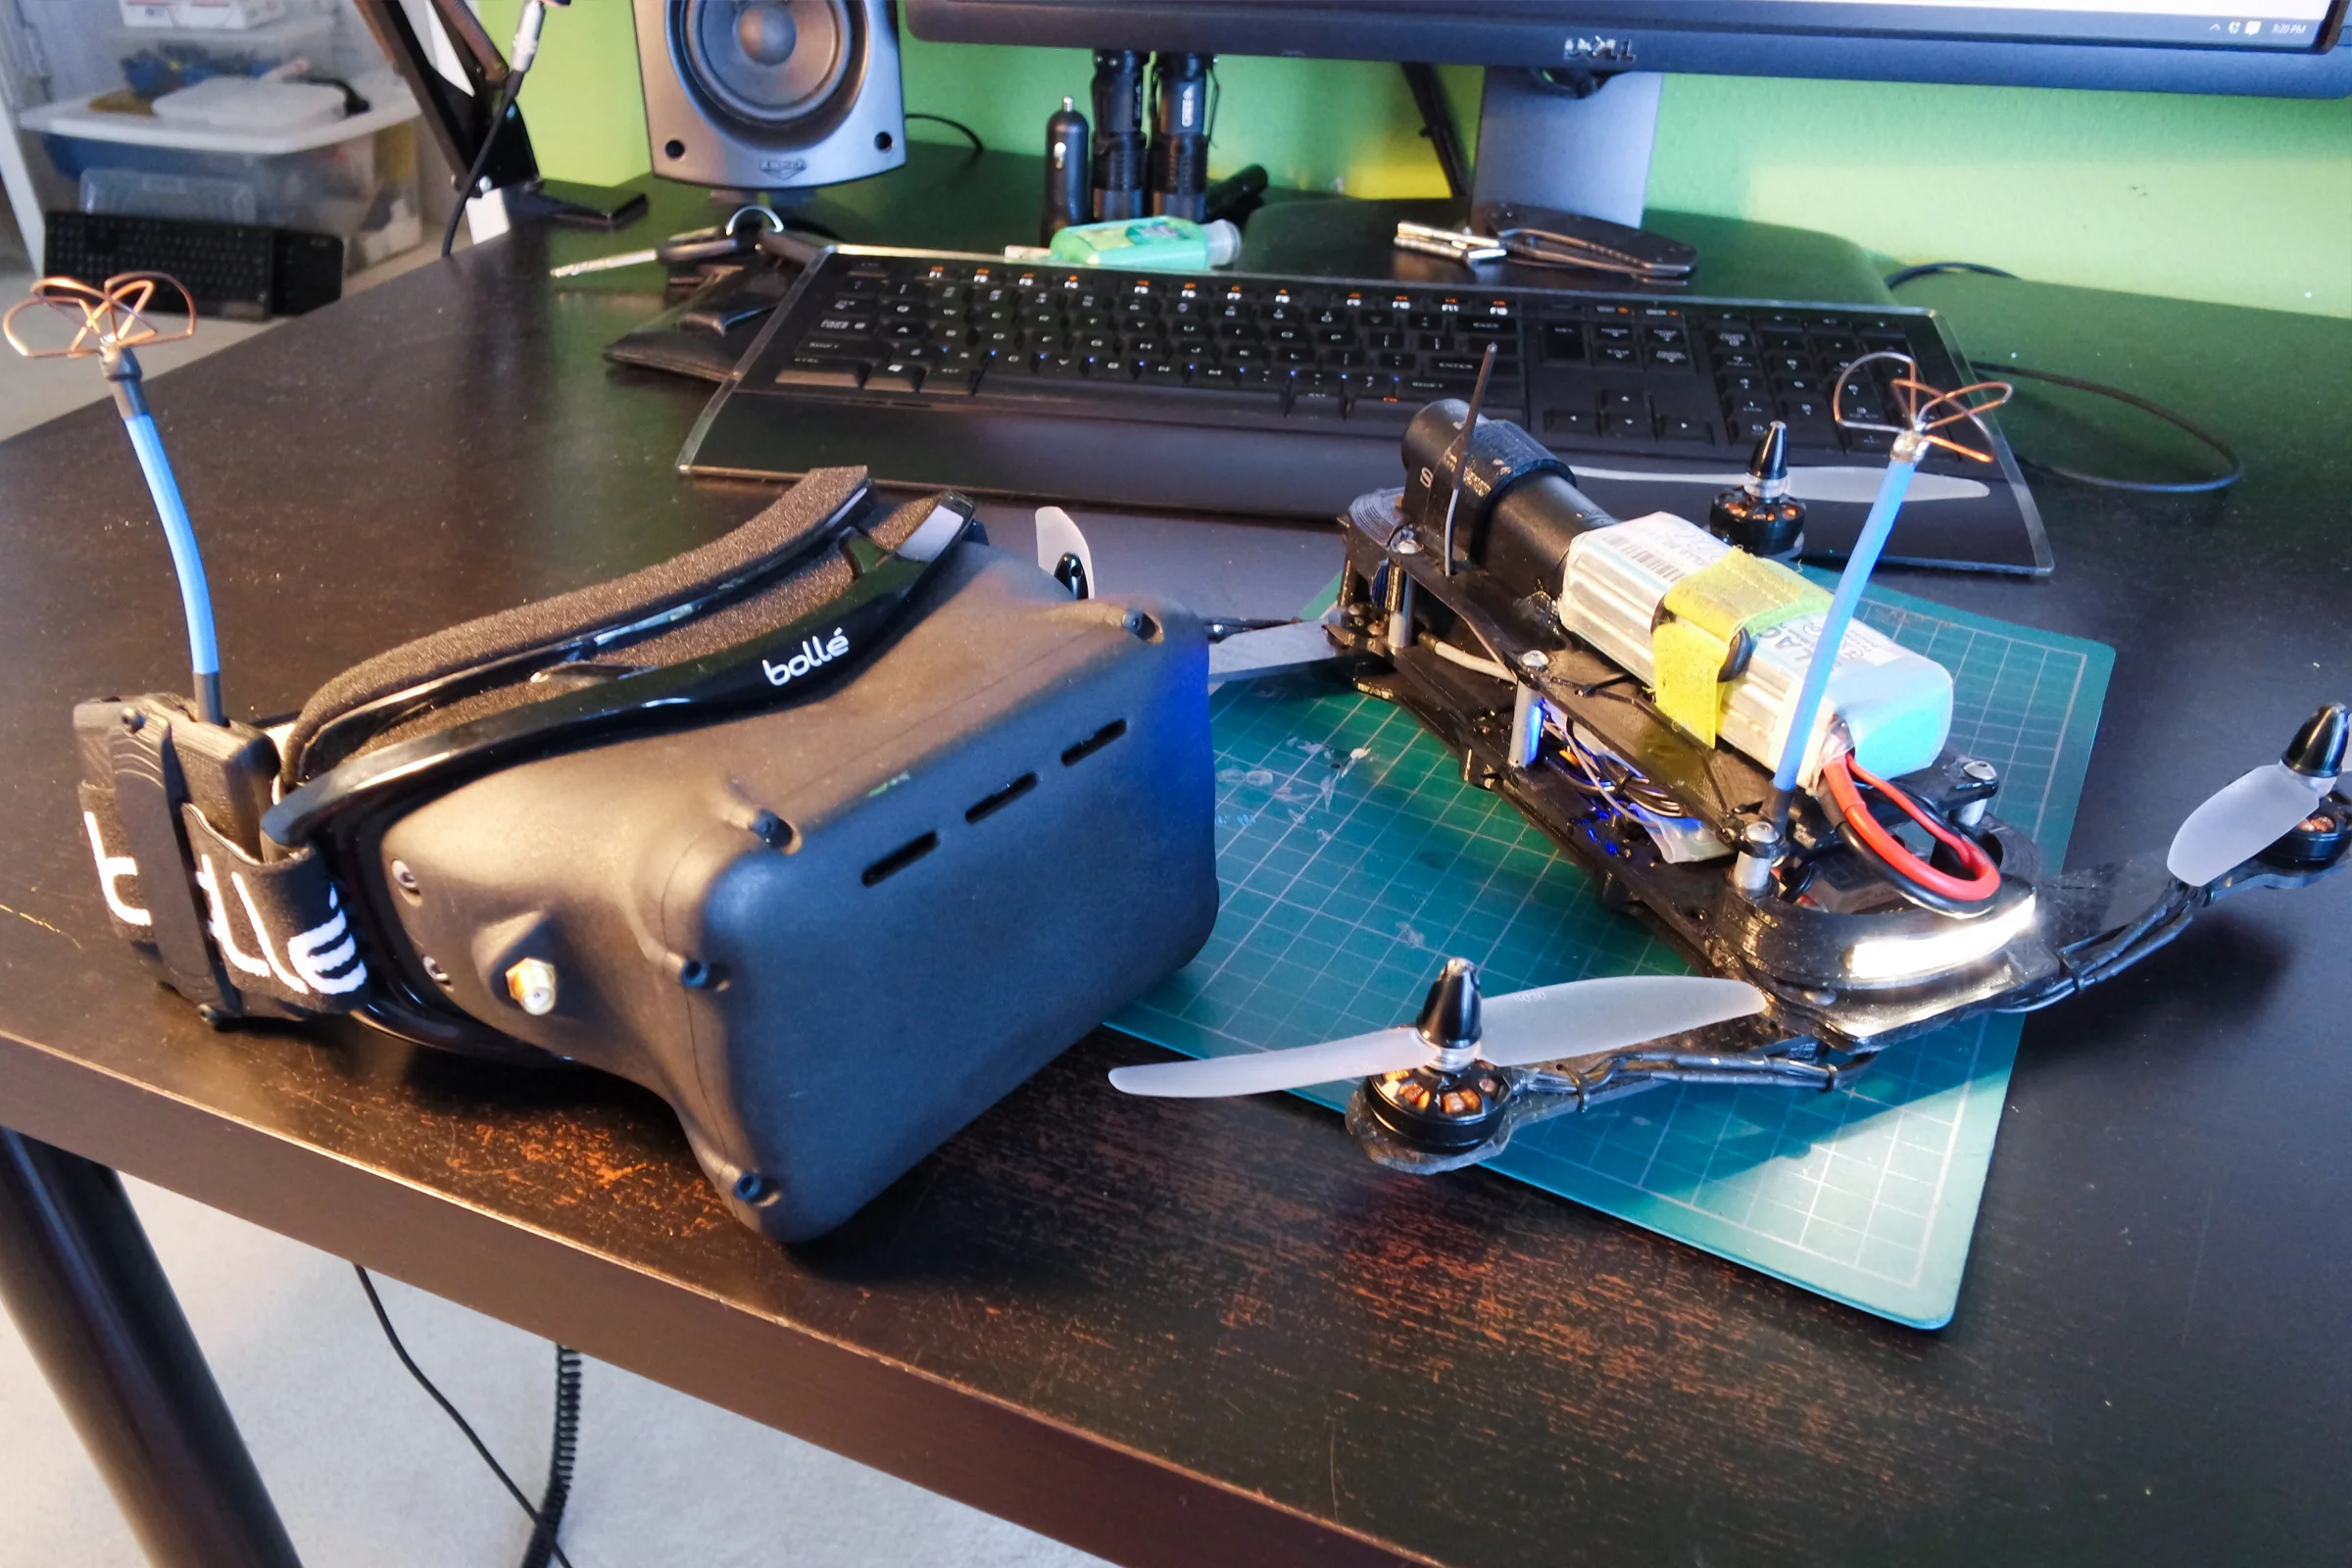
The longer CF arms provided the additional rigidity needed for precise handling and proved to be the correct choice by surviving dozens of high-speed crashes that would have shattered earlier prototypes. Even though Drone 5 carried the heaviest payload in the series, it had the best flight characteristics due to the compact packaging and centralized weight distribution. With the custom wide-FOV goggles and simultaneous HD recording, this platform was the successful culmination of the entire development program.